
Getting Started with Android Development
Android is a mobile operating system developed by Google which supports a large number of applications in smartphones. These applications make life more easy and innovative for users. Android Inc. was founded by Andy Rubin in 2003 and obtained by Google in 2005 and later the OHA (Open Handset Alliance). It is based on the Linux Kernel and considered for touchscreen mobile as well as big screen devices like smartphones and tablets, smart TVs.
Version
Since 2008, Android has number of updates which have improved the operating system with new features. Each release is named in alphabetical order after a desert. The android versions being called “Cupcake”, “Donut”, “Eclair”, “Froyo”, “Gingerbread”, “Honeycomb”, “Ice Cream Sandwich”, “Jellybean”, “KitKat”, “Lollipop”, “Marshmallow”, “Nougat’, ‘Oreo’, “Pie” respectively.
Features
Application framework : It allows reuse and replacement of components.
Android Runtime (ART) :
It is optimized for garbage collection and has better debugging support.
Dalvik was the Android runtime
Integrated Browser : Based on the open source Web-kit engine.
Optimized graphics : It is powered by a custom 2D graphics library, 3D graphics.
Media support
GSM Technology
SQLite
Widgets
Near Field Communication (NFC)
Android applications can be written in Java, Kotlin programming language. They can be developed using Cross-Platform technologies like Xamarin, PhoneGap (Cordova), Ionic, etc. Android is offered as open source for developers to develop applications and provides Android SDK (Software development kit) for software development. Some of the basics applications of android
Android applications are collection of one or more application components.
Overall application behavior is affected by each component.
All components in the application must be declared by manifest file.
In manifest file, you need to declare all application requirements, hardware access settings, minimum version of Android required, etc.
Android Architecture (Framework)
Android OS is a heap of components which is divided into five sections and four main layers as shown below :
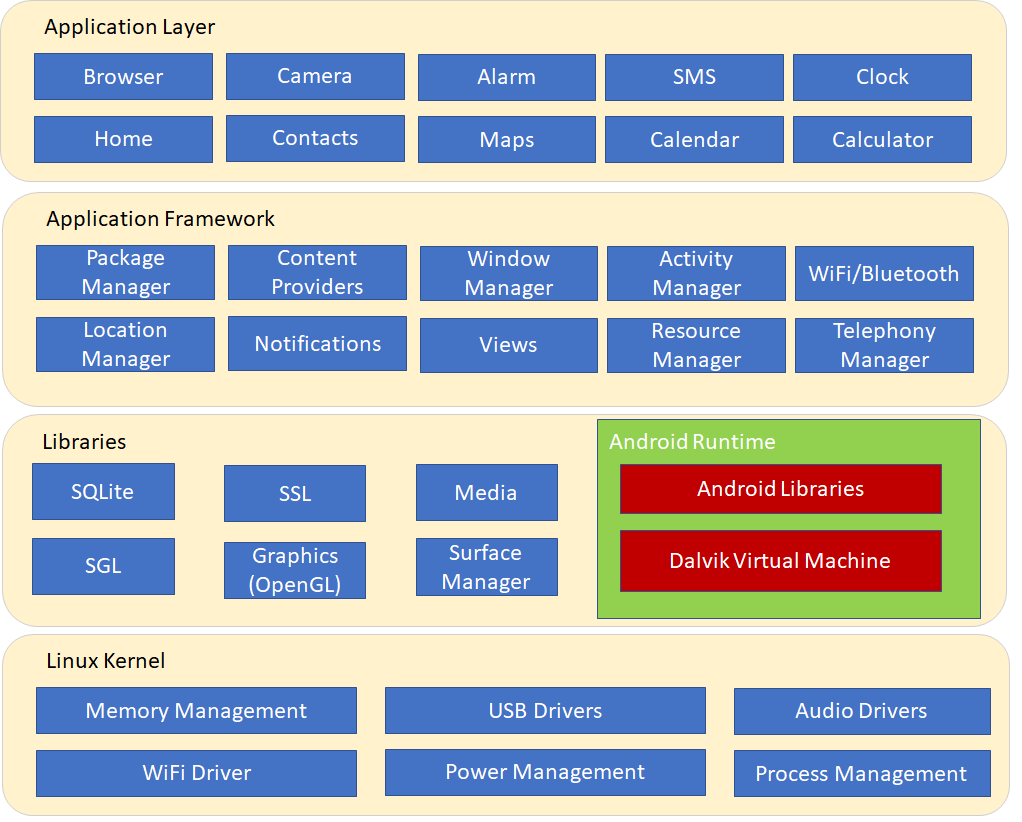
Figure 1 :Android Architecture
Linux kernel
Provides abstraction layer between the device hardware. It consists of all the hardware drivers like audio, keypad, camera, display, etc. This kernel also manages all the memory and processes of the device.
Libraries
Runs on top of the kernel, Android has various libraries such as media library for playback of audio, surface manager to provide display management, Graphics libraries for 2D, 3D graphics, SQLite for local database.
Android Runtime
Provides an important component called Dalvik Virtual Machine. It is a kind of Java VM which is specially designed for Android. The Dalvik Virtual Machine makes use of Linux core features like memory management, process management and multi-threading, which is fundamental in the Java language. Also offers different core libraries which allow Android app developers to write Android apps by means of Java programming language.
Application Framework
Many advanced services are provided by application framework in the form of Java classes. Developers can use these services in their applications. Following are the important services :
Content Providers : Content providers permits applications to share data with other applications.
Activity Manager : It controls all parts of the application lifecycle.
Resource Manager : It provides access external non code base resources such as color, strings, dimensions and UI layouts.
View System : Set of views which are used to create application user interfaces.
Notifications Manager : It allows applications to display notifications and alerts to the user.
Applications
This layer provides user interface and it is in the top layer of architecture. Developers write their application which will be installed on this layer only. Examples are Calculator, Contacts, Browser, Games, Apps, etc.
System Requirements
Operating Systems
You can start your android application development in following operating system.
Windows XP(32-bit) or Windows 7/8//8.1/10(32-64 bit)
Mac OS X 10.5.8 or later
Linux
Development tools
JDK 6 or higher version
Java Runtime Environment (JRE) 6
Android Studio
Eclipse
Following are the tools to develop android applications
Downloads and Installation
You can use Android studio which gives you everything to start developing applications including Android SDK tools. Make sure you have installed JDK 6 or greater before you setup Android studio.
JDK
You can download the latest JDK from the following link and make sure that you download the appropriate version (32-bit or 64-bit) for your system.
Android studio
Download Android studio by following this link : Android Studio
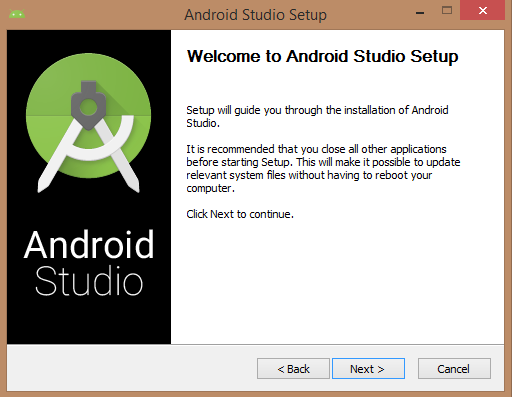
To setup Android Studio on Windows :
So let’s launch the download Android studio EXE file and click Next button.
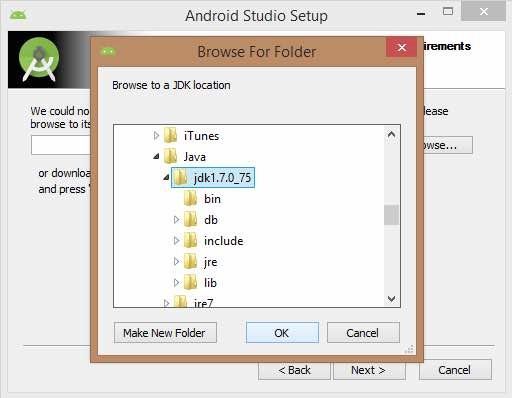
Mention the JDK path or later version in android studio installer.
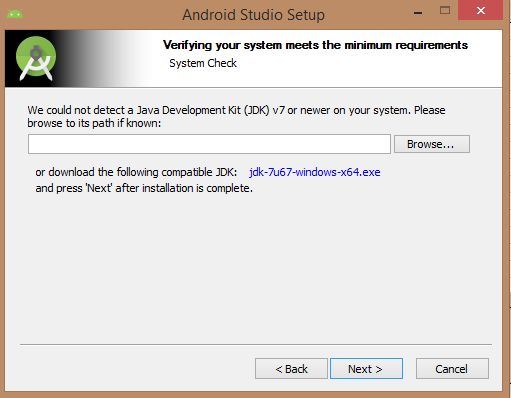
The following image shows that starting JDK to Android SDK
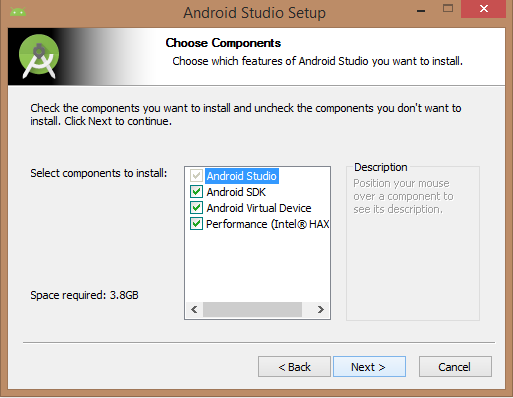
Android studio, Android SDK, Android Virtual Machine and performance (Intel chip) are selected and click Next button.
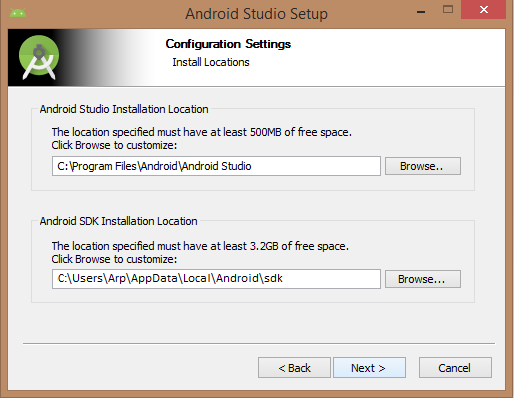
Let’s keep the default location and click Next button.
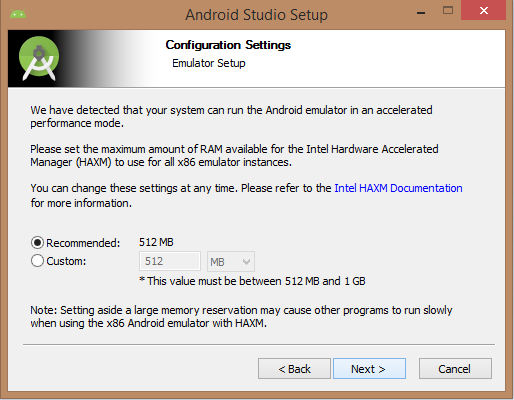
It would take 512MB space of RAM.
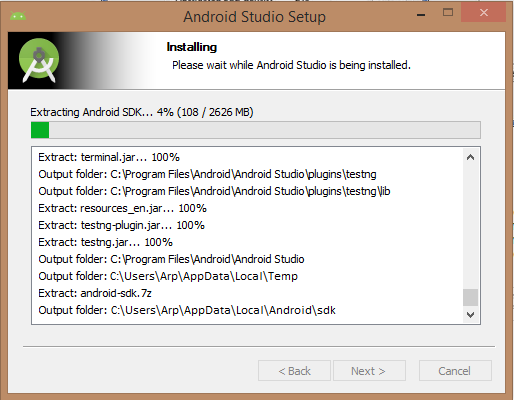
Installation will start as shown below and it will take some time to finish the task.
After installation is completed, click the finish button and open android studio. Now you are ready to proceed your first Android application development.
Getting Started
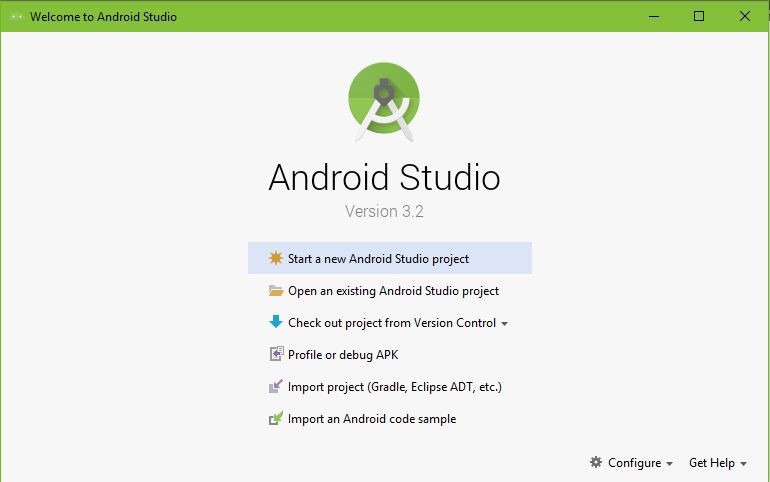
Here, we are going to learn how to create a simple Hello World project in Android Studio. Firstly, open the Android Studio and it will show screen as : In this window, click Start a new Android Studio project.
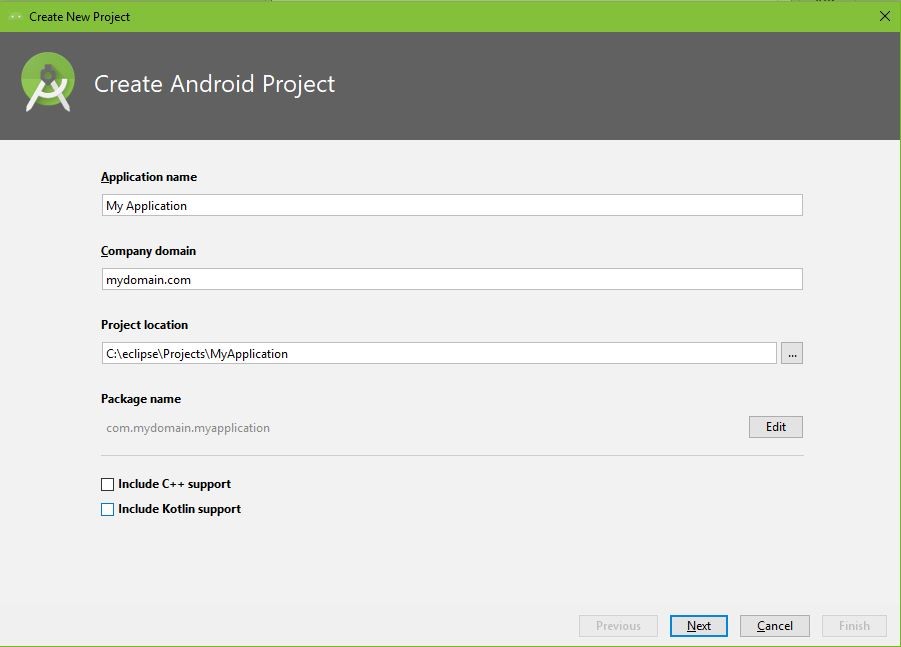
In the New project screen, application name, package name and project location should be entered and click Next.
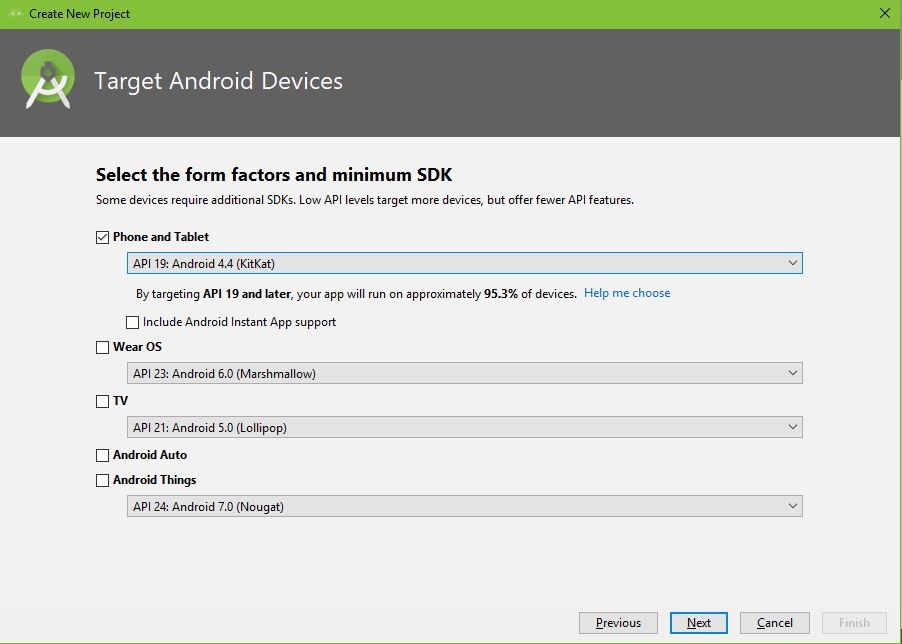
We need to specify Minimum SDK here. In this tutorial, lets select API 19: Android 4.4 (KitKat).
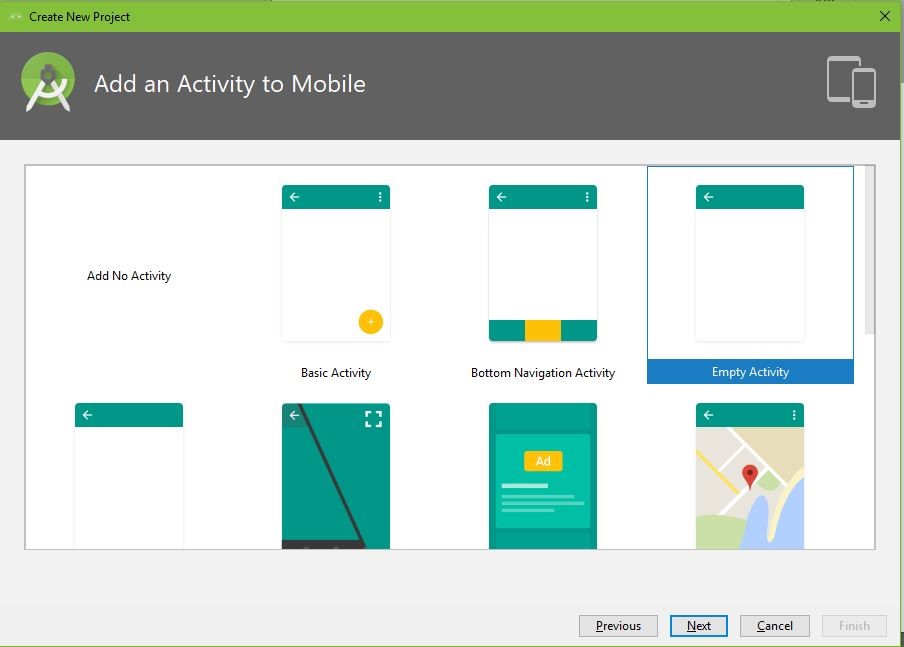
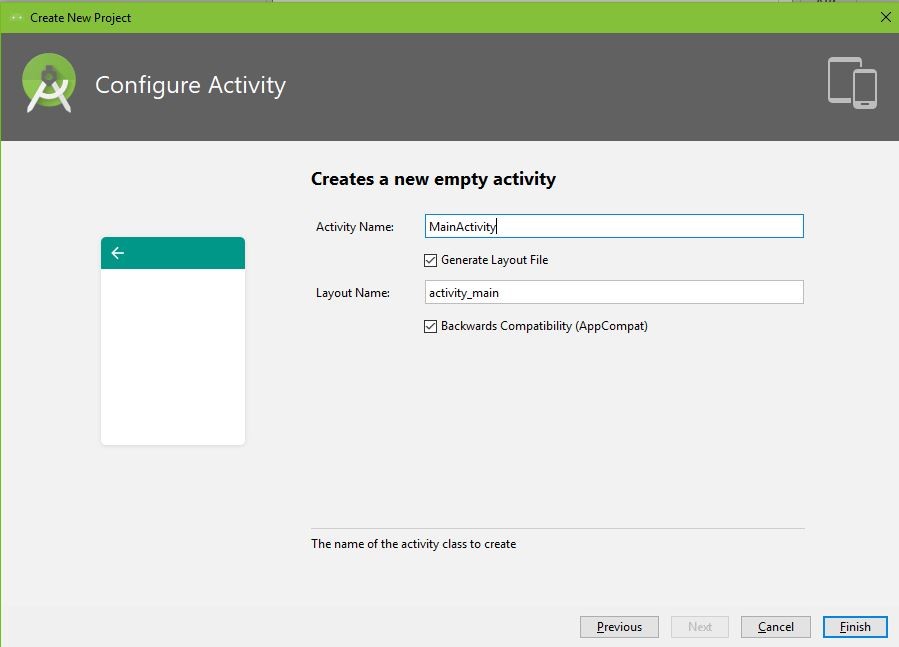
In the Add an Activity to Mobile screen, lets select Empty Activity and click Next.
Next leave all the fields as default values and click Finish.
Now, you can write the application code here.

This is the main activity in which the system launches an instance of this activity and load its layout.
 package com.mydomain.myapplication;

 import android.support.v7.app.AppCompatActivity;
 import android.os.Bundle;

 public class MainActivity extends AppCompatActivity {

 @Override
 protected void onCreate(Bundle savedInstanceState) {
 super.onCreate(savedInstanceState);
 setContentView(R.layout.activity_main);
 }
 }
The activity_main.xml file
This is the layout file that may contain buttons, images, input elements, etc. Here, you can see a TextView that with text ‘Hello World!’. This is loaded from MainActivity.
 <?xml version="1.0" encoding="utf-8"?>
 <android.support.constraint.ConstraintLayout xmlns:android="http://schemas.android.com/apk/res/android"
 xmlns:app="http://schemas.android.com/apk/res-auto"
 xmlns:tools="http://schemas.android.com/tools"
 android:layout_width="match_parent"
 android:layout_height="match_parent"
 tools:context=".MainActivity">

 <TextView
 android:layout_width="wrap_content"
 android:layout_height="wrap_content"
 android:text="Hello World!"
 app:layout_constraintBottom_toBottomOf="parent"
 app:layout_constraintLeft_toLeftOf="parent"
 app:layout_constraintRight_toRightOf="parent"
 app:layout_constraintTop_toTopOf="parent" />

 </android.support.constraint.ConstraintLayout>
The Manifest File
The manifest file works as an interface between the android OS and the application. The manifest file is as below :
 <?xml version="1.0" encoding="utf-8"?>
 <manifest xmlns:android="http://schemas.android.com/apk/res/android"
 package="com.mydomain.myapplication">

 <application
 android:allowBackup="true"
 android:icon="@mipmap/ic_launcher"
 android:label="@string/app_name"
 android:roundIcon="@mipmap/ic_launcher_round"
 android:supportsRtl="true"
 android:theme="@style/AppTheme">
 <activity android:name=".MainActivity">
 <intent-filter>
 <action android:name="android.intent.action.MAIN" />

 <category android:name="android.intent.category.LAUNCHER" />
 </intent-filter>
 </activity>
 </application>

 </manifest>
Running the application
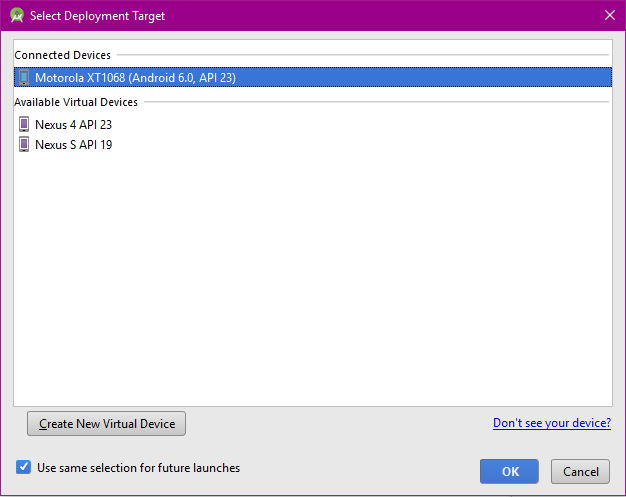
Let’s run the application. Press Shift + F10 to run the application. You need to select deployment device where you want to run application.
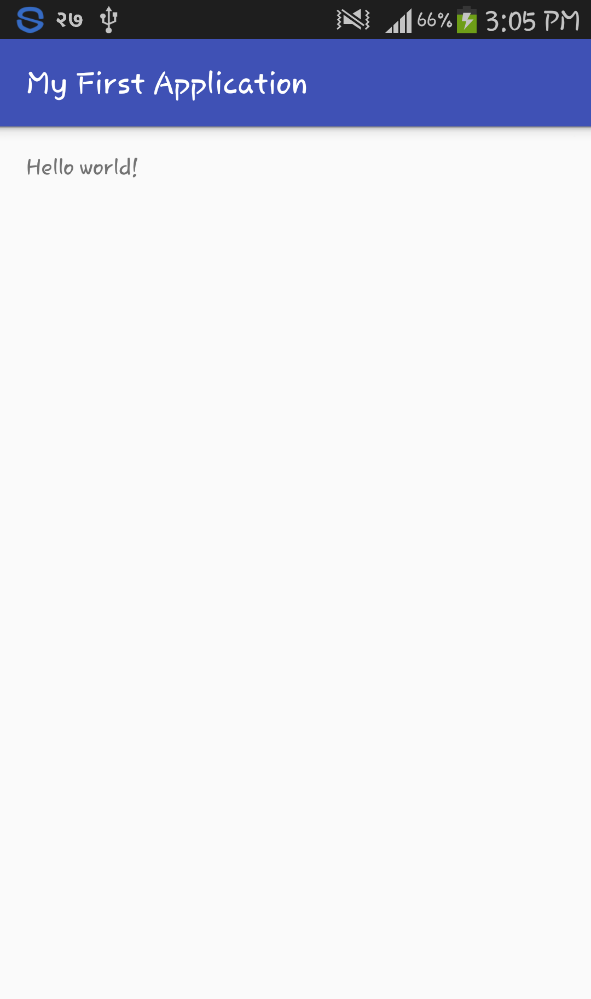
Following screen is the output of our first Android application.
Folder Structure
Android Project view
In Project view, we can see lots of files and directories. The most important of which are the following :
project-name/
build/This folder contains build outputs.
libs/This folder contains private libraries.
src/This folder contains all code and resource file.
src/androidTest/This folder contains code for instrumentation tests that run on an Android device.
src/main/This folder contains all our java source files. Also contains activity controllers, models, helpers, etc.
AndroidManifest.xml
This file describes the nature of the application and each of its components.
java/This folder contains Java code sources.
gen/This folder contains the Java files generated by Android Studio, such as your R.java file and interfaces created from AIDL files.
res/This folder contains application resources, such as drawable files, layout files, and UI string.
assets/This folder contains file that will be compiled into an .apk file.
test/This folder contains code for tests.
build.gradle (module)This describes module-specific build configurations.
build.gradle (project)This represents your build configuration that apply to all modules.
Resources (res)
- anim/
This folder contains XML files for animations required for an app. R.anim class is used to access these files.
- color/
This folder contains XML files colors required for an app. R.color class is used to access these files.
- drawable/
This folder contains Image files like .png, .jpg, .gif or XML files. R.drawable class is used to access them.
- layout/
This folder contains XML files that represent UI layout. R.layout class is used to access them.
- menu/
Application need menus such as Options menu, Context menu, Sub menu. This folder contains XML files that represent such type of menus. R.menu class is used to access them.
- raw/
Some Arbitary files need to be saved in their raw form. So this folder is used to store them. Resources.openRawResource() with the resource ID, which is R.raw.filename is requred to open such files.
- values/
This folder contains XML files that holds values such as colors, strings, and integers. For example :
arrays.xml : Holds array resources. R.array class is used to access them.
integers.xml : Holds integer resources. R.integer class is used to access them.
bools.xml : Holds boolean resources. R.bool class is used to access them.
colors.xml : Holds color values. R.color class is used to access them.
dimens.xml : Holds dimension values. R.dimen class is used to access them.
strings.xml : Holds string values. R.string class is used to access them.
styles.xml : Holds application styles. R.style class is used to access them.
- xml/
Contains Arbitrary XML files. These files can be read at runtime by calling Resources.getXML(). Various settings/configuration can be saved here and used at run time.
Conclusion
The demand of mobile apps is increasing day by day and android market is about 90% of all the operating systems like iOS and Windows. So there is high potential market in the field of android apps development. So why delay? Happy Coding!