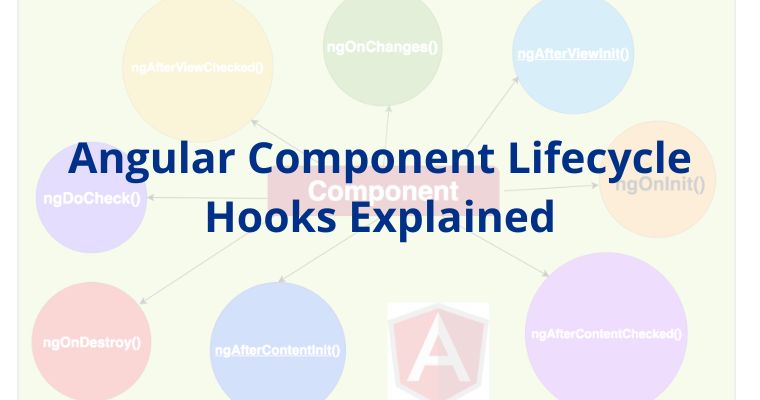
Angular Component Lifecycle Hooks Explained
28 Feb 2024
Advanced
33K Views
5 min read

Learn via Video Course & by Doing Hands-on Labs
Angular Course
Angular Component Lifecycle Hooks: An Overview
Hello there! Have you ever wondered how Angular handles the magic that happens behind the scenes in your web apps? Let us now dive into an insightful Angular tutorial and discuss Angular Component Lifecycle Hooks! These amazing occurrences occur at various phases, causing your components to do wonderful things. It's like getting a backstage pass to see what's going on in your app, all made clearer through comprehensive Angular certification training!What is Angular Component Lifecycle Hooks?
Lifecycle hooks are Angular methods that are executed at certain points during a component's lifecycle. These methods allow you to tap into the Angular component lifecycle and apply custom logic or operations at specified points in time.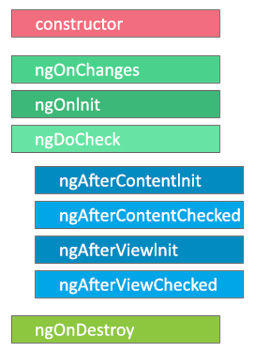
Eight Lifecycle Hooks in Angular
Angular has many lifecycle hooks that allow you to inject code at precise times in a component's or directive's life cycle. These hooks function similarly to checkpoints, allowing you to conduct specified tasks based on the current state of the component. In Angular, there are eight lifecycle hooks:- ngOnChanges
- ngOnInit
- ngDoCheck
- ngAfterContentInit
- ngAfterContentChecked
- ngAfterViewInit
- ngAfterViewChecked
- ngOnDestroy
1. ngOnChanges
When the value of an input binding to the component changes, this hook is called.Example of ngOnChanges
ngOnChanges(changes: SimpleChanges) {
 if (changes['data']) {
  this.processData(changes['data'].currentValue);
 }
}2. ngOnInit
Once the component has been initialized and its input bindings have been handled, this hook is invoked.Example of ngOnInit
ngOnInit() {
 this.initialData = this.getData();
}3. ngDoCheck
Every change detection cycle ends with a call to this hook. Because of the performance ramifications, it is frequently regarded as an anti-pattern.Example of ngDoCheck
ngDoCheck() { if (this.element.clientWidth !== this.lastWidth) { this.adjustLayout(); this.lastWidth = this.element.clientWidth; }}4. ngAfterContentInit
After the projected content (content projected into the component with <ng-content>) has been initialized, this hook is invoked.Example of ngAfterContentInit
ngAfterContentInit() { this.content = this.contentElement.nativeElement.textContent;}5. ngAfterContentChecked
This hook is invoked at the end of each change detection cycle for the projected content.Example of ngAfterContentChecked
ngAfterContentChecked() { if (this.content) { this.analyzeContent(this.content); }}6. ngAfterViewInit
After the component's view (including its children) has been fully initialized, this hook is called.Example of ngAfterViewInit
ngAfterViewInit() { this.canvas = this.canvasElement.nativeElement; this.drawChart(this.data);}7. ngAfterViewChecked
This hook is invoked at the end of each change detection cycle for the component's view.Example of ngAfterViewChecked
ngAfterViewChecked() { if (this.isScrolling) { this.updateScrollPosition(); }}8. ngOnDestroy
When the component is destroyed, this hook is called.Example of ngOnDestroy
ngOnDestroy() { this.unsubscribeFromEvents();}Summary
Component creation, update, & destruction all involve angular magic. Lifecycle hooks enable checkpoints for injecting code at certain stages in the app's lifecycle, improving app functionality and speed. Make good use of these hooks for a smooth and efficient Angular experience!
FAQs
Q1. What is the lifecycle of an Angular component?
Angular uses various change detection processes to track changes in data-bound attributes throughout the lifecycle. An Angular lifecycle begins when an Angular component class is initiated. It then defines the view of the component as well as the view of the child components.
Q2. What lifecycle hook can be used on a component to track all changes to @input values?
OnInit. OnInit is a lifecycle hook that is called when Angular has initialized all of a directive's data-bound properties. To handle any additional initialization chores, define a ngOnInit() function. When the component's first change detection is run, this hook is called.
Q3. What are Angular lifecycle hooks used for?
As it produces, updates, and destroys directives and components, Angular calls lifecycle hook methods on them. Angular manages the lifespan of a component. It is created, and rendered, its descendants are created and rendered, it is checked when its data-bound properties change, and it is destroyed before being removed from the DOM.
Q4. What does a lifecycle hook do?
A lifecycle hook allows the instance to wait for a given amount of time (one hour by default) for the action to complete before transitioning to the next state.
Take our free angular skill challenge to evaluate your skill

In less than 5 minutes, with our skill challenge, you can identify your knowledge gaps and strengths in a given skill.