What are Progressive Web Apps? - Building PWA Using Ionic 4
Hi everyone, in this blog, we will see how we can use ionic to create our first progressive web app. We will see how we can install and use various tools to test our app as well.
Introduction
Ionic framework allows users to build cross-platform hybrid apps. We can use the same source code and build it and deploy as per the requirement. Let's say we want to deploy it as a web app or mobile app on Google Play or App store everything can be achieved using the same source code.
Ionic also offers the power of progressive web apps, we will also discuss in details about progressive apps as we move ahead.
Features:
There are several advantages which we get when we use the Ionic Framework:
- Open Source: Framework is free to use and the code is available for everyone.
- Maintained By Ionic Team: Though the code is open source, the releases are managed by the ionic team.
- Power of UI Frameworks: Ionic framework 4 is framework agnostic, it means we can still use the framework of our choices like Angular, ReactJS or Vue.
- Awesome Tools: Ionic provides various tools in enterprise version for rapid development.
- Support for Angular Routing: With ionic 4, while using Angular framework now it provides support for Routing Module. Earlier it was different than Angular Routing.
- Learning Curve: We can use the same HTML, CSS code which we are comfortable with, so if you are already aware of any of the frameworks mentioned above, the learning curve is minimal.
- Power of Cordova: Ionic uses Cordova to convert our apps to a mobile compatible app.
- Community Support: Ionic project on Github has almost 36k stars and more than 280+ contributors. A lot of support is available on StackOverflow and CodeProject.
- Power of Progressive Web Apps: Ionic provides support for the progressive web app.
Progressive Web App
Features:
- Responsive : PWA Apps are responsive, UI is rendered as per device.
- Works Offline : PWA apps uses service workers, which makes apps to work in offline mode as well.
- Installable : PWA Apps are installable if an app is PWA we get one option to install the app. No need to manage or install the app using the play store.
Installation
Before we can go ahead and build our app using ionic we need to install a few software.
NodeJs: We need to install nodejs, you can download and install node from here
Npm: It gets installed with node, so you don't have to install it separately.
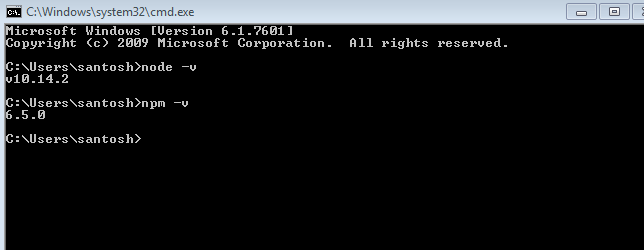
Use below commands to verify the version of npm and node. Try to keep it updated on your dev machine.
Use commands shown in the image to verify the version :
VS Code: We also need an editor, the most preferred editor is VS Code. You can download and install VS Code from here. It is available for windows, linux and mac.
IONIC Installation
CLI
Ionic provides CLI for development, we can use various commands provided by CLI to create a new app, build and deploy the app.
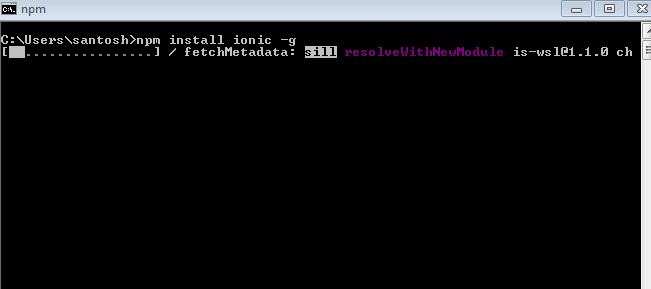
Run below-shown command from command prompt to install CLI. In case you are using linux or max use sudo command.
For windows, it is recommended to run the command prompt as admin.
Once CLI is installed for IOS and Android we need extra setup, for creating an IOS app we need a Mac.
Android Setup
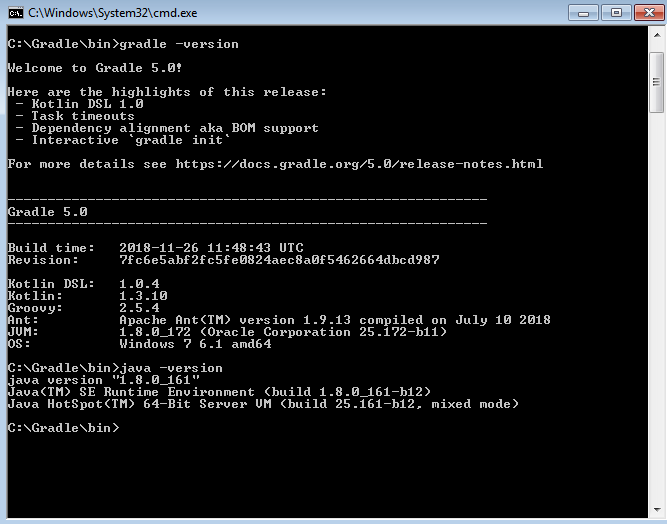
Gradle: It is a build tool for mobile apps, it can be downloaded from here
Andriod Studio and Andriod SDK: next you need andriod studio and SDK to be installed, refer this page for installation guide.
Use below-shown commands to check the version, in case you already have it installed.
IOS Setup
As discussed above IOS apps can be only created on MacOS.
Xcode: We need to install Xcode IDE for creating native Apps, and an IOS simulator.
You can refer to the installation guide here
Environment Used
For this blog post we are using the below environment:
- Nodejs version 10
- npm version 6.5.0
- Windows 7
- Ionic 4.6.0
- VS Code
Creating Our First App
Let's create our first app using Ionic CLI, we will be creating a TODO App and we will use Angular framework. The Ionic CLI uses Angular version 7.
Let's follow the step by step guide to creating the app:
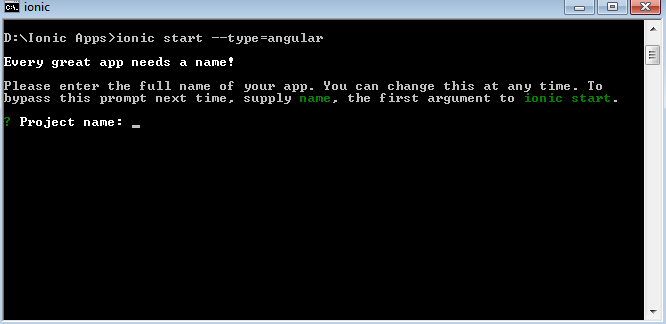
We can use ionic start command to create a new app, we need to pass --type=angular to use an angular framework
From a directory fire, the commands are given it will ask for a Project name, let's use todo as a project name.
Next, it will ask you to choose Starter template, there are 3 options blank, sidemenu and tabs, we can use the arrow key to choose, we will use sidemenu in our case.
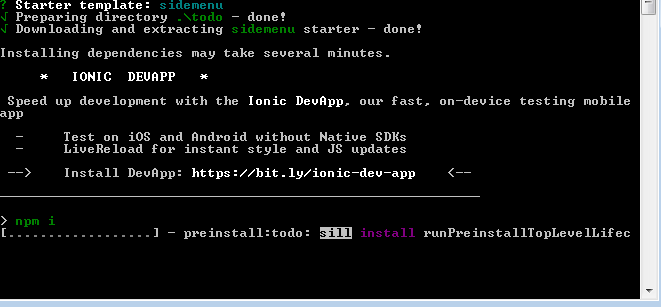
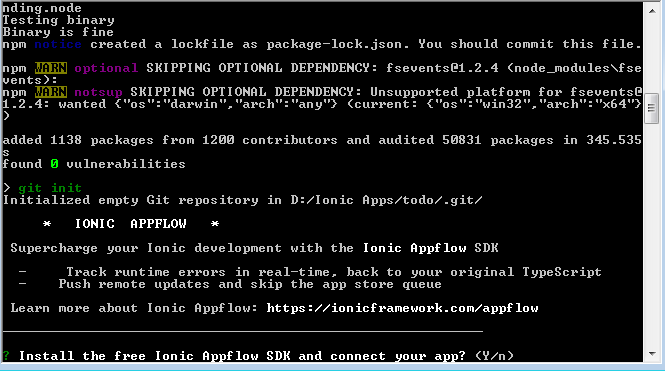
Once we provide the template it will install all the dependencies for our project. It will ask if we want to install free Ionic Appflow SDK, it as an enterprise tool for managing devops for our apps, it provides free trial, we can choose Y, and we will cover how to use this toll in upcoming blogs.
As we chose yes it will ask if you have Appflow account, in case you already have one login or signup to create a new account.
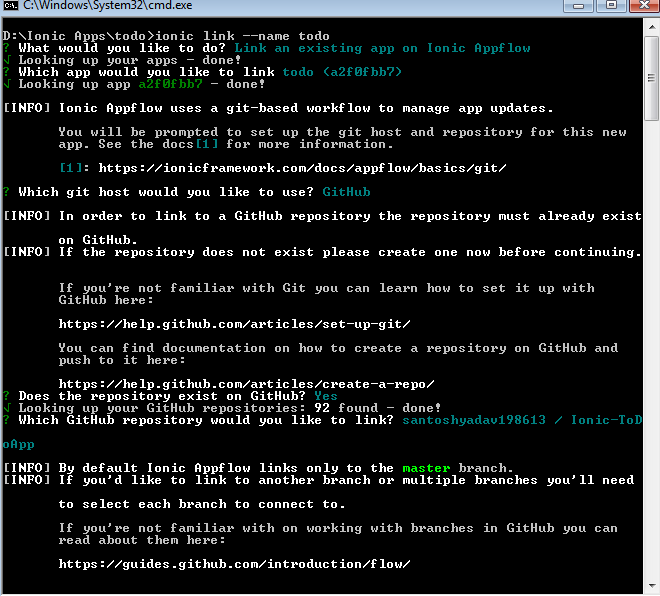
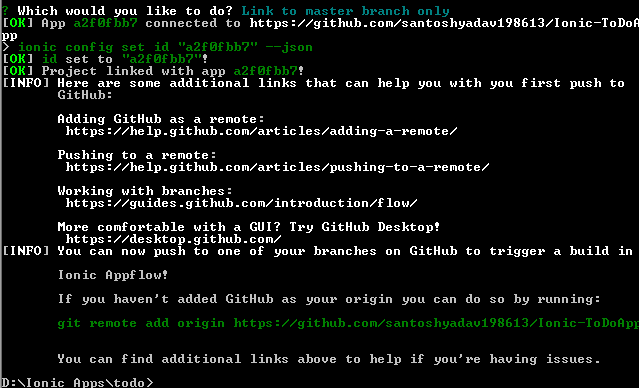
We can use below command after for an existing project as well. Just follow the steps as shown below
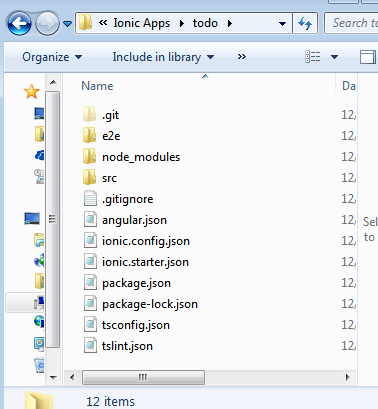
Once we are done with all commands, open your app in VS Code, your app structure should look like below screenshot, if you have the idea about Angular App structure you will see apart from ionic.config and ionic.starte rest all files and folders are same.
Once opened in VS Code use the command prompt to run "npm start" command to run our app locally. The app will start on 4200 port once you see "Compiled Successfully", open the browser and move to http://localhost:4200
We should see an app with 2 sidebar menus: I am using Chrome device toolbar with Pixel 2 device emulator.
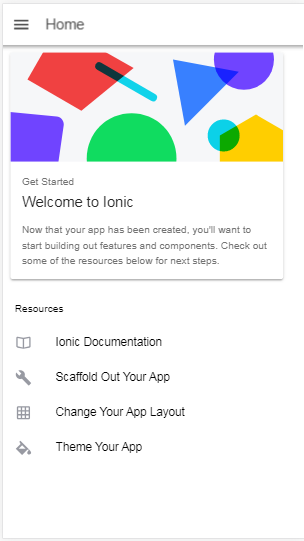
Ionic has its own component which we can use to build our app, to see the list of all components visit this page
We will be using few input components and list component. We can use "ionic g" command to add new files to our app.
We can add the following types of files using the above command, in case you are aware of Angular framework, you are already aware of those.
page
component
service
module
class
directive
guard
pipe
interface
enum
The only file thing which is different is the page, in ionic a page is nothing but a component which will be rendered on the route. If a component is not going to be accessed by route create a component.
Let's add a new page which will be used to add a new task.
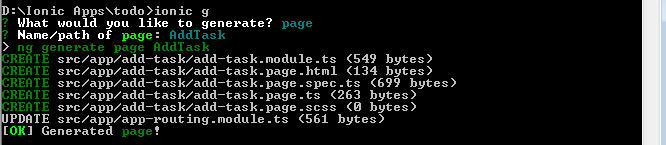
If you notice whenever we add a new page, ionic adds a route in app-routing.module by default ionic uses lazy loading feature to load the pages. Open the file you will notice below code
Next open app.component.ts and notice an variable appPages, you will find 2 entries for home and list, add { title: 'Add Task', url: '/add-task', icon: 'add' }.
The icon value is the name of the icon which will be displayed on sidebar, ionic has its own icons you can access it here
Now go back to app, you will notice 3 menus now, the only thing is hamburger button is missing from Add Task screen. Open add-task.page.html and replace the code with below-given code
<ion-header>
 <ion-toolbar color="primary">
 <ion-buttons slot="start">
 <ion-menu-button></ion-menu-button>
 </ion-buttons>
 <ion-title>Add Task</ion-title>
 </ion-toolbar>
</ion-header>

<ion-content>

</ion-content>
Next, we will add a service for out ToDo App, we will have 3 methods, to add a new Task, to list all task and mark a task as complete.
use "ionic g service todo --flat=false" to create a new service, --flat=false flag will create a folder as well named todo. 2 Files will be created now in todo folder "todo.service.ts" and "todo.service.spec.ts"
We will add a new interface as well for todo app, from todo folder we have service fire this command "ionic g interface todo", it will create a new file todo.ts.
Add below code in an interface
export interface Todo {
 userId: number;
 title: string;
 completed: boolean;
}
We will not use any API for this demo purpose, we will add methods which saves data locally to a service.
Open todo.service.ts and copy below code.
import { Injectable } from '@angular/core';
import { Todo } from './todo';

@Injectable({
 providedIn: 'root'
})
export class TodoService {
 todo: Todo[] = [];

 constructor() { }

 addTask(task: Todo) {
 this.todo.push(task);
 }

 getAllTask(): Todo[] {
 return this.todo;
 }

 getCompletedtask(): Todo[] {
 return this.todo.filter((task) => task.completed === true);
 }
}
Now we will add a form to save the data by using the same service, open add-task.page.ts and below code.
Now open add-task.page.html and add below code to create a form, we are using template driven form here.
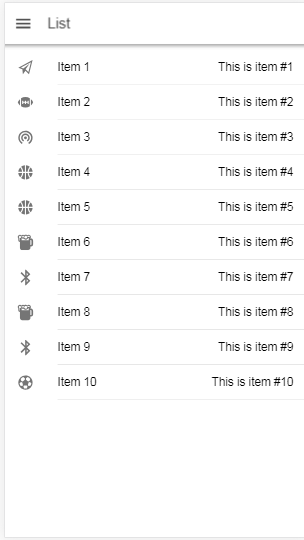
To List, the task added we will use existing list page which was created with the template, now open list.page.ts and copy below code.
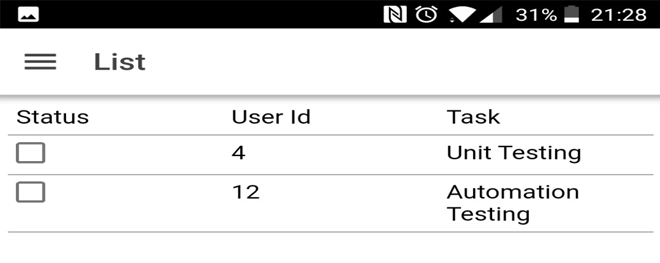
Next open list.page.html and below code to see the list, we are using ionic grid here.
Once done go to the app and add a new task and move to List to see the same task.
{ path: 'add-task', loadChildren: './add-task/add-task.module#AddTaskPageModule'}
import { Component, OnInit } from '@angular/core';
import { Todo } from '../todo/todo';
import { TodoService } from '../todo/todo.service';

@Component({
 selector: 'app-add-task',
 templateUrl: './add-task.page.html',
 styleUrls: ['./add-task.page.scss'],
})
export class AddTaskPage implements OnInit {

 task: Todo = {
 userId: 0,
 title: '',
 completed: false
 };

 constructor(private todoService: TodoService) { }

 ngOnInit() {
 }

 addTask() {
 this.todoService.addTask(this.task);
 this.task = {
 userId: 0,
 title: '',
 completed: false
 };
 }
}
<ion-header>
 <ion-toolbar color="primary">
 <ion-buttons slot="start">
 <ion-menu-button></ion-menu-button>
 </ion-buttons>
 <ion-title>Add Task</ion-title>
 </ion-toolbar>
</ion-header>

<ion-content>
 <form #taskForm="ngForm" (submit)="addTask();taskForm.reset()" novalidate>
 <ion-list>
 <ion-item>
 <ion-input type="number" [(ngModel)]="task.userId" name="userid" placeholder="User Id" ></ion-input>
 </ion-item>
 <ion-item>
 <ion-input required type="text" [(ngModel)]="task.title" name="title" placeholder="Title"></ion-input>
 </ion-item>
 </ion-list>
 <div padding>
 <ion-button [disabled]="taskForm.invalid" type="submit" >Add Task</ion-button>
 </div>
 </form>
</ion-content>
import { Component, OnInit } from '@angular/core';
import { Todo } from '../todo/todo';
import { TodoService } from '../todo/todo.service';

@Component({
 selector: 'app-list',
 templateUrl: 'list.page.html',
 styleUrls: ['list.page.scss']
})
export class ListPage implements OnInit {
 todoList : Todo[];
 constructor(private todoService: TodoService) {
 }

 ngOnInit() {
 this.todoList = this.todoService.getAllTask();
 }
}
<ion-header>
 <ion-toolbar>
 <ion-buttons slot="start">
 <ion-menu-button></ion-menu-button>
 </ion-buttons>
 <ion-title>
 List
 </ion-title>
 </ion-toolbar>
</ion-header>

<ion-content>
 <ion-grid>
 <ion-row style="border-bottom: groove">
 <ion-col>Status</ion-col>
 <ion-col>User Id</ion-col>
 <ion-col>Task</ion-col>
 </ion-row>
 <ion-row style="border-bottom: groove" *ngFor="let item of todoList">
 <ion-col>
 <ion-checkbox color="primary" [(ngModel)]="item.completed"></ion-checkbox>
 </ion-col>
 <ion-col>
 {{item.userId}}
 </ion-col>
 <ion-col>
 {{item.title}}
 </ion-col>
 </ion-row>
 </ion-grid>
</ion-content>
Testing App on Mobile Device
Now our app is working fine on web, but we need to verify if it works on the mobile device, deploying app every time is not an idle solution, this is where tolls provided by Ionic helps.
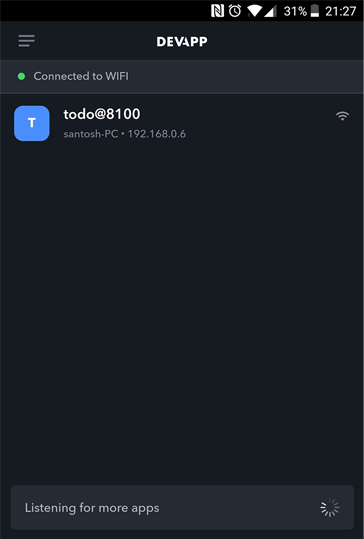
Ionic DevApp:
Go to play store and search for Ionic DevApp and install the same.
Once installed login using your ionic credentials.
Now stop the existing npm start command, you can close the command prompt or press ctrl+c to stop.
now run ionic serve -c make sure you are logged into DevApp, once the app is compiled it will automatically detect the app, which looks like below screenshot
Ionic using CDN
Ionic can be used with any UI framework starting Version 4. So in case, you don't have any framework like Angular, ReactJs or VueJs you can use Ionic from CDN as well.
Use below script tag to use Ionic without any installation:
<script src="https://unpkg.com/@ionic/core@latest/dist/ionic.js"></script>
For using Icons use :
<script src="https://unpkg.com/ionicons@4.0.0/dist/ionicons.js"></script>
Ionic for ReactJS
Starting Ionic 4 @ionic/react package is available to be used with react app. You can refer sample app on git
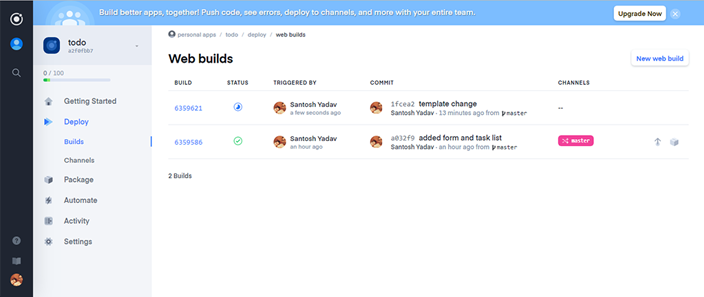
Ionic Appflow
With Ionic Appflow, it's now even easier to manage DevOps for our mobile apps, you can build and deploy your app in a single click, the below dashboard has shown :
Summary
Ionic version 1 and 3 were developed for AngularJS and Angular respectively, Ionic team has re-written the new version to support multiple UI frameworks also in apps where you are using only JavaScript.
Ionic has been there from 2013 and already more than 5million developers are using it, and with Ionic 4 taking the framework to multiple UI frameworks is only going to make it a strong contender.
Take our free skill tests to evaluate your skill!

In less than 5 minutes, with our skill test, you can identify your knowledge gaps and strengths.