


25
apr.Understanding jQuery Mobile Buttons
07 sep. 2022
Intermediate
10,8K Views
3 min read
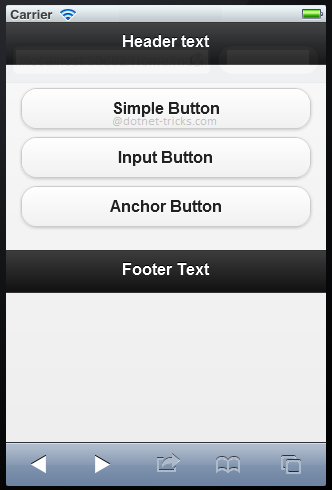
Buttons are created with the help of standard HTML anchor and input elements, then enhanced by jQuery Mobile to make them more attractive and usable on a mobile device. Typically, anchor links (a elements) are used to make navigation buttons, and input or button elements are used to make buttons for form submission.
Creating a Button in jQuery Mobile
Creating a button in jQuery mobile is very simple. You can create a button in jQuery mobile by using following three HTML element:
<button> element
<input> element
<a> element with
data-role="button"
<div data-role="page">
 <div data-role="header">
 <h1>Header text</h1>
 </div>
 <div data-role="content">
 <button>Simple Button</button>

 <input type="button" value="Input Button">

 <a href="#" data-role="button">Anchor Button</a>
 </div>
 <div data-role="footer">
 <h1>Footer Text</h1>
 </div>
</div>
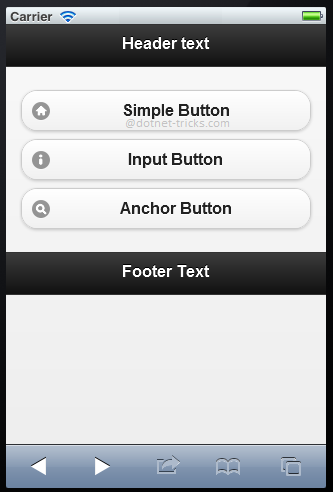
Adding Icons to jQuery Mobile Buttons
You can also add icons to jQuery mobile buttons by using data-icon attribute as given below:
<div data-role="page">
 <div data-role="header">
 <h1>Header text</h1>
 </div>
 <div data-role="content">
 <button data-icon="home">Simple Button</button>

 <input type="button" value="Input Button" data-icon="info">

 <a href="#" data-role="button" data-icon="search">Anchor Button</a>
 </div>
 <div data-role="footer">
 <h1>Footer Text</h1>
 </div>
</div>
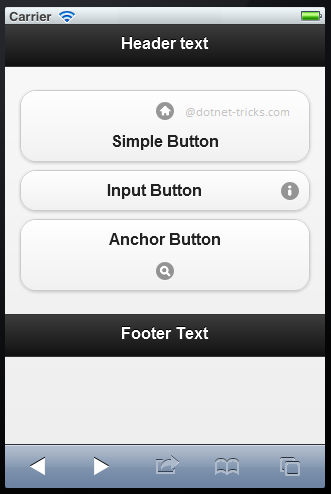
By default, all icons in buttons are placed to the left. But you can also set icon positions by setting values to data-iconpos attribute as given below:
Top
Right
Bottom
Left
<div data-role="page">
 <div data-role="header">
 <h1>Header text</h1>
 </div>
 <div data-role="content">
 <button data-icon="home" data-iconpos="top">Simple Button</button>

 <input type="button" value="Input Button" data-icon="info" data-iconpos="right">

 <a href="#" data-role="button" data-icon="search" data-iconpos="bottom">Anchor Button</a>
 </div>
 <div data-role="footer">
 <h1>Footer Text</h1>
 </div>
</div>
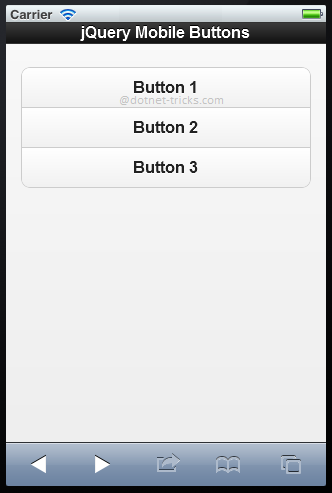
Grouping Buttons
jQuery Mobile allows you to make a group of buttons by using data-role="controlgroup" attribute together with data-type="horizontal|vertical" to specify whether to group buttons horizontally or vertically.
<div data-role="page">
 <div data-role="header">
 <div align="center">jQuery Mobile Buttons</div>
 </div>
 <div data-role="content">
 <div data-role="controlgroup" data-type="vertical">
 <a href="#yourlink" data-role="button">Button 1</a>
 <a href="#yourlink" data-role="button">Button 2</a>
 <a href="#yourlink" data-role="button">Button 3</a>
 </div>
 </div>
</div>
What do you think?
I hope you have enjoyed the article and would able to have a clear picture about jQuery Mobile buttons. I would like to have feedback from my blog readers. Your valuable feedback, question, or comments about this article are always welcome.
Take our free skill tests to evaluate your skill!

In less than 5 minutes, with our skill test, you can identify your knowledge gaps and strengths.
