Building an Azure Service Fabric Cluster
This article will explain the step-by-step process of setting up a Service Fabric cluster in Azure through the Azure portal. Here firstly we will create a cluster in Azure Portal and see how we can connect to the cluster using Service Fabric Explorer from certificate installed client machine. Then we will deploy a sample application to our cluster using Visual Studio 2017.
Create a Cluster in Azure
Step 1
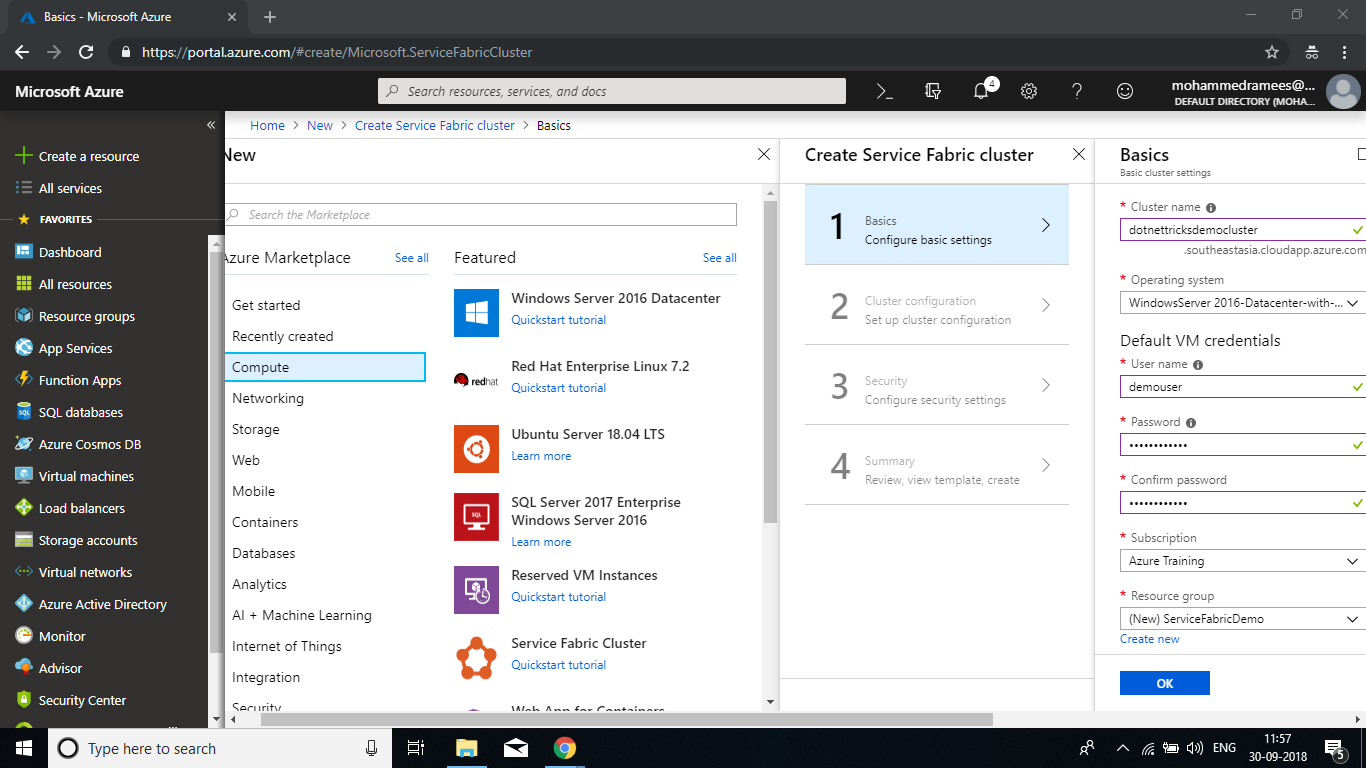
Sign into Azure Portal and create a new Service Fabric Cluster by clicking on Create a resource => Compute => Service Fabric Cluster => Create Creation of Service Fabric Cluster involves four steps. In the first step, you have to provide the following details.
Cluster name : Enter a unique name for your cluster. Here I am using dotnettricksdemocluster which will be appended by .<location>.cloudapp.azure.com as domain
Operation System : Select the preferred operating system for your virtual machine. You can choose between Windows and Linux versions. Here I am going with the default WindowsServer 2016-Datacenter-with-Containers
Username : Provide a username that you need to use to connect to the nodes of the cluster using Remote Desktop
Password : A strong password as per your choice to connect to the VM
Subscription : Select the subscription to which the services to be deployed in case of multiple
Resource group : Create or select an existing resource group. Here I am creating a new one named Service Fabric Demo
Location : Select the nearest data center location for your services to be deployed.
Step 2
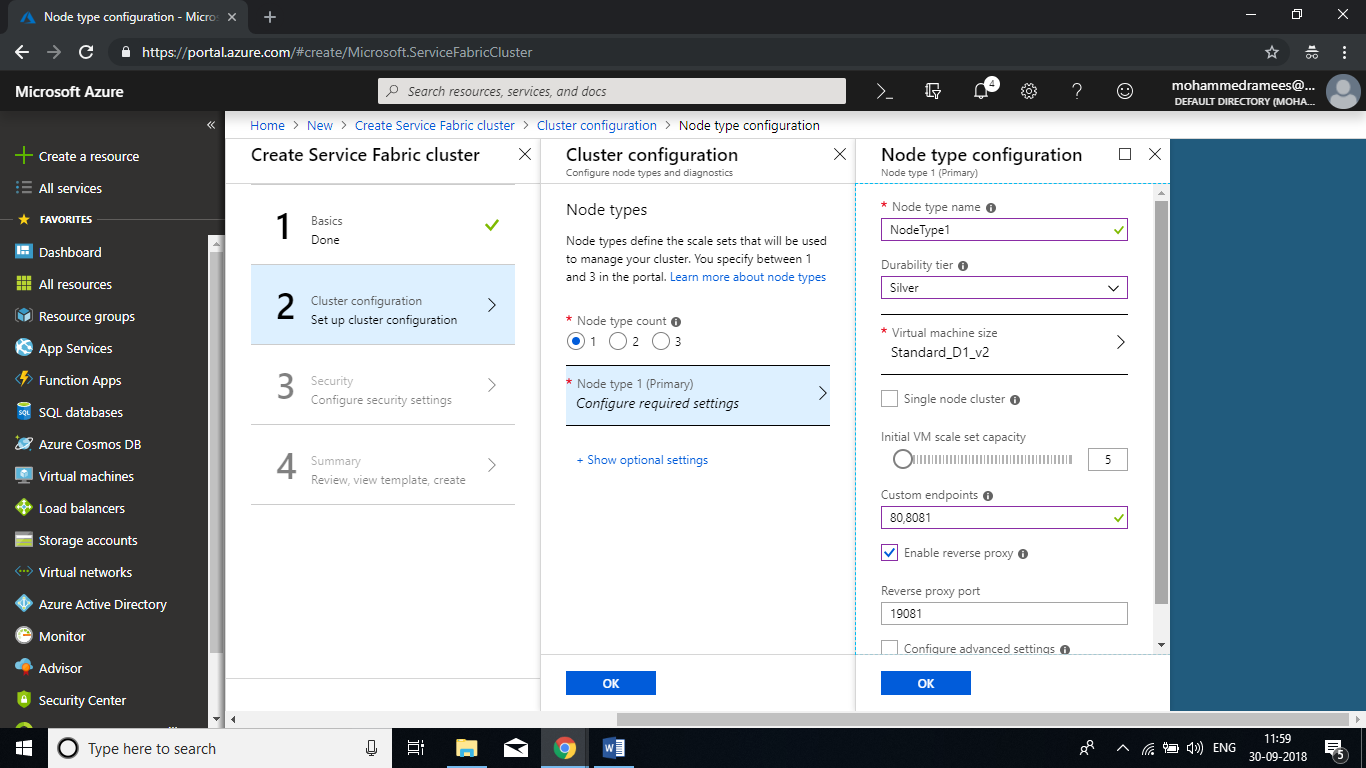
In the second step we need to set up the cluster configuration. In a cluster, we can have more than one node type(scale sets that will be used to manage a cluster). First, we have to specify the count for the node type. Its equivalent to roles in cloud services and in each node type we can define the VM sizes, number of VMs and their properties. Here we are using one node type and we have to define it. Click on Node type 1 to configure the settings and provide the following details.
Node type name : Provide a name with alphanumeric characters. Here I am using NodeType1
Durability tier : Choose a durability tier according to your requirement. It determines the SKU size for the node type. Here I am using Silver
Virtual machine size : Choose your VM size from the available options. Sizes are shown here depend upon the tier you selected
Single Node Cluster : By default, a cluster will have five nodes. Check this option if you are opting for a single node only
Initial VM scale set capacity : Choose a value between 3-50 for your scale set. Here I am going with the default five
Custom endpoints : List the endpoints required separated by a comma.
Enable reverse proxy : Check if you need to communicate between applications.
Add Security to Cluster
Step 3
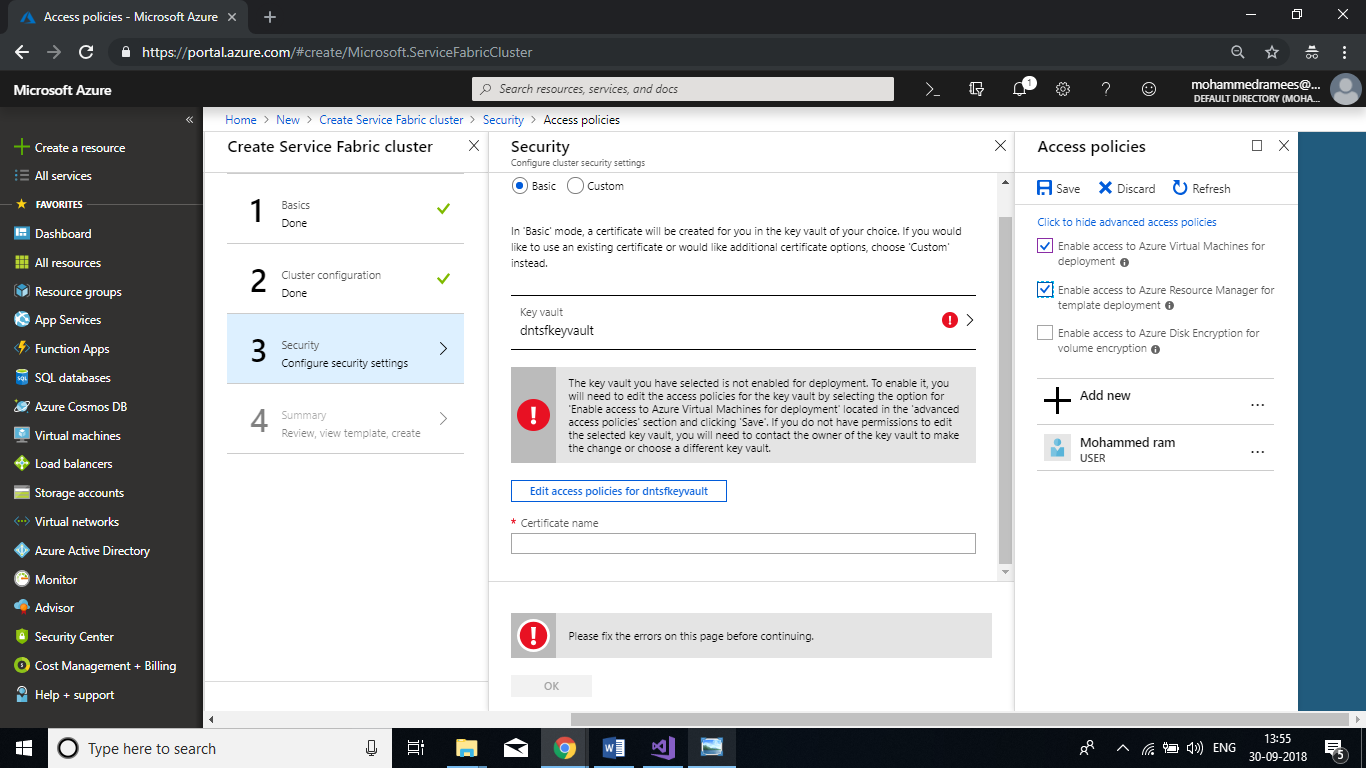
Next we have to configure security settings for the cluster. We are having two options to configure security. If you have already a certificate uploaded to your key vault you can use custom and provide the values here or you can go with the basic where you can create a new certificate. Choose the Basic and follow the screen to create or use key vault and add a certificate. Provide a name and create a new resource group for the vault, leave everything as default and click on create and wait for creation to complete as it is a synchronous process.
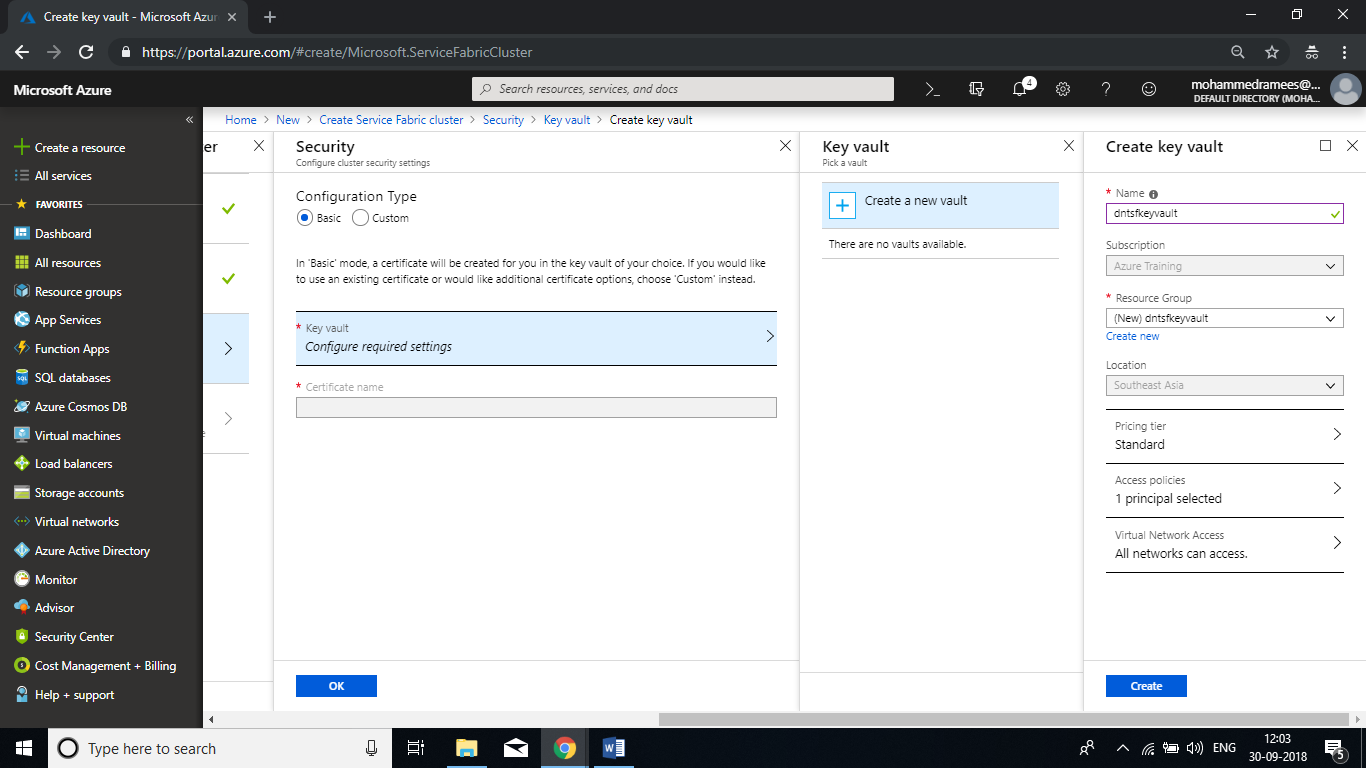
Now we have to edit access policies for the key vault to enable for the deployment. Click on the Edit access policies and then click on Click to show advanced access policies, and check Enable access to Azure Virtual Machines for deployment and Enable access to Azure Resource Manager for template deployment and click on Save
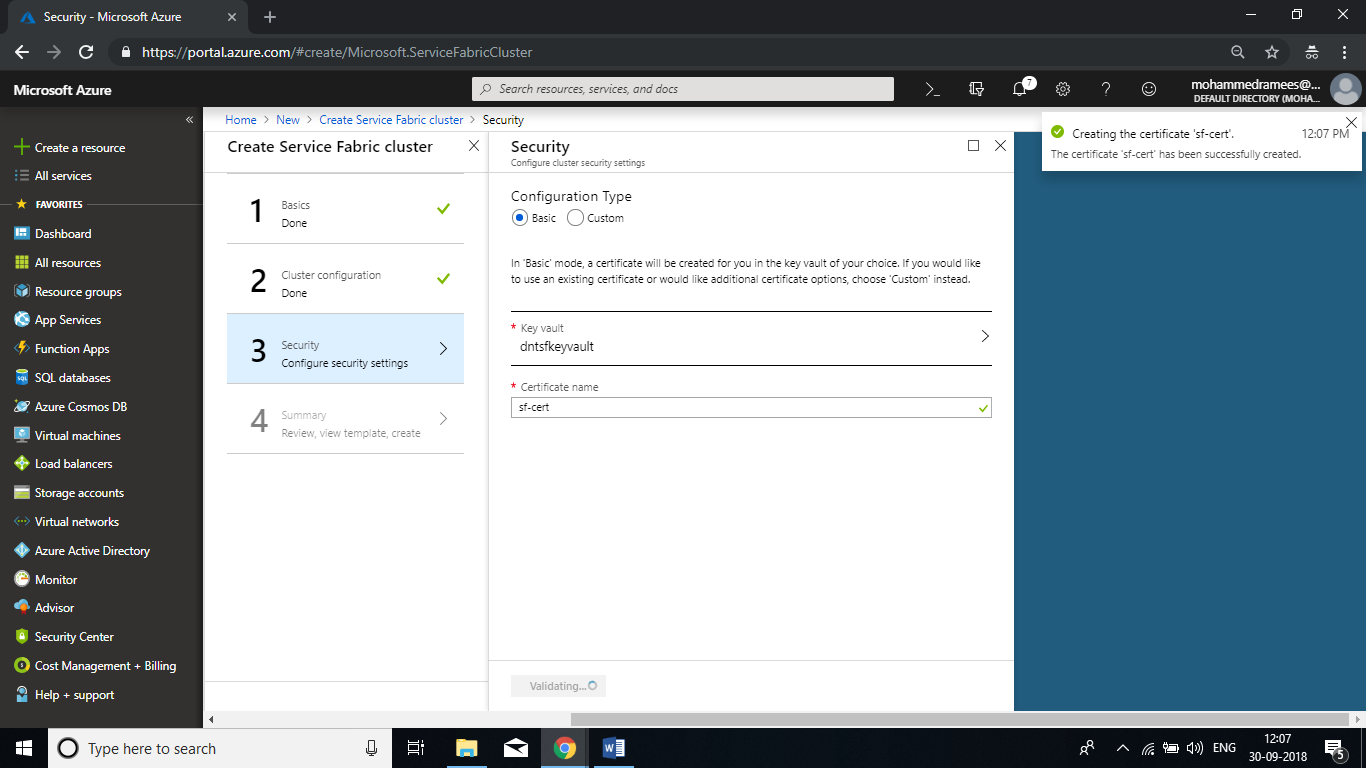
Provide a name for the certificate and click on OK
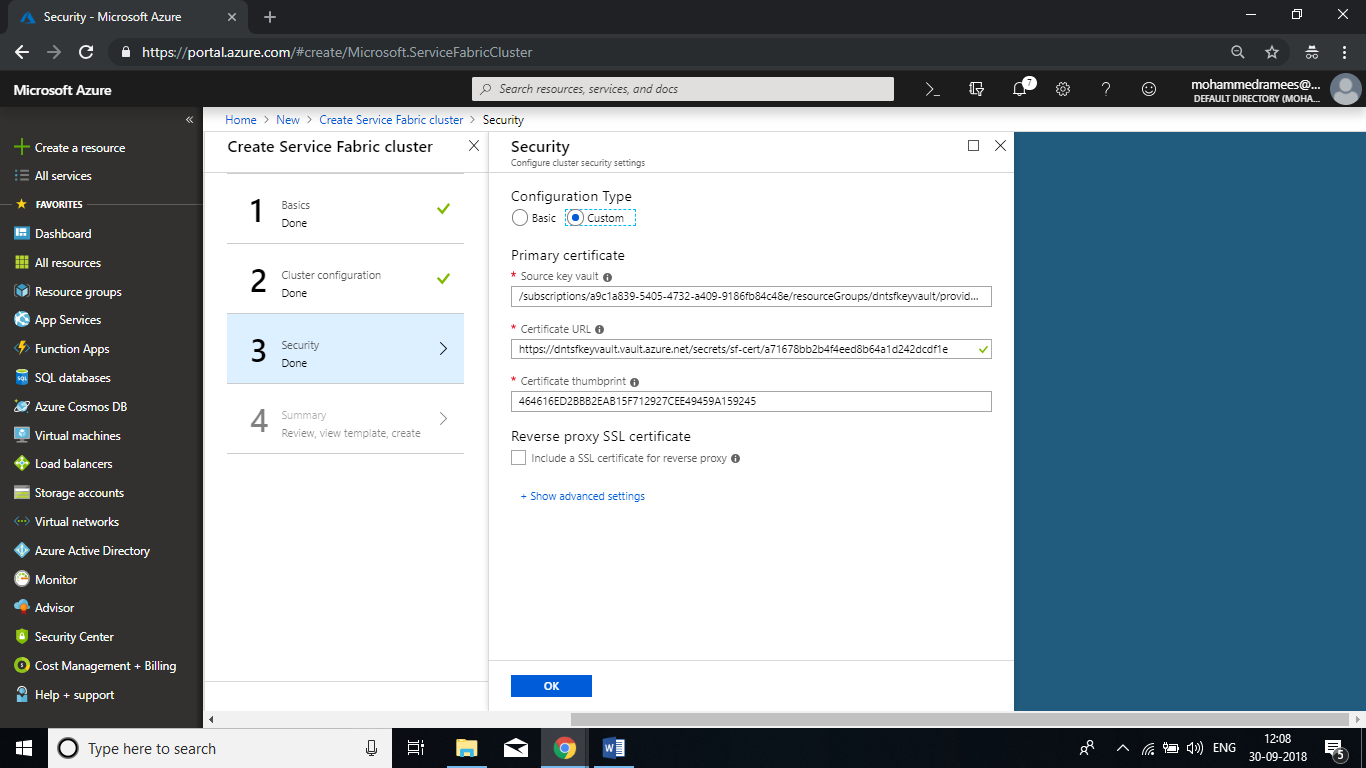
In case you have opted for custom you have to submit SourceVault, CertificateThumbprint and the CertificateURL values from your key vault.
Finalize Cluster Creation
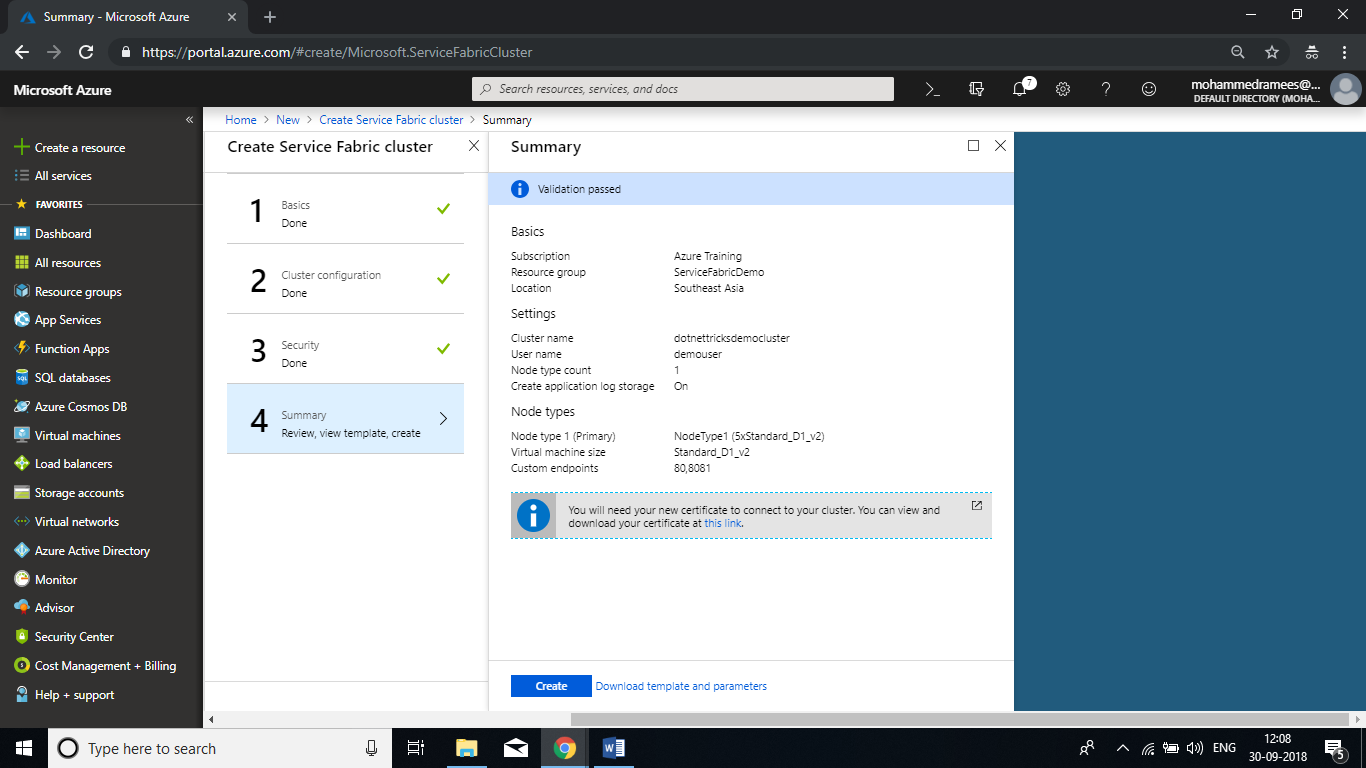
Step 4
Here the final validation will happen and you can initiate for the deployment. Here you can download the certificate by clicking on the link (please keep it open in another tab). As the certificate is not password protected you should make sure that it is safe.
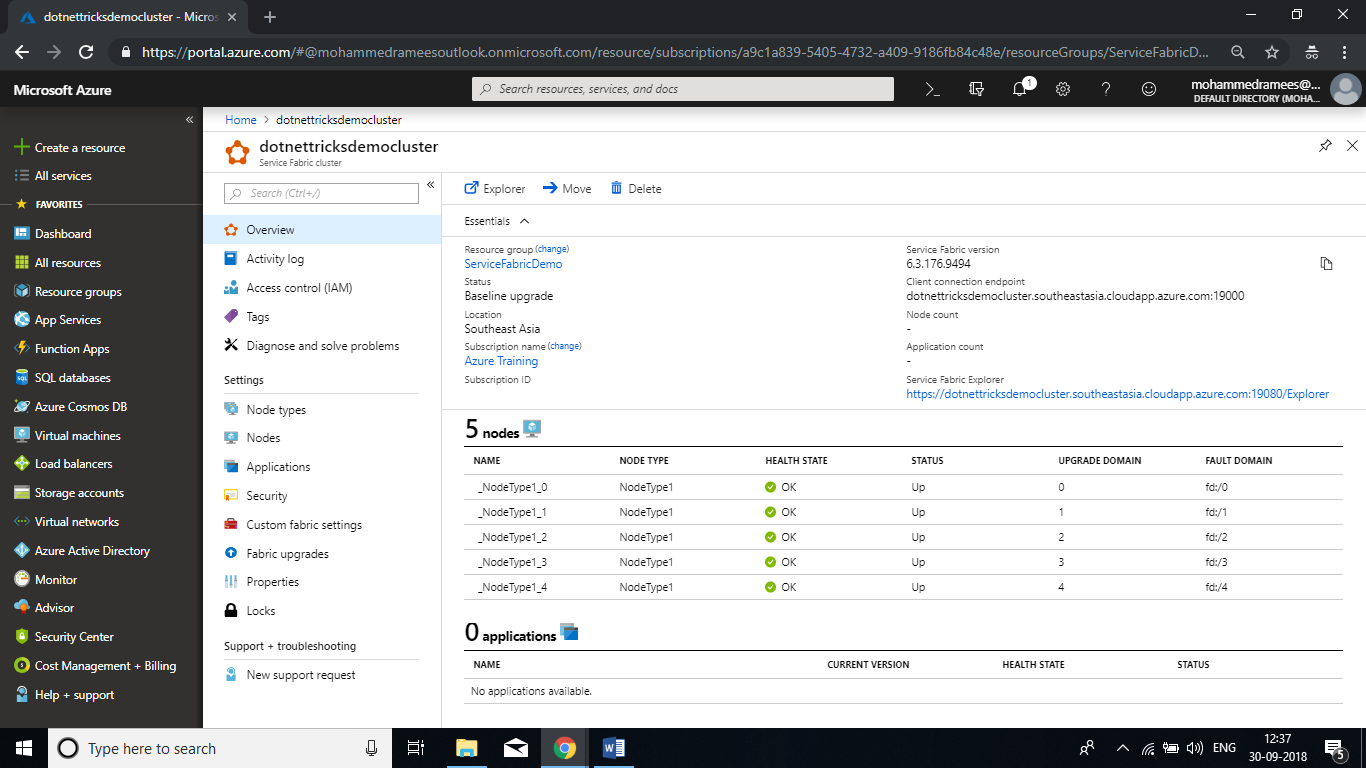
It may take some few minutes for the deployment and once it is completed you can check the status here on the dashboard.
Connect to the cluster using Service Fabric Explorer
Step 5
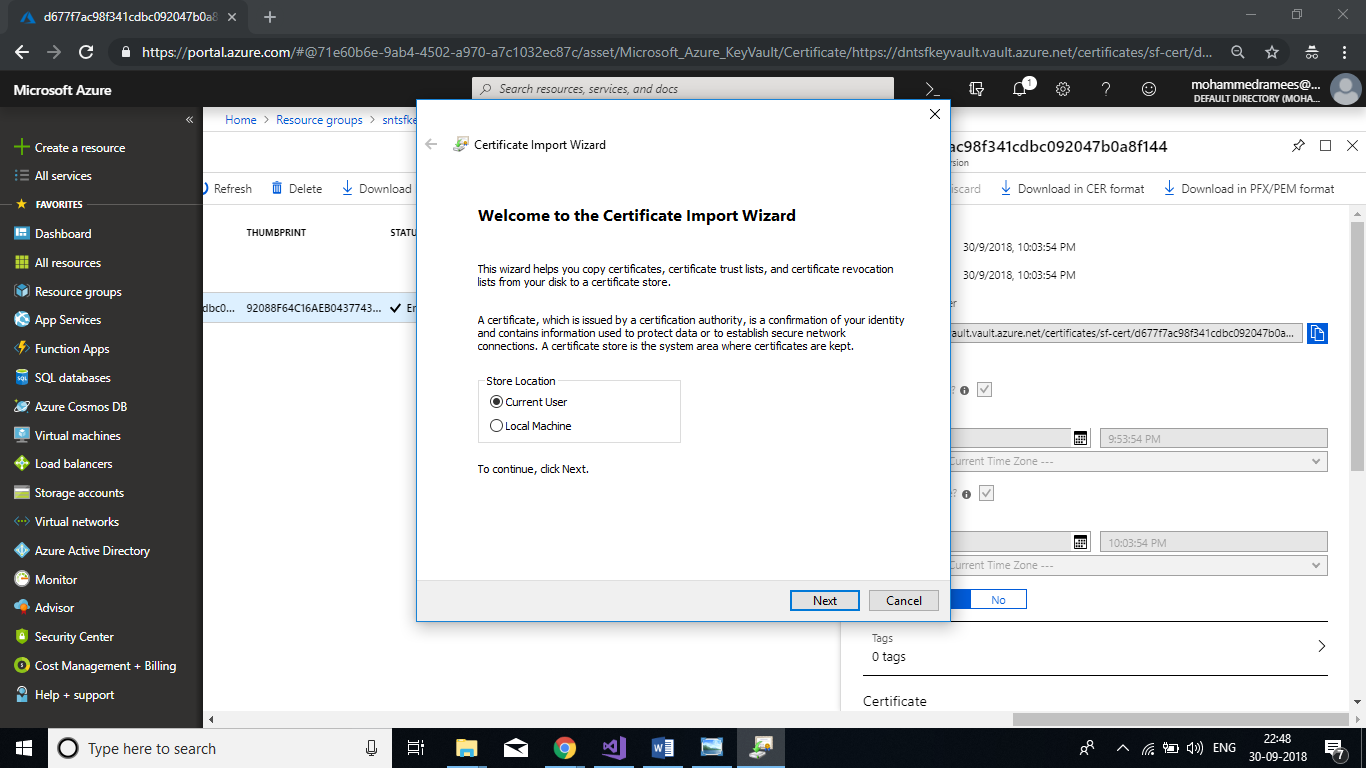
To connect to your secure cluster using Service Fabric Explorer you first need to import the certificate into the Personal (My) store of the current user or local computer. Download the certificate and follow the steps to install on your machine.

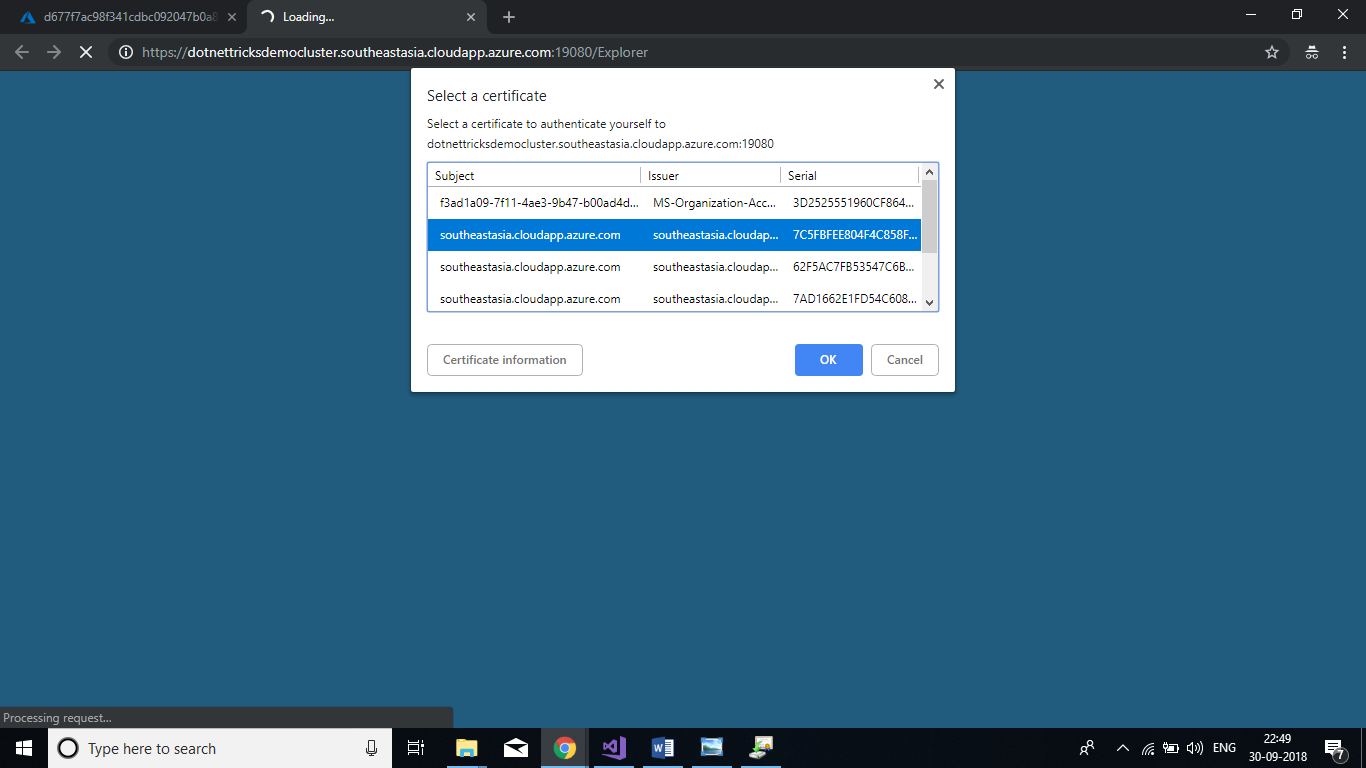
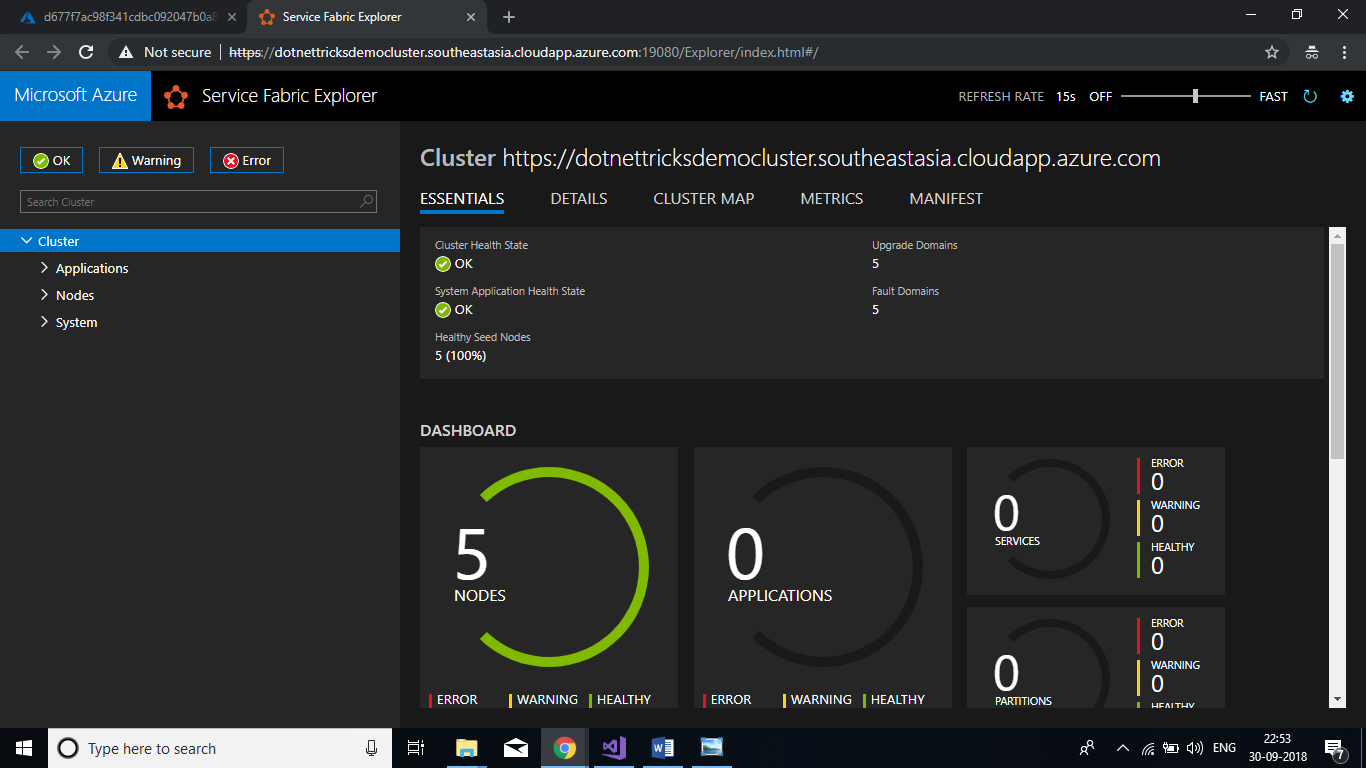
Once the import is completed, click on the explorer on the dashboard and it will prompt you to choose your certificate and it will take you to the service fabric explorer. It will be having an URL similar to https://<your-cluster-endpoint>:19080/Explorer
Deploy Application to an Azure Cluster
Step 6
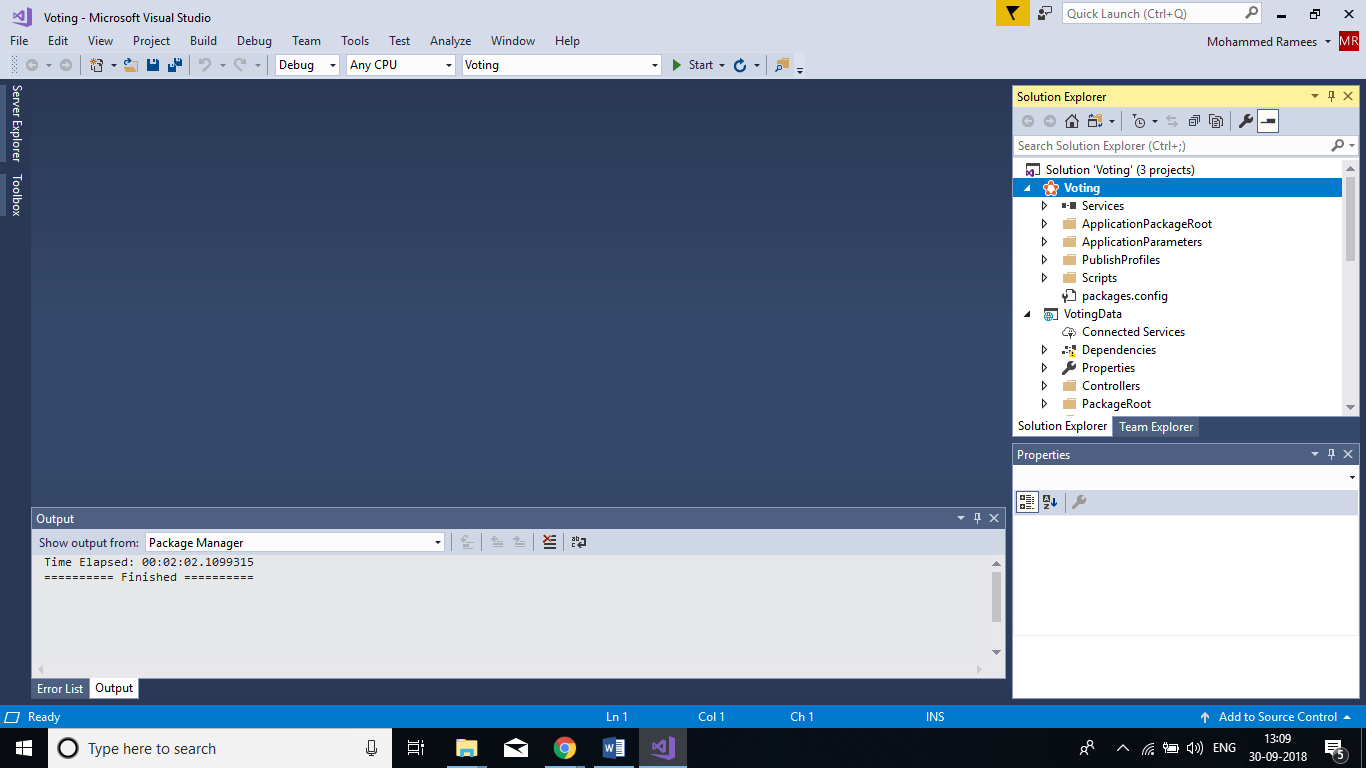
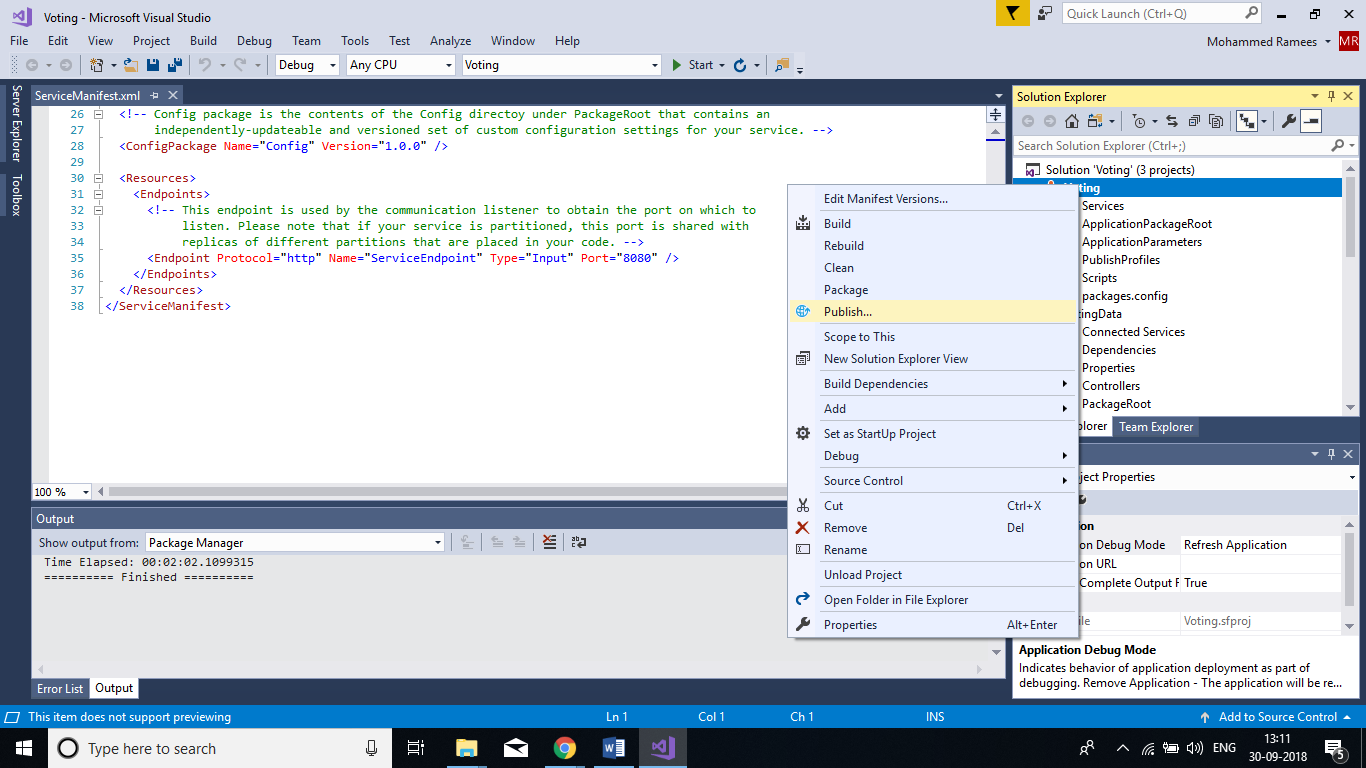
Here we are deploying a sample voting application from Microsoft to our cluster. You can get the application from the top download link. Open the application in Visual Studio and Right click on the Voting project from solution explorer and click on Publish
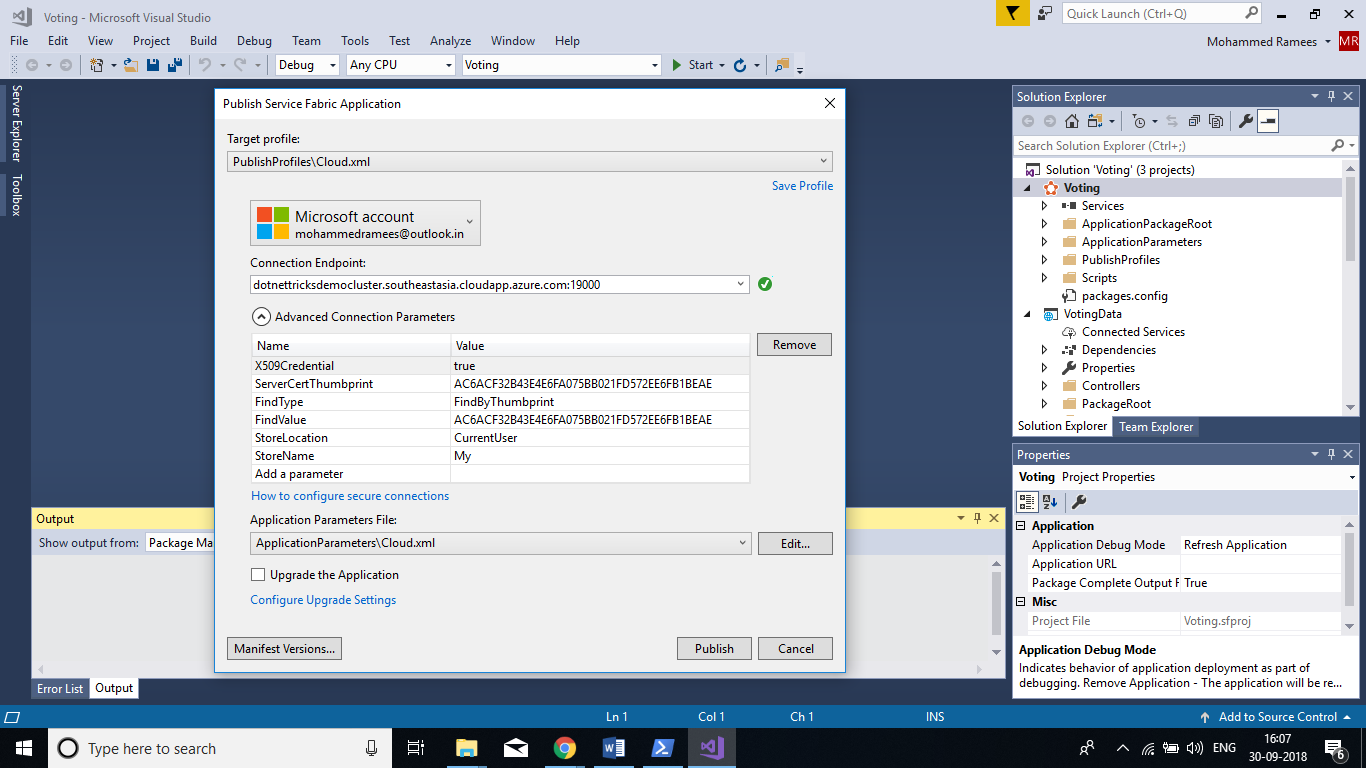
Sign into your Azure Account if prompted for and select the Connection Endpoint from the list. Make sure the values in the Advanced Connection Parameters match with your certificate values. Click on Publish. It may take a few minutes for the publishing to be completed.
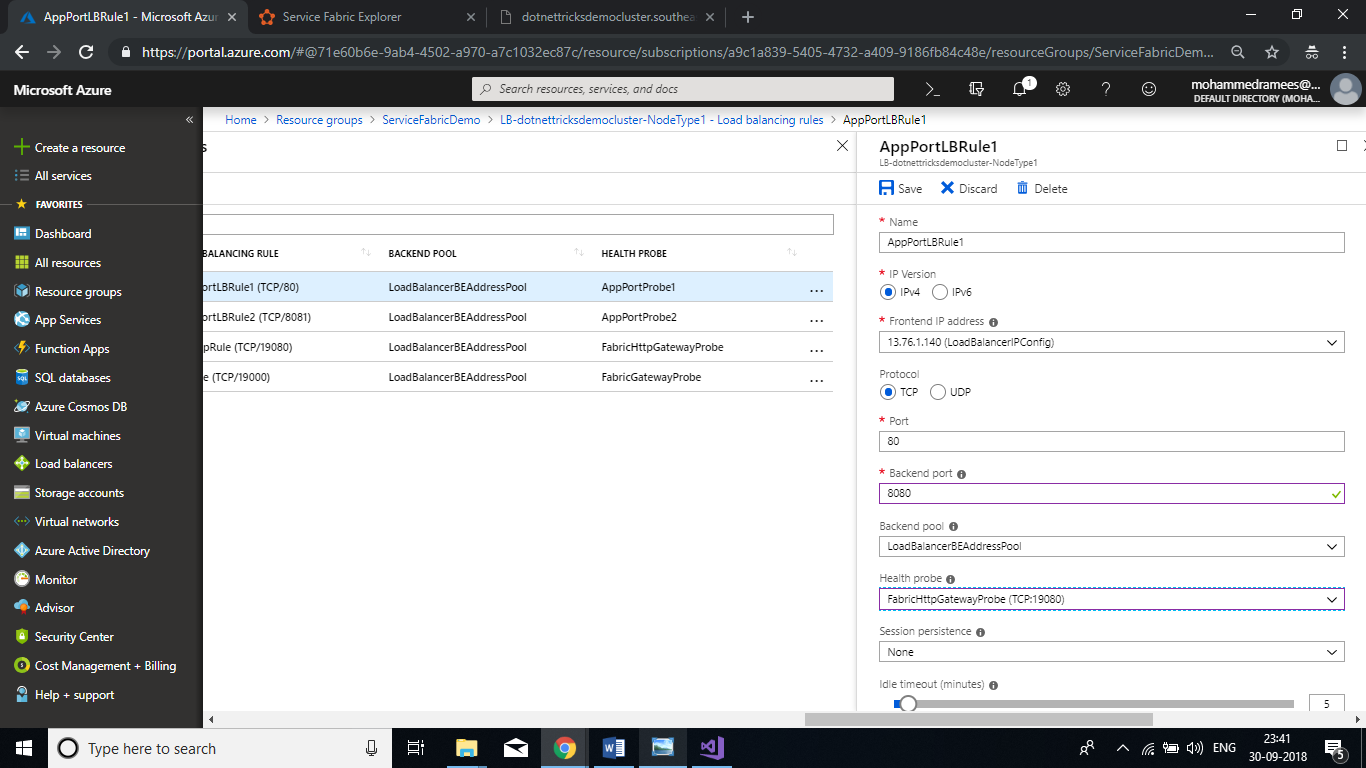
The web project has a manifest file located at \PackageRoot\ServiceManifest.xml that specifies the endpoint protocol and port as below. Endpoint Protocol="http" Name="ServiceEndpoint" Type="Input" Port="8080" We need to update load balancer rule to make the clusters URL reach the website. Open your Load Balancer=> Load balancing rules=>Select first rule that maps backend and front end to port 80.
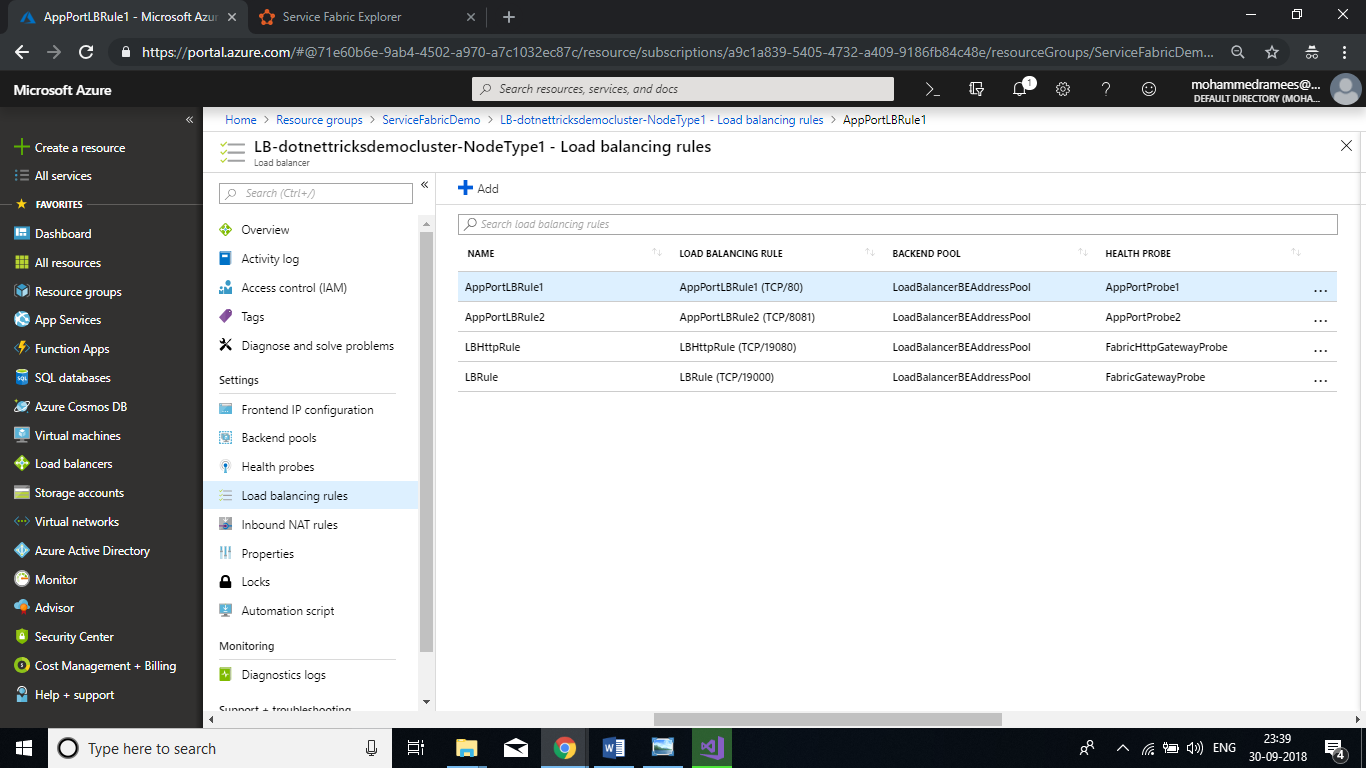
In the settings blade update Backend port to 8080 and Health probe to FabrixHttpGatewayProbe (TCP:19080). Save the settings.
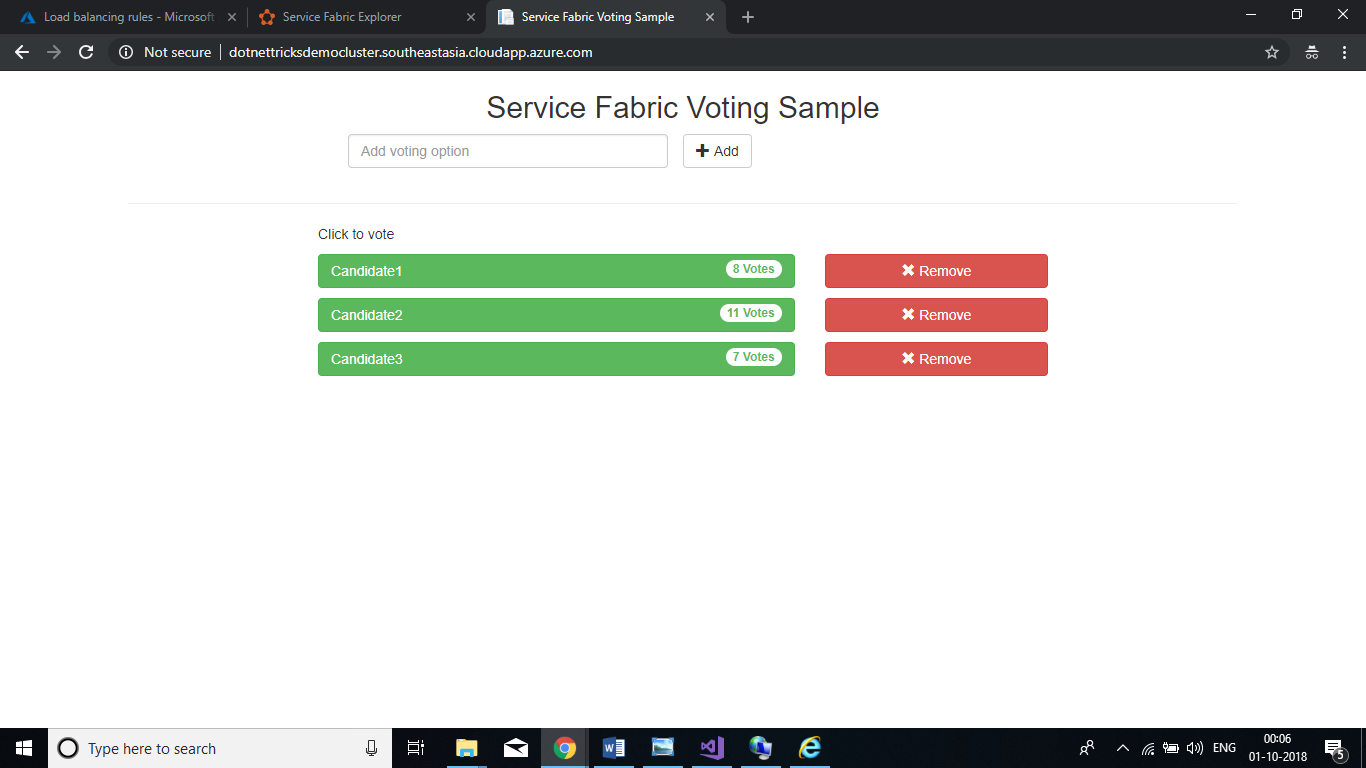
Once the saving is completed you can access the application from the URL
Summary
So, we have successfully deployed a Service Fabric application to Azure Service Fabric Cluster using Visual Studio 2017