
Routing in React using React-Router: Part2

ReactJS Course
Routing in React using React-Router: An Overview
In our previous part of React Tutorial, we have developed a simple routing mechanism where we can traverse through different URLs of the application, the same way if we have tons of pages into the application so in this case, the situation will be more complex to handle. For that, we can develop child routing or you can say nested routing in react application. To implement child or nested routing, in this article we will learn a simple approach for that.
In this part of the react-router series, I have used some of the same packages as we have used previously in React Routing Part1, so I am just going to modify those files to implement our nested routing functionality. In this article, I have used many of the react-bootstrap components which are given below.
Navbar
Nav
Panel
So these are some primary components we have used to design a user interface or UI elements, now let’s see the steps to configure nested routing in a detailed manner.
Read More - React JS Interview Questions And Answers
Steps to configure nested/child routing
The routing is a way to move across the app i.e. from one page to another by matching the URL patterns and if it matches with the current routing configuration, then the respective page will be rendered, but sometimes we may need child or nested routing because the enterprise architecture may have parent-child modules configured so we will learn how to implement nested routing further in this guide.
To implement nested or child routes in React, we need to follow a few steps to implement the functionality, and all the required steps have been explained below.
Step 1
In part-1 of this tutorial, we have created three basic components as given below.
Home.js import React from 'react';
const Home = () => (
<div>
<h1>This Is From Dashboard Page</h1>
</div>
)
export default Home; import React from 'react';
const About = () => (
<div>
<h1>This Is From About Us Page</h1>
</div>
)
export default About; Out of these three files, we are going to implement child or nested routes in the contact.js file so create the file and paste below lines of the code snippet.
 import React from 'react';
 import Profile from './child/Profile';
 import Email from './child/Email';
 import Phone from './child/Phone';

 import { Tabs, Tab, Panel } from 'react-bootstrap';
 // To use routing functionalities
 import { Link, Switch, Route } from 'react-router-dom';

 const divStyle = {
 width: '50%',
 margin: '7px 27%'
 };
 const Contact = (match) => (
 <div>
 <h1>This is From Contact US Page</h1><hr />

 <Link to="/contact">Profile</Link> |
 <Link to="/contact/email">Email</Link> |
 <Link to="/contact/phone">Phone Number</Link>

 <Switch>
 <Route exact path='/contact' component={Profile} />
 <Route exact path='/contact/email' component={Email} />
 <Route exact path='/contact/phone' component={Phone} />
 </Switch>
 </div>
 )

export default Contact; As you can see in the contact us component as explained in the above example, we have included an additional element <link> to apply child components to be rendered and same as Switch element that allows us to render the exact component that exactly matched with the requested URL.
Apart from these three files, we can create more files to test the functionality for a child or a nested routing, and for that create an additional three files inside a new folder called \Child inside the component folder and the code snippet have been given below.
/components/child/Profile.js import React from 'react';
import { Tabs, Tab, Panel } from 'react-bootstrap';
const divStyle = {
width: '50%',
margin: '7px 27%'
};
const Profile = () => (
<div>
<Panel style={divStyle}>
Ubgifu79bg79 <Panel.Heading>Profile Page </Panel.Heading>
<Panel.Body><a href="https://www.scholarhat.com/mentor/manav">Click Here</a></Panel.Body>
</Panel>
</div>
)
export default Profile; import React from 'react';
import { Tabs, Tab, Panel } from 'react-bootstrap';
const divStyle = {
width: '50%',
margin: '7px 27%'
};
const Email = () => (
<div>
<Panel style={divStyle}>
<Panel.Heading>Email</Panel.Heading>
<Panel.Body>pandya.manav@gmail.com</Panel.Body>
</Panel>
</div>
)
export default Email; import React from 'react';
import { Tabs, Tab, Panel } from 'react-bootstrap';
const divStyle = {
width: '50%',
margin: '7px 27%'
};
const Phone = () => (
<div>
<Panel style={divStyle}>
<Panel.Heading>Contact</Panel.Heading>
<Panel.Body>1234567891</Panel.Body>
</Panel>
</div>
)
export default Phone; All three of the above components just contain the static data, and as you can observe that here in these files, we have used the Panel component of react-bootstrap.
Read More - React JS Roadmap
Step 2
If you have followed the previous part of this series then we have developed primary routing into the file app.js which is the primary component for our web application, Apart from the routing part, as you can see that I have used additional components such as Tabs, Tab, Navbar from the library called react-bootstrap. ITt is being used to provide the basic layout to our component but it's totally up to you to choose the layout of your component's content.
Open app.js and paste the following code snippet.
App.js import React, { Component } from 'react';
import './App.css';
// ract-bootstrap components
import { Navbar, Nav, NavItem, MenuItem, NavDropdown , Tabs , Tab } from 'react-bootstrap';
// Our speperately created components
import Home from './Components/Home';
import About from './Components/About';
import Contact from './Components/Contact';
// To use routing functionalities
import { Link, Switch, Route } from 'react-router-dom';
class App extends Component {
render() {
return (
<div className="App">
<Navbar>
<Navbar.Header>
<Navbar.Brand>
<a>Routing With React-Router Part-2</a>
</Navbar.Brand>
</Navbar.Header>
<Nav>
<NavItem href="javascript:void(0)">
<Link to="/">Dashboard</Link>
</NavItem>
<NavItem href="javascript:void(0)">
<Link to="/about">About Us</Link>
</NavItem>
<NavItem href="javascript:void(0)">
<Link to="/contact">Contact Us</Link>
</NavItem>
</Nav>
</Navbar>
<Switch>
<Route exact path='/' component={Home} />
<Route path='/about' component={About} />
<Route path='/contact' component={Contact} />
</Switch>
</div>
);
}
}
export default App; Step 3
Before this step, we have covered our user interface configuration, but let me clarify one thing if you execute the above example then it would not work because we have not implemented BrowserRouter to our main component which is index.js.
What is BrowserRouter
When we are working with the router in react, in the background it manages the history API which is a part of HTML5, I mean when we routing through the different pages, at that time we should maintain the history so that components will be available to route back again accordingly. Basically, it manages three different events which are explained below.
pushState
popState
replaceState
These events are used to manage the different routing activities using state and update accordingly based on the history object.
To configure BrowserRouter, we need to import the API from the third-party library called react-router-domas given below.
import { BrowserRouter } from 'react-router-dom'; After the complete configuration of the BrowserRouter, the final index.js file looks as given below.
 import React from 'react';
 import ReactDOM from 'react-dom';
 import './index.css';
 import App from './App';
 import registerServiceWorker from './registerServiceWorker';
 import { BrowserRouter } from 'react-router-dom';

 ReactDOM.render(
 <BrowserRouter>
 <App />
 </BrowserRouter>, document.getElementById('root'));
registerServiceWorker(); Note
Before executing the project, make sure to update the index.html file where need to add all the required scripts as given below.
 <!DOCTYPE html>
 <html lang="en">

 <head>
 <meta charset="utf-8">
 <meta name="viewport" content="width=device-width, initial-scale=1, shrink-to-fit=no">
 <meta name="theme-color" content="#000000">
 <link rel="manifest" href="%PUBLIC_URL%/manifest.json">
 <link rel="shortcut icon" href="%PUBLIC_URL%/favicon.ico">
 <!-- Bootstrap CDN Files -->
 <link rel="stylesheet" href="https://maxcdn.bootstrapcdn.com/bootstrap/3.3.7/css/bootstrap.min.css" integrity="sha384-BVYiiSIFeK1dGmJRAkycuHAHRg32OmUcww7on3RYdg4Va+PmSTsz/K68vbdEjh4u"
 crossorigin="anonymous">
 <link rel="stylesheet" href="https://maxcdn.bootstrapcdn.com/bootstrap/3.3.7/css/bootstrap-theme.min.css" integrity="sha384-rHyoN1iRsVXV4nD0JutlnGaslCJuC7uwjduW9SVrLvRYooPp2bWYgmgJQIXwl/Sp"
 crossorigin="anonymous">
 <!-- End -->
 <title>React App</title>
 </head>

 <body>
 <noscript>
 You need to enable JavaScript to run this app.
 </noscript>
 <div id="root"></div>
 </body>

</html> Because it contains the two different style sheets which are responsible for all the themes-related settings, and if you omit those style sheets then it is may possible that you cannot see the desired layout properly as it gets distorted.
The very last step is to execute the application and see how nested/child routing works after applying all the above configurations.
Output screens
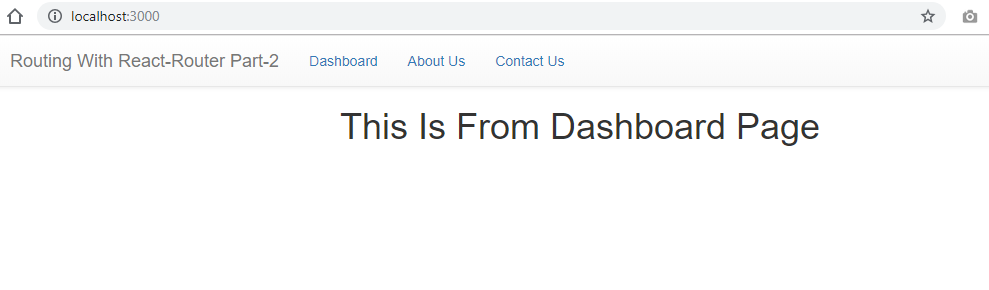
- Dashboard Page
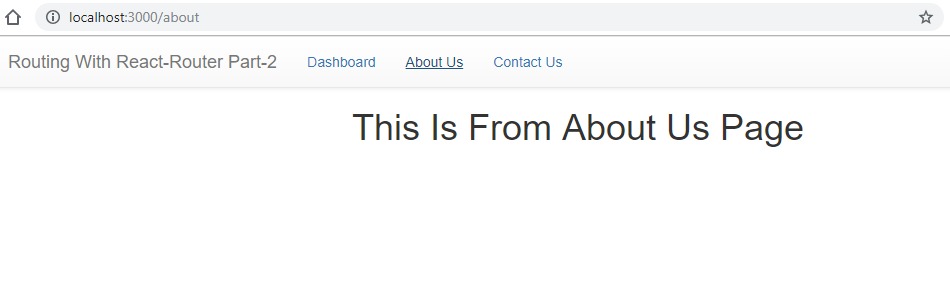
- About Us Page
This page is the entry point of our application and loads immediately when we hit the application into the browser.
Once we click on the About Us link, we can see the below output which renders the about us component by matching /about from the URL.
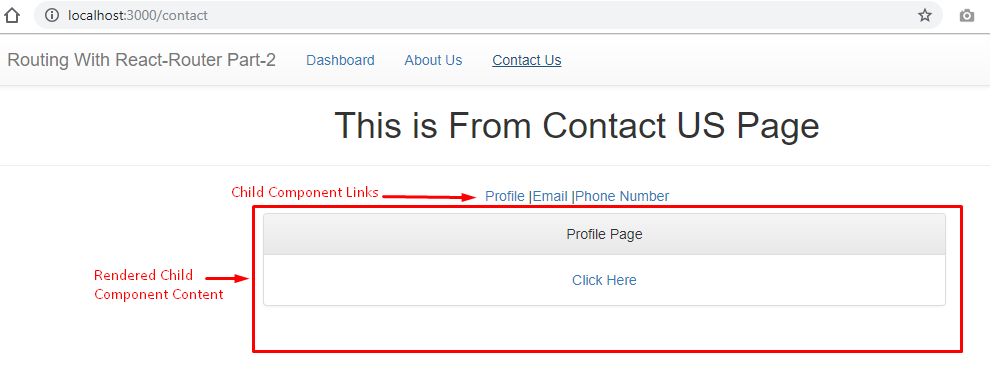
- Contact Us (With profile page as a child)
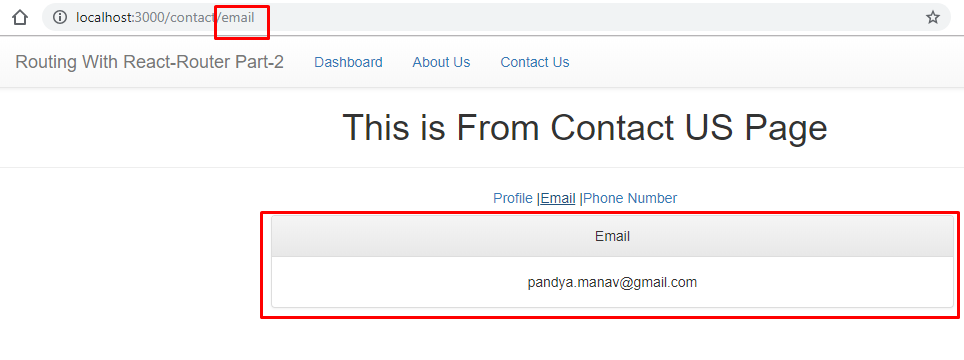
- Email Details Page
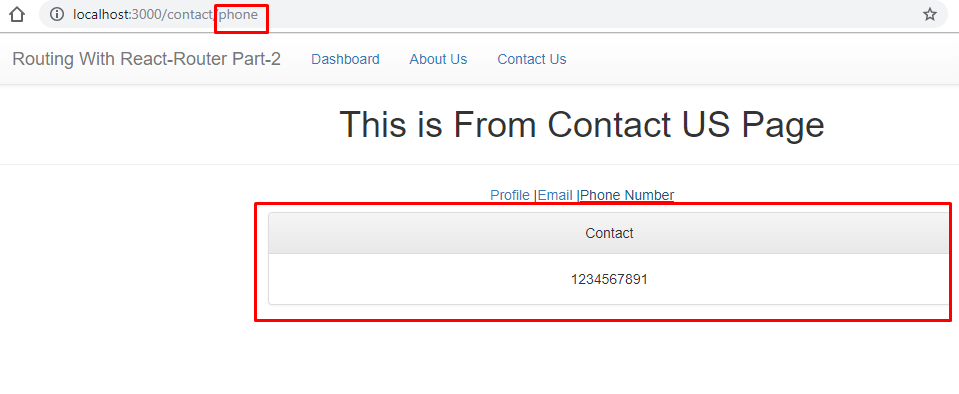
- Phone Number Details Page
Here on this contact us page, we have implemented child/nested routes, when we click on the contact link at that time it by default loads the profile page because we have configured profile page as a child route as a primary route.
When we click on the email link, at that time just observe the URL that how the child route key has been added with the parent route as /contact/email added to the URL.
This is the contact us page where we have displayed the contact number details.
If you look at all the above pages, from the contact pages we have three separate child routes and whenever we click on any of the child routes, at that time it loads the only content of the child and replaces it with the existing one.
This Is how we can achieve child/nested routing, but keep in mind that it does not follow any code standard, it’s just only for demo purposes thus you can try and implement it by following the proper standard and also do some enhancements to learn it in the better manner.
Summary
In this two-part series of the react-router, we have covered different concepts of routing and its related configuration which can be useful while implementing routing in React application, let’s recap all the points that we have gone through quickly.
Introduction to the routing
Packages to use for routing configuration
Steps to configure single-page routing
Steps to configure child or nested routing
How to use react-bootstrap components with react
I hope you have learned something out of these two parts of the series of routing with React, I have shared the complete source code with this article and try to implement all the feature that we have covered and apply it to your project for a better understanding and hands-on learning. For more clarity, consider enrolling in our React JS Certification Training.
Take our free react skill challenge to evaluate your skill

In less than 5 minutes, with our skill challenge, you can identify your knowledge gaps and strengths in a given skill.