
Directives in Vue.js
Directives are used to modify the behavior of our HTML elements which reside in the DOM. In other words, we can say that directives are one of the important parts of the Vue and it is used just like an HTML element’s attribute added along with any HTML elements into the Vue template. This is called the special attribute by which we can perform the various kind of actions based on the directive function implementation. There are tons of in-built directives supported into the VueJs but we can also create our custom directive in order to perform the required behavior using the HTML element.
The Vue.js Directives are one of the special versions of HTML attributes that allow us to manipulate the DOM elements based on the multiple parameter or conditions. Directives are very powerful and they can be used for day-to-day development activities like hiding/show elements, adding/removing elements, and so on.
Syntax to use Directives in Vuejs
In order to create and use the different directives, for that, we need to follow the directive pattern which is explained below. In Vue, we need to use the “v-” prefix along with the directive name as given in the below example.
 <element prefix-directiveId="[arg:] ( keypath | expression ) [filters...]">
 // code
 </element>
As you can see in the above syntax, we have a “prefix” followed by the directive name or id which we can use to identify the type of directive, below is a simple example of the v-model directive which is an in-built directive provided with the Vue.
 <template>
 <div class="hello">
 <h1>{{ message }}</h1>
 <div>
 <input v-model="fullName" />
 </div><br />
 <div>
 Your Full Name Is : {{ fullName }}
 </div>
 </div>

</template>

<script>
export default {
 name: "Model",
 data() {
 return {
 message: "v-model Directive in VueJs",
 fullName: ""
 };
 }
};
</script>
Here in the above example, we have a variable called “fullName” and using this variable, we are going to use its value, and it means we are trying to implement two-way data binding. And by using the v-model directive, the value of the full name will be synced based on the change event of the input. This is how we can use the directives with the “v-” prefix followed by the directive name.
The v-model works on the basis of two-way data binding as we do in Angular where as soon as the user changes the value from the text box, it will be updated into the mode and the same value can be used as an output simultaneously.
Types of Directives in Vue
So far, we have learned what is directive and how to use any of the types of directives in our Vue application. Vuejs contains a number of different directives, which we can use to perform various actions based on different situations. Below are the different directives supported into the Vue along with the appropriate examples.
v-show directive
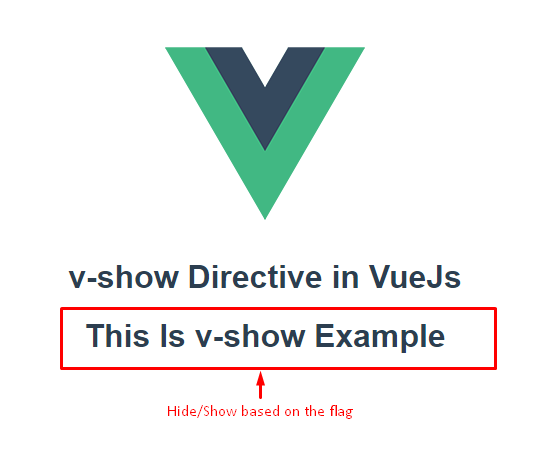
The v-show directive in Vuejs is used to show or hide the different HTML elements conditionally. Just like the toggle effect, if we want to hide or show something based on the specific flag, then we can use this directive in order to achieve the hide/show function.
The v-show directive is similar to the if-else condition where if the condition is fulfilled then show perform some action, and if not then any default action can happen.
Syntax<element v-show="flag/condition"> // content </element>Example
<template>
<div class="hello">
 <h1>{{ message }}</h1>
 <div v-show="isVisible">
 <h1>This Is v-show Example</h1>
 </div>
</div>
</template>

<script>
export default {
name: "Show",
data() {
 return {
 message: "v-show Directive in VueJs",
 isVisible: true
 };
}
};
</script>
Into the above example, we have a boolean flag “isVisible” with the default value set to the true and based on the flag value, the specific div element will be shown or hidden based on the boolean value. After running the above example, we can see the output like this.
v-bind directive
the v-bind directive is used to bind the value from the script to the template or else we can say that v-bind is used to bind the value from the component logic to the HTML template. We can also call it “one-way data binding” because it binds the values from the business logic to the template like the value of a label, classes, styles, arrays, objects, and image source.
Syntax<element v-bind:property="value"> // content </element>Example
 <template>
 <div class="hello">
 <h1>{{ message }}</h1>
 <div>
 <img v-bind:src="value1" />
 <img v-bind:src="value2" />
 </div>
 </div>
 </template>

 <script>
 export default {
 name: "Bind",
 data() {
 return {
 message: "v-bind Directive in VueJs",
 value1:
 "https://encrypted-tbn0.gstatic.com/images?q=tbn:ANd9GcT4-_9RcAcEzGNJwggrEybw0eGKz9WL1tTT5FMp5RC4SGQUmOOs",
 value2:
 "https://encrypted-tbn0.gstatic.com/images?q=tbn:ANd9GcSiLWmP_PWT8i0wDoSDcpumNyoNmb-tjfffWz3bKx-rNLY60VdscA"
 };
 }
 };
 </script>
In the above example, we are trying to bind the image source using the v-bind directive. For that, we have used two different variables which provide the image URL and it will be bound to the src property of the image element using the v-bind directive. But to keep in mind that it won’t work two ways and value will not be reflected vice-versa.
v-model directive
We have seen the example of the v-model, in the introductory part that how to use this directive. Basically, the v-model directive is used to bind the value of a script to the Vue template, and it will be a “two-way data binding” in other terms. Below is a simple example in which we are getting the value of a textbox element and showing the value at a time.
 <template>
 <div class="hello">
 <h1>{{ message }}</h1>
 <div>
 <input v-model="fullName" />
 </div><br />
 <div>
 Your Full Name Is : {{ fullName }}
 </div>
 </div>

</template>

<script>
export default {
 name: "Model",
 data() {
 return {
 message: "v-model Directive in VueJs",
 fullName: ""
 };
 }
};
</script>
v-for directive
the v-for directive in Vuejs is used to iterate over the below list of items.
Arrays
Objects
Array of objects
A specific range of the integer/numbers
Quiet as many times, we need to perform the iteration based on the different functional requirements. For such requirements, we can use the v-for directive which is similar to for loop which we have used in other different programming languages.
Below is the syntax that shows how the directive v-for can be used.
Syntax<element v-for="(value, key) in array_object"> //content </element>Example
 <template>
 <div class="hello">
 <!-- <h1>{{ message }}</h1> -->
 <h3
 v-for="(value, key) in values"
 v-bind:key="value"
 >
 {{ key }} : {{ value }}
 </h3>
 </div>
</template>

<script>
export default {
 name: "Loop",
 data() {
 return {
 message: "v-for Directive in VueJs",
 values: [
 "Value 1",
 "Value 2",
 "Value 3",
 "Value 4",
 "Value 5",
 "Value 6",
 "Value 7",
 "Value 8",
 "Value 9",
 "Value 10"
 ]
 };
 }
};
</script>
Here in the above example, we have a list of values as an Array, and also going to iterate the items using the v-for. the v-for directive will iterate over the Array until it reaches the last element of an array and will print the appropriate values. This is how we can iterate over the arrays, objects, and so on using the v-for directive.
v-if, v-else and v-else-if directives
These are all the conditional rendering directive which is used to add or remove element based on the specific condition if the given condition is matched then the respective instruction will be expected or the else case will be executed.
v-if
This directive is used to render the element if the condition provided will be evaluated to be true.
Syntax<element v-if="variable/ (true/false) / expression"> // content </element>
v-else
This directive is used to render the element if the v-if directive will be evaluated to false along with the content.
Syntax<element v-else> // content </element>
But to keep in mind that we don’t need to pass any expression or condition because it will be rendered if the condition is evaluated false then the v-else portion will be rendered by default.
v-else-if
the v-else-if directive is used to render an element if we have multiple conditions to be evaluated but need to compare each and every condition for the batter rendering element. It can be used along with the other directives like v-if and v-else.
Syntax<element v-else-if="varible/ (true/false) / expression"> // content </element>Example of simple v-if and v-else
<template>
<div class="hello">
<h1>{{ message }}</h1>
<div v-if="myValue < 10">
<h1>Number is less than 10</h1>
</div>
<div v-else>
<h1>Number is equal to 10</h1>
</div>
</div>
</template>
<script>
export default {
name: "Show",
data() {
return {
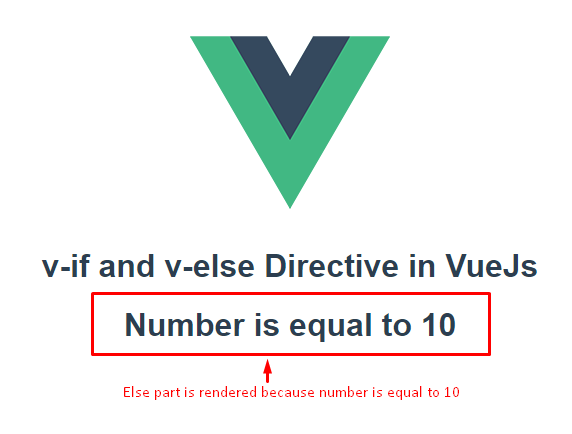
message: "v-if and v-else Directive in VueJs",
myValue: 10
};
}
};
</script>
<!-- Add "scoped" attribute to limit CSS to this component only -->
<style scoped>
</style>
In this example, we have one data variable which is called “myValue” with the 10 as the default value. So based on the variable, we are going to evaluate the condition whether the value is greater than 10 or equal. After running the above example, we can see the output like this.
<template>
<div class="hello">
<h1>{{ message }}</h1>
<div v-if="myValue < 10">
<h1>Number is less than 10</h1>
</div>
<div v-else-if="myValue > 10">
<h1>Number is greater than 10</h1>
</div>
<div v-else>
<h1>Number is equal to 10</h1>
</div>
</div>
</template>
<script>
export default {
name: "Show",
data() {
return {
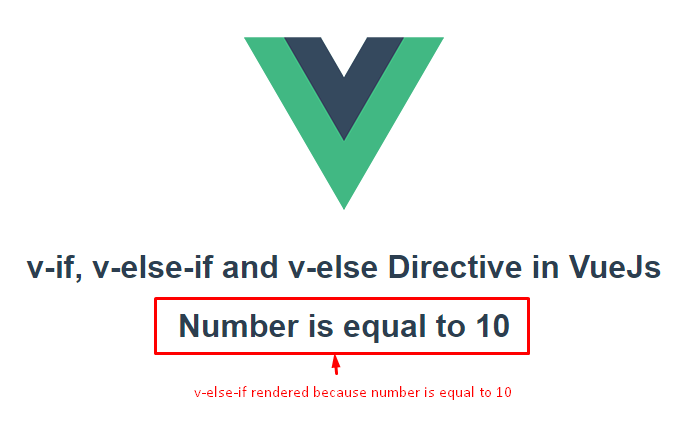
message: "v-if, v-else-if and v-else Directive in VueJs",
myValue: 10
};
}
};
</script>
<!-- Add "scoped" attribute to limit CSS to this component only -->
<style scoped>
</style>
In this example, we have the same data variable “myValue”, and based on the different conditions, we are going to render a different message. This is how we can use if, else if, and else conditional directives to evaluate the different expressions. After running the above example, we can see the output like this.
v-text directive
the v-text directive in Vue is very similar to the interpolation and v-text is used to bind the value of the data variables into the Vue template. We can also call it as “one-way data binding” because it binds the value to the template element directly.
Below is the syntax that shows how to use the v-text directive.
Syntax<element v-text="data_variable"> // content </element>Example
<template>
<div class="hello">
<h1>{{ message }}</h1><br />
<h1 v-text="message"></h1>
</div>
</template>
<script>
export default {
name: "Show",
data() {
return {
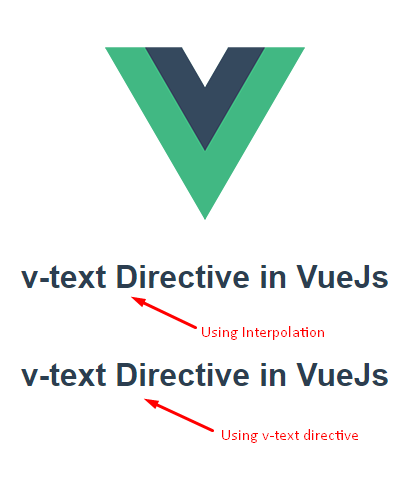
message: "v-text Directive in VueJs",
};
}
};
</script>
<!-- Add "scoped" attribute to limit CSS to this component only -->
<style scoped>
</style>
Here in the above example, we have one data variable called “message” which contains the static message. In order to use the “message” value, we can use two different approaches.
String interpolation
v-text
In this example, we have used two of the methods which show the static message into the template or we can say it binds the data variable’s value into the Vue template. When we run the above example, the output will be like this.
So far, we have learned about the different directives which we can use in our project to play around with the different HTML dom elements behavior like showing or hiding elements, conditional rendering, element iteration, etc. These all are the in-built directives provided by the Vue, but if we can also create our custom directive as well.
Custom Directive
We have seen the various types of in-built directives for the different requirements, but do you think that these directives are well suited for all our functional requirements? I don’t think so, because sometimes it may happen that we want some behavior which cannot be fulfilled by those in-built directives. Then Custom Directives comes into the picture which is used to create the custom behavior of an HTML element based on our requirement.
How to create the Custom Directive
Now we know the requirement of the custom directive, but we may think that how to create it. We can create any custom directive using the separate section into the <script> section which is called the “directives” section. Below is the normal directives section of the Vue file.
 <script>
 export default {
 name: "Custom",
 data() {
 return {
 message: "Custom Directive in VueJs"
 };
 },
 directives: {
 // custom directive functions
 }
 };
 </script>
As you can see in the above syntax, we have a separate section for “directives” where we can create and implement different custom directives. Now let’s see the simple example for the custom directive to change the font size based on the mouse over and mouse out events for the label element.
Example <template>
<div class="hello">
<h1>{{ message }}</h1>
<div>
<label v-fontSize>Hover On ME !!!</label>
</div>
</div>
</template>
<script>
export default {
name: "Custom",
data() {
return {
message: "Custom Directive in VueJs"
};
},
directives: {
 fontSize: {
 bind(el, binding) {
 el.onmouseover = function() {
 el.style.fontSize = "50px";
 };
 el.onmouseout = function() {
 el.style.fontSize = "15px";
 };
 }
 }
}
};
</script>
<!-- Add "scoped" attribute to limit CSS to this component only -->
<style scoped>
</style>
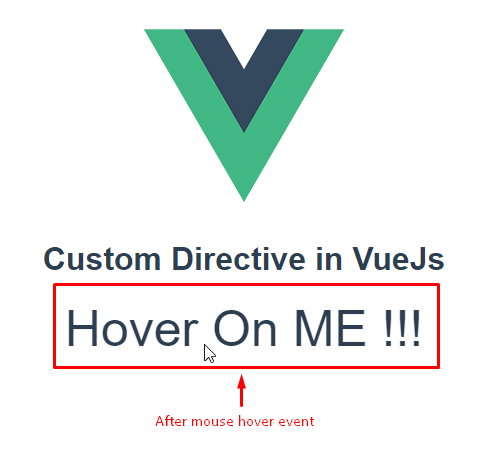
In the above example, we are trying to change the font size of an <label> element using the custom directive. For that, we have created a custom directive named “v-fontsize” that updates the font size of the text on the hover of the element.
fontSize: {
bind(el, binding) {
el.onmouseover = function() {
el.style.fontSize = "50px";
};
el.onmouseout = function() {
el.style.fontSize = "15px";
};
}
}
Which accept the complete HTML element and change the styles of an element i.e. font size based on the two different events.
Onmouseover()
Onmouseout()
This is how we can write the custom logic to change the behavior of any HTML element based on our functional requirement. After running the above example, we can see the output like this.
Before the hover event

After the hover event
Hook Functions
In our previous example, we have created a Custom Directive inside the “directive” section of a script. But with that, we have also used one term “bind”, what does it mean, well it's nothing but a kind of Hook Function which is used to trigger the specific action based on the Hook cycle. It is just like a different Hooks lifecycle method but has different methods in the context of directives. Let’s see the list of Hooks functions for the directives.
inserted(..element, ..binding, ..vnode): This hook function will be triggered whenever any directive bounds to the specific element once in a while. By using this hook function, we can perform various initial functions which need some onload kind of things.
inserted(..element, ..binding, ..vnode) :Called when the component or element is inserted into its parent node. It may not be in the DOM yet.
update(..element, ..binding, ..vnode, ..oldVnode) : It is called when the containing component has updated but just before its children will be updated.
componentUpdated(..element, ..binding, ..vnode, ..oldVnode) : It is called when the containing component has updated but after its children will be updated.
unbind(..element, ..binding, ..vnode): It is called when any directive is going to unbound from the component or element and it will trigger only once a time.
All these are the Hook Functions that can be applied while binding the directive to the different HTML elements. Let’s see one example of using any Hook Function listed above and see how it works.
Example <template>
<div class="hello">
<h1>{{ message }}</h1>
<label v-onHover>This is Label with Custom Directive</label>
</div>
</template>
<script>
export default {
name: "HookExample",
data() {
return {
message: "Hook Function in VueJs"
};
},
directives: {
onHover: {
bind(el, binding) {
alert("Bind Hook Function Called Once");
}
}
}
};
</script>
<!-- Add "scoped" attribute to limit CSS to this component only -->
<style scoped>
</style>
Here in the above example, we have one simple <label> element along with the custom directive called “onHover”. So whenever we execute the above file, we will get the simple alert box along with the message that “bind” will be called once whenever our directive binds to the HTML element. After running the above example, we can see the output like this.
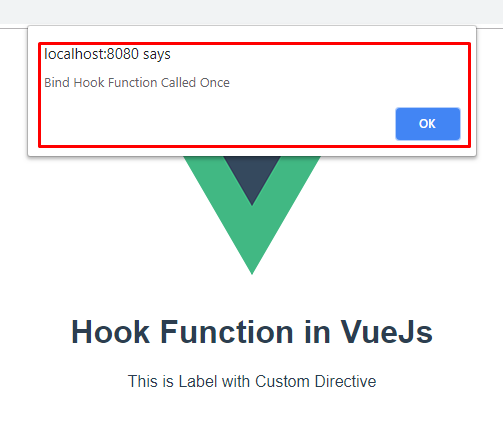
So whenever we run our file, we can see the output like this which shows the message, the same way we can use different hook functions based on the different functional requirements.
Directive Hook Arguments
Every hook function allows us to provide the various arguments for batter configuration for the directives. Not every argument is compulsory except “el” which is used to pass the complete HTML element to the Hook Function. Below is the complete list of arguments provided to Hook Functions.
element
The main HTML element is to be bound along with the directive. When we try to console it, we can see that the complete HTML element will be returned.
binding
Basically, this is an Object which contains the various properties which we can use in our binding configuration setting. Below is the complete list of supported arguments.binding. name The appropriate name of our custom directive.
binding.value: The value of a JavaScript expression passed to the directive. We can process “value” based on custom behavior like changing the size of text, color, and other settings.
binding.oldValue: Contains the previous value of the directive, but only provided an update and componentUpdated hook functions.
binding.expression: This is the value expression represented as a string. For example directive (v-directive= {25 * 25}) then the expression will be evaluated “25 * 25” into the directive function body.
binding.arg –: This is the argument that will be passed to the directive. For example the directive (v-directive: URL=” value”) then: URL will act as a binding argument.
binding.modifiers: It is the object which contains any modifiers passed to the directive as Boolean values. For example (v-XYZ.hi1.hi2) then value of the modifiers would be {hi1: true, hi2: true}
vnode
This is a virtual node used by Vue’s renderer engine or compiler. It's better to understand when we should use this in our functional requirements.
oldVnode
The previous version of the above Vnode. And it is only available in the update hooks in order to get the older value of a specific node.
Here we have seen the different arguments to be passed along with the directive, which further will be processed based on the custom behavior for batter directive configuration.
Empty Directive
Version 0.12 supports the Empty directive which doesn’t accept any argument. It means Empty Directive will ignore if there are any arguments provided and also ignore its value. By default, there are two types of empty directives that are supported which are listed below.
v-pre
It will ignore each and every parent and child element and does not allow its content to be compiled.
v-cloak
This property remains on the element until the associated ViewModel finishes its compilation.
It’s combined with the different CSS rules such as [v-cloak] {display: none}, this directive can be used to hide un-compiled mustache bindings until the ViewModel is ready for execution.
Example<div v-pre> Hello World </div>
The content inside the <div> element will be ignored for the compilation but it renders its content.
Read More Articles Related to vue
Summary
Directives play an important role in VueJs to apply and update the behavior of the different HTML elements. So far in this article, we have learned different aspects of Directives which are listed below.
What is the Directive?
How to use Directive in Vue?
Different types of In-built Directive
How to create Custom Directive
Different Hook Functions are supported
Arguments provided to the Hook Functions
Empty Directive
I hope we have learned Directive in a simpler manner, I would recommend just trying it out and seeing how it helps to make our development life easier.