
Filters in Vue.js
Filters are a way to format our text into a different form than the existing format using custom business logic. If you have used Angular then you probably know the meaning of filters and their importance of it in the development. Same way in Vue, we can use a filter to change the format of a text the way we want, and in order to use such filter functionality we should use the pipe (|) symbol along with the text.
As the name suggests itself, the filters are the data presentation tools used to filter out the data from the DOM level, it means that the data is still the same in its original location but is now can be seen in a custom specified manner which is not necessarily the way it was originally stored in the data store respectively.
How to use filters
It is very easy to use filters in our Vue applications, and it can be used using the pipe (|) symbol just like we use pipes in Angular, and the basic syntax is given below.
Syntax
 <div>
 Filters in Vuejs : {{ text | pipe_name }}
 </div>
As you can see that we have a text which can be anything like static text or a value from the data variables, and after applying the pipe (|) symbol alongside the value, followed by the pipe name, we will get the desired text formatting as per the instruction provided to the respective filter element.
There are tons of easy-to-use filters in Vue by just using the pipe symbol, now let’s see how many types of in-built filters are supported and how we can define our custom filters as well.
Ways to define filters
In Vue, we can define and implement the filter in two different ways which are explained below.
Local Filter Implementation
To define and implement the local filter, we can make use of the filters option in the component itself. Below is a simple example of a toUpper filter using the filters section.
 <script>
 export default {
 name: "SimpleExample",
 data() {
 return {
 message: "Define local filter in vuejs"
 };
 },
 filters: {
 toupper: function(val) {
 if (!val) return "";
 val = val.toString();
 return val.toUpperCase();
 }
 }
 };
 </script>
We have separate “filters” section, where we can define and implement our custom filter logic as we did in the above example. Hence we can specify multiple filters by separating them using the comma (,) operator.
Global Filter Implementation
We can also define the filters globally before creating the new vue instance. After defining the Global Filter, now we will be able to use it in the whole application wherever we want by just using the appropriate filter name. Below is a simple example to define the new Global filter.
 import Vue from 'vue'
 import App from './App.vue'

 // Global filter
 Vue.filter('toupper', function (val) {
 if (!val) return "";
 val = val.toString();
 return val.toUpperCase();
 })

 Vue.config.productionTip = false

 new Vue({
 render: h => h(App),
 }).$mount('#app')
This is how we can define and implement Local and Global filters using the different scope of it.
How to use Filters
After creating the Local or Global filter, now it’s time to use them, but you may think like how to use them in the template? There are two ways possible to use filters into the template which are explained below.
Using mustache syntax
Interpolation is one of the ways to bind the data values to the template which is called “one-way data binding” In, the same way, we can apply a filter to the same as the below example using the curly braces {{ }}.
 <div>
 Using mustache syntax : {{ myValue | toLower }}
 </div>
Using v-bind expression syntax
This is another way to apply a filter, in which we can use one of the directives called “v-bind” which is the form of a “one-way data binding” mechanism. Below is a simple example using v-bind with a filter.
 <template>
 <div class="hello">
 <div>
 <label v-bind:id="message | toupper">This is label with v-bind</label>
 </div>
 </div>
</template>
As you can see, we have provided an ID attribute with the static message along with the “toupper” filter. After applying the above changes, run the application and we can see the actual output like this.

Types of Filters in Vue
Basically, Vue supports two types of Filters which are listed below.
In-Built Filters
Custom Filter
In-Built filters are not supported in the latest version of Vue i.e. 2.x+, but it was supported in other versions like 0.11 and 0.12.
In-Built Filters
We know that Filters are used to apply text formatting, but we may have different requirements for different things based upon certain business or layout requirements.
Then the in-built filters come into the picture which provides us the way to apply different text formatting based on the filter type. Let’s see the different in-built filters with a simple example.
Capitalize
Capitalize filter is used to transform our text to the Capitalize case from the lower or any case of characters and will convert the first character of the string to the Capitalized form. For that, we just need to pass the filter name along with the pipe (|) symbol as explained in the below given example.
Syntax <div>
{{ text | capitalize }}
</div>
Example
 <template>
 <div class="hello">
 {{ title }}
 <div>
 {{ mytext | capitalize }}
 </div>
 </div>
</template>

<script>
export default {
 name: "BuiltInFilters",
 data() {
 return {
 title: "Built-In Filters in Vue.Js",
 mytext: "Filters in vuejs with example"
 };
 }
};
</script>
Uppercase
The uppercase filter is used to convert the text to the capitalized format for all of the characters into the string. We just need to provide the string along with the filter name as explained in the below example.
Syntax <div>
{{ mytext | uppercase }}
</div>
Example
<template>
<div class="hello">
 {{ title }}
 <div>
 {{ samllText | uppercase }}
 </div>
</div>
</template>

<script>
export default {
name: "BuiltInFilters",
data() {
 return {
 title: "Built-In Filters in Vue.Js",
 samllText: "Filters in vuejs with example"
 };
}
};
</script>
Lowercase
The lowercase filter is used to convert the complete string into the lower characters. For that, we can use ‘lowercase’ as a filter type as described below.
Syntax <div>
{{ mytext | lowercase }}
</div>
Example
<template>
<div class="hello">
{{ title }}
 <div>
 {{ mytext | lowercase }}
 </div>
</div>
</template>
<script>
export default {
name: "BuiltInFilters",
data() {
return {
title: "Built-In Filters in Vue.Js",
samllText: "Filters in vuejs with example"
};
}
};
</script>
Currency
Currency filter allows us to play with the currency-related operation which includes adding various currency symbols prefix or postfix to the actual currency value. We can simply use currency pipe or else we can also specify the additional argument along with the filter name as described below.
Syntax <div>
{{ mytext | currency }}
</div>
Argument
It accepts one additional argument to specify the currency symbol as an argument along with the name of the filter.
<div>
 {{ mytext | currency:'$'}}
 </div>
Example
 <template>
 <div class="hello">
 {{ title }}
 <div>
 {{ totalAmount | currency:'$'}}
 </div>
 </div>
 </template>

 <script>
 export default {
 name: "BuiltInFilters",
 data() {
 return {
 title: "Built-In Filters in Vue.Js",
 totalAmount: "25895.35"
 };
 }
 };
 </script>
Pluralize
Pluralize filter is used to convert the text from singular to the plural based on the argument passed either singular or plural. For that, we need to pass an additional argument as described below.
ArgumentsIf the item is single at that time Pluralize filter adds the ‘s’ character at the end of the value. And if items are multiple then it will add different postfix characters based on the sequence they are coming.
Example <template>
<div class="hello">
{{ title }}
<div>
{{ mytext | pluralize 'value' }}
</div>
</div>
</template>
<script>
export default {
name: "BuiltInFilters",
data() {
return {
title: "Built-In Filters in Vue.Js",
mytext: "Convert to Pluralized"
};
}
};
</script>
So after running the above example, we will get the output like this.
1 value
2 values
And so on based on the sequence of items.
Json
The JSON filter is used to format the JSON code to represent the file as a string including the trailing and remaining spaces. It accepts the complete JSON object which contains the data in the specific JSON format.
ArgumentIt also accepts one additional argument which is used for allowing the spaces.
 <div>
 {{ data | json 4 }}
 </div>
As you can see that we have used ‘4’ which specifies the indent level of spaces, thus we can specify other digits as per our requirement. Keep in mind that the default indent space level is ‘2’.
Example <template>
<div class="hello">
{{ title }}
<div>
{{ data | json 8 }}
</div>
</div>
</template>
<script>
// JSON data file
import data from "./data";
export default {
name: "BuiltInFilters",
data() {
return {
title: "Built-In Filters in Vue.Js",
myJson: data
};
}
};
</script>
filterBy
FilterBy filter is used to filter the array based on the search term which can be changed by the user. And based on the value from the input control, it will be searched from the array for the results. For that, we need to provide the additional argument of a search term along with the filterBy filter as described below.
Syntax<div v-repeat="array } filterBy search_term"> // content </div>
Here, search_term is the value of the item to be searched from the available array, and based on a search result, it will return the unique result which matches with the specified search term.
The filterBy is used where we want to filter the set of records based on a certain key or value and it returns the records which are matched with the given condition.
Example <template>
<div class="hello">
{{ title }}
<div>
<input
type="text"
v-model="searchTerm"
/>
<ul>
<li v-repeat="employees | filterBy searchTerm">{{ fullName }}</li>
</ul>
</div>
</div>
</template>
<script>
import data from "./data";
export default {
name: "BuiltInFilters",
data() {
return {
title: "Built-In Filters in Vue.Js",
employees: [
{ fullName: "hello1" },
{ fullName: "hello2" },
{ fullName: "hello3" },
{ fullName: "hello4" },
{ fullName: "hello5" }
],
searchTerm: ""
};
}
};
</script>
orderBy
OrderBy filter is used to change the order of the different array items either ascending or descending format. Keep in mind that the orderBy filter only works for Array items and not others. We can also specify the specific column from the array in order to sort the items column-wise.
This filter works similarly to the sort() operation that we do with the native JavaScript where we can provide an array of items and sort the array either in ascending or descending pattern.
For that, we need to specify the different arguments which are described below.
ArgumentsField: A string value that is used to order a specific column from the array
Reverse: It is an optional argument that is used to reverse the current set of items than the existing one which returns the array of items in descending order
The default order of the sorting criteria is the ‘ascending’ order but later we can change it to the desired format.
Syntax<element v-repeat="employees | orderBy 'fullName' reverse"> // content to be placed </element>Example
 <template>
 <div class="hello">
 {{ title }}
 <div>
 <ul>
 <li v-repeat="employees | orderBy 'fullName' reverse">{{ fullName }}</li>
 </ul>
 </div>
 </div>
 </template>

 <script>
 import data from "./data";
 export default {
 name: "BuiltInFilters",
 data() {
 return {
 title: "Built-In Filters in Vue.Js",
 employees: [
 { fullName: "hello1" },
 { fullName: "hello2" },
 { fullName: "hello3" },
 { fullName: "hello4" },
 { fullName: "hello5" }
 ]
 };
 }
 };
 </script>
Custom Filter
We have learned that what are the in-built filter and how to use them in Vue, but what if the in-built filter does not fulfill our requirement. At that time, the custom filter is used which allows us to create our custom filter based on our various requirements. In order to create the custom filter, we need to make use of the filters option in a component like this.
 <script>
 import data from "./data";
 export default {
 name: "CustomFilters",
 data() {
 return {
 title: "Custom Filters in Vue.Js",
 mytext: "Custom Filters in vuejs with example"
 };
 },
 // Custom filter function
 filters: {
 // function implementation
 }
 };
 </script>
As you can see in the above example, we have a separate section for the “filters” in which we can define and implement various custom filters based on our requirements. For that, we just need to create separate functions for each custom filter and apply them to the HTML elements. Let’s create one simple example which shows the demo that how to convert simple text to upper case format using a custom filter.
Example <template>
<div class="hello">
<div>
Before applying filter : {{ mytext }}
</div><br /><br />
<div>
After applying filter : {{ mytext | toupper }}
</div>
</div>
</template>
<script>
export default {
name: "CustomFilters",
data() {
return {
title: "Custom Filters in Vue.Js",
mytext: "Custom Filters in vuejs with example"
};
},
// Custom filter function
 filters: {
 toupper: function(val) {
 return val.toUpperCase();
 }
 }
};
</script>
<!-- Add "scoped" attribute to limit CSS to this component only -->
<style scoped>
</style>
In this example, we have one simple string message, which we are going to bind it into the HTML element. We have used the same string value twice in order to show the difference like before applying the “toupper” filter and the after effect of applying our custom filter. In order to convert the normal text to capitalized, we have created a custom directive like this.
filters: {
toupper: function(val) {
return val.toUpperCase();
}
}
Where “toupper” is our custom filter name and as an argument, we are passing the string value, in which we are going to convert the text into the capitalized format. After creating the custom filter, we need to apply it to the HTML element like this.
 <div>
 After applying filter : {{ mytext | toupper }}
 </div>
Now we are done with the simple example, now let’s run this and see the difference.

As we can see, the before and after effect by specifying the custom filter “toupper” which converts the text from normal case to the upper case text. This is how we can create our custom filter and apply it to the template easily in a step by step manner.
Chaining of Filters
Now we know what is Filter, custom Filter and its implementation, but what if we want to apply multiple behaviors to the single HTML element. For that Chaining of Filters will let us do the same by allowing chaining of filters using the same HTML element. In order to implement the chaining of a Filters, we can use multiple pipe (|) symbols along with the different names of Filters.
The chain of filters is handy when our filter purpose can not be served by using the set of in-built filters in Vue. The basic syntax using the chain of filters is given below.
Syntax <element >
{{ text | Filter1 | Filter2 | FilterN }}
</element>
This is how we can use multiple pipe symbols along with the different Filters and will be able to format the string based on different requirements. Now let’s implement a simple example that shows the use of chaining of pipes using Custom filters.
Example <template>
<div class="hello">
Without toupper filter : {{ message }} <br /><br />
With toupper filter : {{ message | toupper | greeting }}<br /><br />
</div>
</template>
<script>
export default {
name: "ChainedFilter",
data() {
return {
message: "Simple example of chained filters in vuejs"
};
},
filters: {
 toupper: function(val) {
 if (!val) return "";
 val = val.toString();
 return val.toUpperCase();
 },
 greeting: function(val) {
 if (!val) return "";
 val = "Hello " + val.toString();
 return val;
 }
}
};
</script>
<!-- Add "scoped" attribute to limit CSS to this component only -->
<style scoped>
</style>
Explanation
Here in the above example, we have used one simple data variable called “message” which we are going to bind in the Vue template. The string is in the lowercase format, but now we want to convert it to the upper case format, and for that, we have created two different filters which are listed below.
toupper()
This filter will convert the string into the upper case characters based on the argument to be passed.
toupper: function(val) {
if (!val) return "";
val = val.toString();
return val.toUpperCase();
},
greeting()
This filter is used to add the greeting message before the message/string.
greeting: function(val) {
if (!val) return "";
val = "Hello " + val.toString();
return val;
}
In short, we are going to combine the two different custom pipes into a single HTML element, which is called “Chaining of pipes”. After creating all the custom pipes, now it’s time to use them in a template like this.
 <template>
 <div class="hello">
 Without toupper filter : {{ message }} <br /><br />
 With toupper filter : {{ message | toupper | greeting }}<br /><br />
 </div>
</template>
Here is the template, we have compared the two different outputs like before applying the chained filter and without using chained filters. After applying all of the filters, we will get the output like this.

As you can see in the above snap, that we’ve got the output in which the chaining of pipes works exactly as we want. Before the actual string message, we have “Hello” as a greeting message which is the result of our Greeting custom pipe, and another pipe that we have created to convert the string to upper case. This is how we can create the Chaining of pipes either using in-built pipes or using the Custom pipes.
Passing arguments to the filters
We have learned how to use filters, but you will be surprised that we can also pass the arguments to the filters. This is just because in the end Filter is a kind of JavaScript function so that it can accept the different method arguments. In order to pass the arguments, we can use the following syntax.
Syntax <element>
{{ value | filter_name(arg1, arg2, ...argN) }}
</element>
Along with the name of the filter, we have specified the arguments like arg1, arg2, and the N numbers of arguments. And the argument will be processed further and will return the result based on the business logic.
NoteFor passing the value, the actual “value” will be the first argument for the filter function by default, and the rest of the arguments will be act as additional arguments.
Example <template>
<div class="hello">
Total is : {{ value | addition(25) }}
</div>
</template>
<script>
export default {
name: "PassingArgumentToFilter",
 data() {
 return {
 message: "Passing arguments to the filters in vuejs",
 value: 25
 };
 },
 filters: {
 addition: function(val1, val2) {
 let val3 = val1 + val2;
 return val3;
 }
 }
};
</script>
<!-- Add "scoped" attribute to limit CSS to this component only -->
<style scoped>
</style>
Explanation
We have one data variable called “value” which can be used to bind into the Vue template.
data() {
return {
message: "Passing arguments to the filters in vuejs",
value: 25
};
},
And we have specified the Filter called “addition” which accepts the different arguments and will return the total of numbers.
filters: {
addition: function(val1, val2) {
let val3 = val1 + val2;
return val3;
}
}
Now after creating the filter function, we can use this filter function in our Vue template like this.
 <template>
 <div class="hello">
 Total is : {{ value | addition(25) }}
 </div>
 </template>
With the addition filter function, we have provided an additional argument ‘25’ and it will automatically get the first argument as “25” because the filter function gets the bind value itself every time. Now we are done with this example, let’s run this example and see the output.
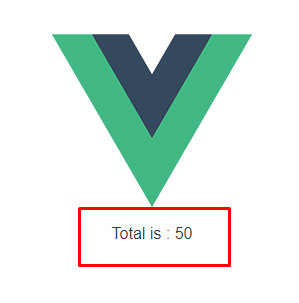
We got 50 as output, because we have a data variable value which is 25 and it will be a first default argument, and another additional argument that we have provided is 25. So in the end, we will get the addition of two numbers.
Summary
In this part of the Vue tutorial, we have learned the tactics about the Filters and covered the below points, so let’s recap it.
Introduction to Filters in Vuejs
Ways to create the Filters
How to use filters in the Vue template
In-Built Filters
Custom Filter
Chaining of a Filters
Passing arguments to the Filters
By using the Filters, we can easily format the text and can change the custom behavior to the different HTML elements, I hope it will help you to be familiar with the Filters in Vuejs while learning through.