


25
AprAngular 7 Tutorials – An Overview and Quick Guidance
12 Mar 2024
Beginner
2.12K Views
20 min read
Learn via Video Course & by Doing Hands-on Labs
Angular Course
Angular 7 Tutorials: An Overview
This Angular 7 tutorial, part of the Angular Tutorial series, covers fundamental and advanced concepts for both beginners and professionals. Angular 7 is a JavaScript framework for creating online applications and single-page apps (SPAs). It uses HTML, JavaScript, and TypeScript.
Angular's built-in features for animation, materials, and HTTP services allow you to create reactive SPAs with auto-complete, toolbar, navigation, and menus. It's a popular front-end programming framework that is regularly updated by Google's Angular team. Certification in Angular, such as Scholarhat's Angular Certification Course, can confirm competence and improve professional opportunities.
Why Learn Angular 7?
Learning Angular is useful because:
- Popular Framework: Angular, supported by Google, is extensively used, with numerous job prospects and a friendly community.
- Single Page Applications (SPAs): Angular excels at creating SPAs, which offer a smooth user experience similar to native apps.
- TypeScript: Angular's use of TypeScript improves code readability and maintainability while reducing errors.
- Component-Based Architecture: Angular's modular design makes code maintenance easier, particularly for large projects.
- Rich Ecosystem: Angular has a vibrant community and a varied ecosystem that includes several learning materials and third-party solutions.
Different Applications of Angular 7
Angular 7 is one of the most popularly known and widely used languages on the web. A few of them are given below:
- POJO-based development: Angular heavily used Plain Old JavaScript Object and it helps in learning Angular more efficiently.
- Google Supported Community: Google actively supports Angular and its development process. Angular is used in different Google Apps.
- TypeScript: Typescript is the superset of JavaScript and it is easy to debug. It is highly secure and object-oriented.
- Multi-platform support: Angular code works on all platforms without much more change in the code.
- Declarative User Interface: Angular mainly uses HTML as a View Language and extends its functionality. It will help in handling UI vs Code differentiation a UI is loosely coupled with code.
- Modular Structure: Angular development is highly modular, highly maintainable, and component-based.
Prerequisites of Angular 7 Tutorials
Angular 7 tutorials are mainly designed for software programmers who want to learn the basics of Angular 7 and its programming concepts easily and simply. But before going to proceed to gain knowledge in Angular 7, you must have an understanding of CSS, HTML, typescript, JavaScript, and DOM (Document Object Model).
Angular Overview
The early version of Angular was named Angular 2. And then the later version was renamed to just Angular to get rid of the confusion between AngularJS and Angular itself. The Angular team releases the new versions of the Angular framework regularly for nearly 6 months and that is twice a year. The last stable version that is available in Angular is 13.1.1.
Angular 7 was first released in October 2018 by Google. The other versions of Angular that were released before Angular 7 are:
- Angular JS
- Angular 2.0
- Angular 4.0
- Angular 5.0
- Angular 6.0
- Angular 7.0
Google is planning to release all the major Angular versions every 6 months after.
Angular 7 Update
Angular 7 was a major release in 2018 wherein the Angular Core Framework; Angular Materials and Angular CLI are updated. So, if you are using Angular 5 or 6 and want to update to Angular 7, then by using the below command, your app will be updated to the recent version –
ng update @angular/cli @angular/core
Application Performance
In Angular 7, there is a bundle budget in Angular.json. Budgets are one of the features that have been added to Angular CLI that allows you to set the limit inside your configuration to make sure your application size is within the limit. You can also set the size so that if the limit is crossed, the app can be warned.
Angular CLI
While using the project setup with the help of the CLI, it will move you towards the built-in features available including style sheet and routing support.
Angular Material and CDK
The Angular Material and CDK are updated in Angular 7. Also, 2 more other features have been added to CDK – virtual scrolling and drag and drop.
- Virtual Scrolling: This feature mainly shows the visible dom elements to the user and as the user scrolls, the next list will be displayed. It will ultimately give out a faster experience as the full list is not loaded one at a time and is only loaded as per the visibility on the screen.
- Drag and drop: You can easily drag and drop elements from a list and be able to place them wherever it is required within the list. The new feature is very fast and smooth.
What Environment Setup is required to install Angular 7?
The following are required to install Angular 7:
- Nodejs
- Angular CLI
- Npm
- IdE for writing your code
To check, whether the node.js has been installed on the system or not, type node –v in the terminal. It will ultimately help you to see the version of nodejs currently installed on the system. Nodejs have to be greater than 8.x or 10.x and npm have to be greater than 5.6 or 6.4.
No, once node.js is installed, npm will also get installed along with it. To check whether npm has been automatically installed or not, type npm –V in the terminal and it will display the version of the npm.
C:\>npm
-v 6.4.1
The installation of Angular 7 is very easy and simple with the help of the Angular CLI. Type npm install –g @angular/cli in your command prompt to install angular CLI on your system. It would take some time to install and once it is completed, you can check the version by using the below command:
ng versionAngular 7 Components
The major portion of the development with Angular 7 is done in the components. Angular Components are the main classes that can interact with the .html file of the component to be displayed on the browser.
The file structure has the app component and it consists of the following files:
- app.component.css
- app.component.html
- app.component.spec.ts
- app.module.ts
- app.component.ts
If you have selected Angular Routing during the project setup, files that are related to routing will also get added and the files are as follows –
app-routing.module.tsThe above-mentioned files have been created by default while we created a new project by using the angular-CLI command.
Angular-CLI has a command to create your component. However, the app component is created by default and will always remain the parent whereas the next components created will form the child components.
Angular Module
Angular Module refers to a place where you can group the angular components, angular pipes, angular directives, and angular services that are related to the application.
Now, if you are developing a website, the header, footer, center, left and right section becomes part of a module. So, to define the module, we can use the NgModule. While creating a new project by using the Angular –CLI command, the ngmodule is created in the app.module.ts by default.
The ngmodule needs to be imported like the below:
Import { NgModule } from ‘Cangular/core’;The structure of the NgModule must be like this –
@NgModule ( { declarations: [AppComponent, NewCmpComponent], imports : [ BrowserModule, AppRoutingModule], providers: [], bootstrap: [AppComponents]} )So, it mainly starts with the @NgModule and contains an object that has declarations, providers, importers, and bootstrap.
Import:
It is mainly an array of modules that are needed to be used in the application. It can also be used by the component in the declaration array as well.
In the @NgModule, we can see the Browser Module has been imported. Now, if your application needs forms, you can include the module with the below-mentioned code –
Import { FormsModule } from ‘@angular/forms’;imports : [BrowserModule, FormsModule]Declaration:
It is an array of components created. No, if any components are created, they will be first imported and the reference will then be included in the declarations like below –
declarations: [ AppComponents, NewCmpComponent]Bootstrap: It includes the main app component for starting the execution.
Providers: It includes the services that we created.
Angular Data Binding
Data Binding is available with Angular from its Angular JS version and after that in all the versions of Angular released, later on, Data Binding is available with them. The use of curly braces in data binding – {{}}; is a process which is known as interpolation.
The variable in the app.component.html file is referred to as {{title}} and the value of the title is initialized in the app.component.ts file and the app.component.html, this value can be displayed.
Event Binding
When a user interacts with an application in Angular 7in the form of a keyboard movement, a mouse click, or a mouseover, it will then generate an event. Such events need to be handled to perform some type of action. This is the time when event binding comes into the picture.
Angular 7 Templates
Angular 7 uses <ng-template> as the tag instead of using the simple <template> tag that was being used in Angular 2. However, <ng-template> has been used since the release of Angular 4, and the earlier version of Angular 2 uses <template> for the same purpose. The reason behind starting the use of <ng-template> rather than using <template> from Angular 4 onwards is because of the name conflict between the <template> tag and the HTML <template> standard tag. It will deprecate completely going ahead. So, let’s see a simple coding where the template has been used along with the “if-else condition” and see what output we can get.
<!--The content below is only a placeholder and can be replaced.--><div style = "text-align:center"> <h1>Welcome to the official {{title}}.</h1></div>
<div> Months : <select (change) = "changemonths($event)" name = "month">   <option *ngFor = "let i of months">{{i}}</option> </select></div><br/><div> <span *ngIf = "isavailable;then condition1 else condition2">   The condition is valid. </span> <ng-template #condition1>Condition is valid from template</ng-template> <ng-template #condition2>Condition is invalid from template</ng-template></div><button (click) = "myClickFunction($event)">Press Me</button>
Now, in the above code, you can see that for the Span tag, if the statement has been added with the else condition and called the template condition 1 else condition 2. The templates can be called as follows:
<ng-template #condition1>Condition is valid from template</ng-template><ng-template #condition2>Condition is invalid from template</ng-template>So, if the condition is true, then the template of condition 1 is called, or else condition 2 will be called.
Directives
Angular Directives is a js class that can be declared as @directive. We have mainly 3 directives in Angular7 which are –
- Component Directives: It mainly forms the main class with the details of how the component can be processed, used, and instantiated at runtime.
- Attribute directives: It mainly deals with changing the look and behavior of the dom element. You can able to create your own directives.
- Structural directives: A structure directive mainly deals with manipulating the dom elements. Structural directives have a * sign before the directive. For example *ngFor and *nglf.
Angular 7 CLI bundling budget
With the release of Angular 7, Angular CLI added one new update which is "Bundling Budget" using the file angular.json.
The bundling budget is a feature added with Angular CLI which allows us to set bundling size limits inside our application configuration to make sure that our application size is within the defined limit set. We can set the size so that the application can be warned when the limit is crossed and it can be either upper limit or lower limit.
Below is the example, where inside the angular.json file, one can specify the budget options with the minimum and maximum size limit.
"budgets": [{ "type": "bundle", "name": "main", "maximumWarning": "150kb", "maximumError": "300kb"}]Angular 7 Pipes
Angular Pipes are previously called filters in Angular 1.x but from the Angular 2 version onwards, it has been called "pipes" and to work with the pipe, we need to use the | (pipe) symbol as described below.
The | (pipe) character or symbol in Angular 7 is used to transfer the data in a certain form of a defined type and below is an example using the pipe called "lowercase".
{{ Welcome to Angular 7 | lowercase }}
It takes arrays, integers, dates, and strings as input separated with the “ | ” to be converted into the format that is needed and display the same.
Some of the built-in pipes that are available in Angular 7 are:
- Uppercasepipe
- Lowercasepipe
- Currencypipe
- Percentpipe
- Atepipe
- Slicepipe
- Jsonpipe
- Decimalpipe
Above are the pipes provided in-built with the Angular framework, but apart from that, sometimes we may have to create some logic and for that, the custom pipe would be helpful in such cases so that we can create the custom pipe in angular as well.
Below is a simple example of a custom pipe in Angular.
import {
 Pipe,
 PipeTransform
} from '@angular/core';

@Pipe ({
 name: 'Multiplication'
})

export class MultiplicationPipe implements PipeTransform {
 transform(value: number, multiplyByNumber: string): number {
 let multipliedValue = parseFloat(multiplyByNumber);
 return multipliedValue * value
 }
}
There are so many other necessary parts of Angular 7 including Routing in angular, HTTP Client, CLI Prompts, Angular Forms, Materials/CDK Virtual Scrolling, Animations, Materials/ CDK Drag & Drop, and many more. All we can understand is that the market demand for Angular 7 including other latest versions of Angular is so high and most well-known companies are now involved in this part of development. Making a career in this field would help you to get a high-paying job. Dot Net Tricks Angular course aligned with the real-time scenario that is delivered by the Industry's best Technical consultant, Google GDE, and Microsoft MVP globally.
Read More:
- Top Angular Interview Questions and Answers
- Angular Developer Salary in India
- Angular Roadmap to Become an Angular Developer
Summary
Angular is one of the most popular Typescript-based & open-source frameworks for building client-side web applications or we can say single-page applications (SPAs) seamlessly. As we know the Typescript is a superset of JavaScript, JavaScript runs on the client side of the web and works with the DOM elements, which can be used to design or program how any of the web pages will behave when the user is interacting with the DOM elements or the components. Learning Angular will surely help to enhance your angular skill set while having better career opportunities in the coming decades.
FAQs
Q1. What is the purpose of Angular 7?
Angular 7 is an open-source JavaScript framework for developing online applications and apps in JavaScript, HTML, and Typescript, a superset of JavaScript. Angular includes built-in features for animation, HTTP services, and materials, which include auto-complete, navigation, toolbars, menus, and more.
Q2. What are the new features in Angular 7 to 10?
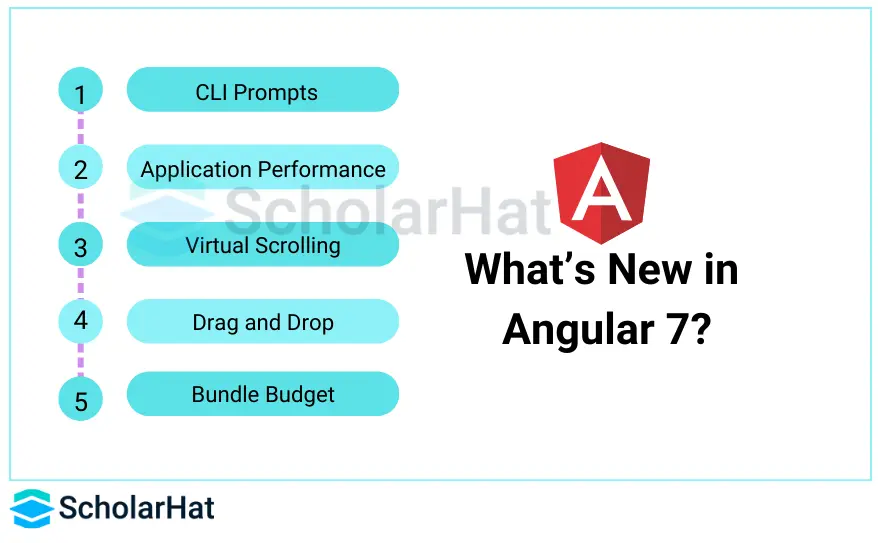
New features of Angular 7 include:
- CLI prompt.
- Angular Material and Component Development Kit (CDK).
- Virtual scrolling.
- Drag and drop.
- Application performance - Checking bundle size.
- Typescript 3.1 includes support for dependency updates.
- Angular and Bootstrap.
Q3. What is the difference between AngularJS and Angular7?
One important contrast between Angular and AngularJS is that AngularJS is JavaScript-based, whereas Angular is TypeScript-based. That means you must utilize Typescript in Angular to construct applications. Typescript is a typed superset of JavaScript.
Q4. What is a component in Angular7?
Components are the primary building pieces of Angular apps. Each component consists of An HTML template that specifies what appears on the page. A TypeScript class that specifies behavior. A CSS selector that specifies how the component is utilized in a template.
Q5. Is Angular 7 a programming language?
Angular is a JavaScript framework that allows you to develop reactive single-page applications (SPAs). This is a leading front-end programming framework that is routinely updated by Google's Angular team. Angular 7 is component-based.
Take our free angular skill challenge to evaluate your skill

In less than 5 minutes, with our skill challenge, you can identify your knowledge gaps and strengths in a given skill.