25
AprConditional Statements in C++: if , if..else, if-else-if and nested if

C++ Programming For Beginners
Conditional Statements in C++: An Overview
The flow of a program is managed using conditional statements in C++. If a condition is true inside the ifstatement, the body of the statement executes. If false, elseis used to specify an alternate course of action. You can check several criteria sequentially using the else-ifstatement and learn C++ from scratch. For multi-way branching based on the result of an expression, use the switch statement. You can also check our C++ Certification Course for in-depth knowledge of C++.
Conditional Statements in C++ programming?
In C++, conditional statements are control structures that let code make decisions. These statements are also known as decision-making statements. They are of the type if statement, if-else, if else-if ladder, switch, etc. These statements determine the flow of the program execution.
Types of Conditional Statements in C++
In this article, we'll discuss the first kind of conditional statement i.e. if...else statements in C++. We'll discuss the switch statement in the next tutorial switch statement in C++.
if … else statements
if-else is the first kind of control statement in C++. In this, the operations are performed according to some specified condition. The statements inside the body of the if block get executed if and only if the given condition is true.
Read More - Advanced C++ Interview Interview Questions and Answers
Variants of if-else statements in C++
We have four variants of if-else statements in C++. They are:
ifstatement in C++if-elsestatement in C++if else-if ladderin C++nested ifstatement in C++
- if statement in C++
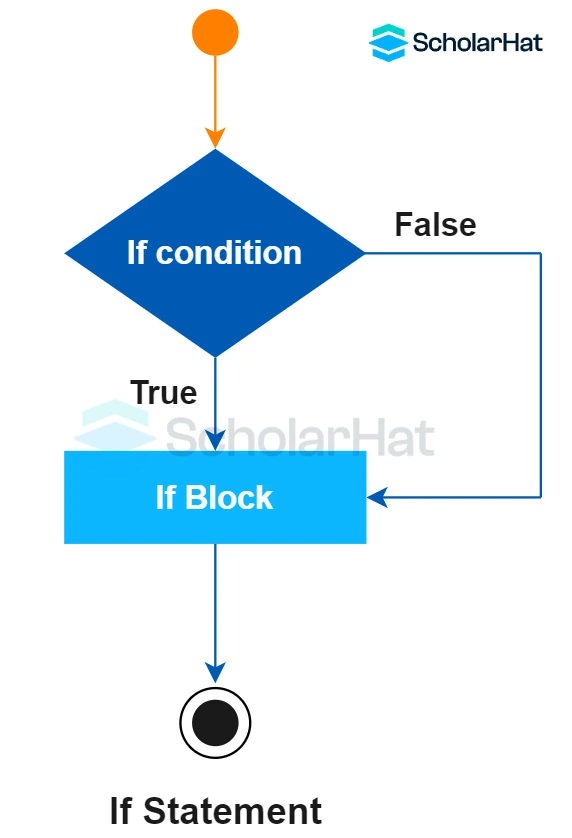
if statements in C++ are one of the most simple statements for deciding in a program. When you want to print any code only upon the satisfaction of a given condition, go with the simple if statement.
Syntax
if(testcondition)
{
 // Statements to execute if
 // condition is true
}
- In the
ifstatement, the test condition is in(). - If the
testconditionbecomestrue, the body of theifblock executes else no statement of theifblock gets printed.
Example
// C++ program to understand if statement
#include <iostream>
using namespace std;
int main()
{
 int i = 11;
 if (i > 15)
 {
 cout << "11 is greater than 15";
 }
 cout << "I am Not in if";
 return 0;
}This C++ code in C++ Compiler initializes the integer ito 11 and then checks to see if it is greater than 15 using an ifstatement. It outputs "I am Not in if" to the console because 11 is not greater than 15.
Output
I am Not in if
- if-else statement in C++
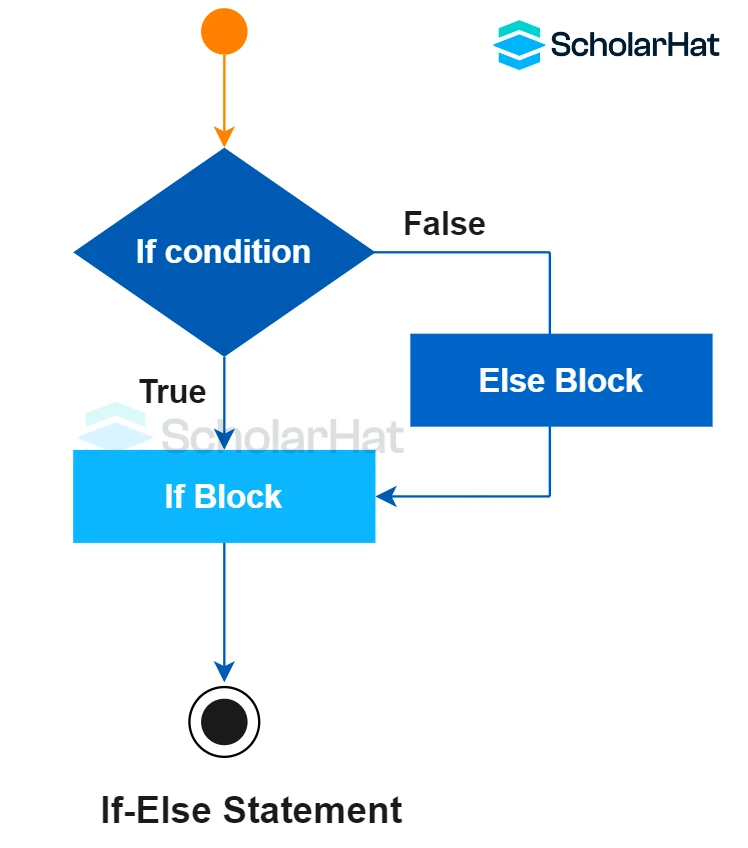
It is an extension of the if statement. Here, there is an if block and an else block. When one wants to print output for both cases - true and false, use the if-else statement.
Syntax
if (testcondition)
{
 // Executes this block if
 // condition is true
}
else
{
 // Executes this block if
 // condition is false
}
Example
// C++ program to understand the if-else statement
#include <iostream>
using namespace std;
int main()
{
 int A = 16;
 if (A < 15)
 cout << "A is smaller than 15";
 else
 cout << "A is greater than 15";
 return 0;
}
This C++ program initializes the integer variable Ato 16 and then checks to see if it is less than 15 using the if-elsestatement. It outputs "A is greater than 15" to the console because it isn't.
Output
A is greater than 15
- nested if statement in C++
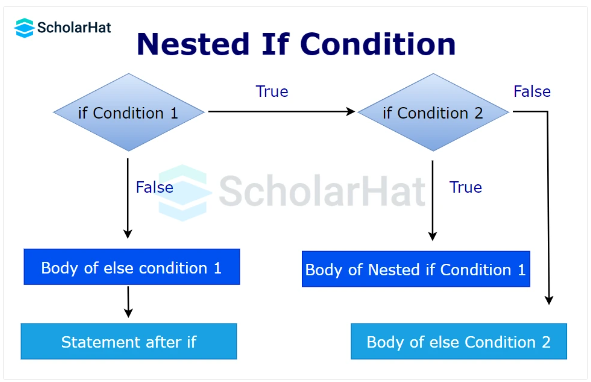
We can include an if-else block in the body of another if-else block. This becomes a nested if-else statement.
Syntax
if(test condition1)
{ //if condition1 becomes true
 if(test condition1.1)
 {
 //code executes if both condition1 and condition 1.1 becomes true
 }
 else
 {
 //code executes if condition1 is true but condition 1.1 is false
 }
}
else
{
 //code executes if condition1 becomes false
}
Example
// C++ program to understand nested-if statement
#include <iostream>
using namespace std;
int main() {
 int a = 10;
 int b = 5;
 if (a > b) {
 // Control goes to the nested if
 if (a % 2 == 0) {
 cout << a << " is even";
 }
 else {
 cout << a << " is odd";
 }
 }
 else {
 cout << a << " is not greater than " << b;
 }
 return 0;
}
- In the above code in C++ Editor, the first
ifstatement checks whethera>b. - If
ais greater thanb, thenested ifstatement is checked. - If the
nested ifcondition isfalse, theelsestatement in thenested ifblock gets executed. - If the first
ifstatement evaluates tofalse, thenested ifblock gets skipped and theelseblock executes.
Output
10 is even
- if else-if ladder in C++
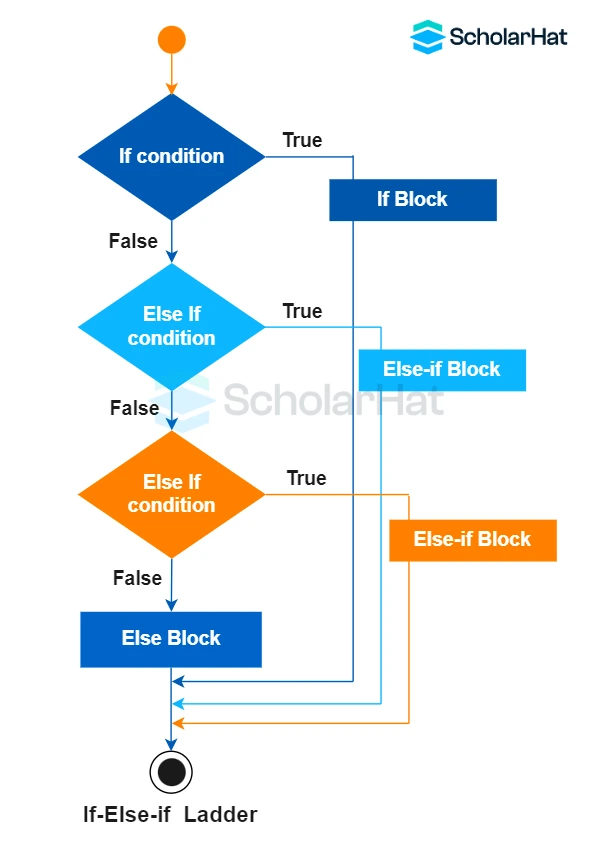
It is an extension of the if-else statement. If we want to check multiple conditions if the first ifcondition becomes false, use the if else-if ladder. If all the if conditions become false the else block gets executed.
Syntax
if (testcondition1)
 statement;
else if (testcondition2)
 statement;
.
.
else
 statement;
Example
// C++ program to understand if-else-if ladder
#include <iostream>
using namespace std;
int main()
{
 int A = 20;
 if (A == 10)
 cout << "A is 10";
 else if (A == 15)
 cout << "A is 15";
 else if (A == 20)
 cout << "A is 20";
 else
 cout << "A is not present";
 return 0;
}Theif else-ifladder is shown in this section of C++ code. It sequentially compares the value of Ato several conditions. It outputs "A is 20"as the condition matched and comes out of the ladder.
Output
A is 20Summary
This article gives a vast idea about if-else conditional statement in C++ language, including its various types with syntax and examples. If you've understood everything we went over in this blog post, congratulations! Now you can check out for a C++ certificationto get some more insights and practice on such an important programming concept.
FAQs
Q1. What are some common mistakes to avoid with conditional statements?
- Incorrect logic: Double-check your conditions for errors and ensure they accurately represent your desired behavior.
- Missing braces: Braces are crucial for defining the code block associated with each condition.
- Infinite loops: Be cautious with conditions that might never become false, leading to an endless loop.
- Dangling else: Ensure an else statement belongs to the correct if condition.


