


25
AprBuilding CI/CD Pipeline with the Azure DevOps
22 Mar 2024
Intermediate
29.9K Views
11 min read
Learn via Video Course & by Doing Hands-on Labs
Azure DevOps Course
Building CI/CD Pipeline with the Azure DevOps: An Overview
Azure DevOps Pipelines provide you the option to do your CI builds for any platform and any tool or language. In this comprehensive Azure DevOps tutorial, you will learn how to utilize Azure DevOps CICD Pipelines, which offers a web interface for creating jobs containing steps necessary to produce a production artifact for your software. The build automation pipelines enable you to trigger processes from any external repository, such as GitHub, SVN, or your local Git server, as well as Azure DevOps repositories.
Deploy your application effortlessly to Google Cloud, AWS, Azure Cloud, or on-premises services. In Azure DevOps Certification Training, use the complete suite for comprehensive traceability through boards, repos, version control, and build/release tools. Achieve built-in traceability for compliance and seamlessly integrate other tools through available integration points.
What is CI/CD?
Continuous integration and continuous delivery (CI/CD) are the backbone of DevOps. It helps fast software development and deployment to enable continuous delivery of value to end users by achieving incremental software delivery. Continuous integration (i.e. CI) is an automated way to build, package, and test the applications. These builds are passed as inputs to the CD pipeline.
Continuous delivery (i.e. CD) automates the delivery of applications to selected infrastructure environments like development, UAT, production. With Azure DevOps, you deploy any software on any platform.
Steps to create CI/CD pipeline
Let us see the steps to implement build automation and deployment automation with Azure DevOps Pipelines.
Create Your Azure DevOps Organization
The first step is to navigate to https://dev.azure.com and sign-in to Azure DevOps. You need to create at least an organization to store your projects, your repositories.
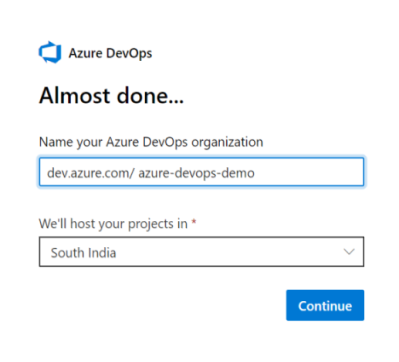
Please visit Microsoft’s documentation for more advance organization scenarios.
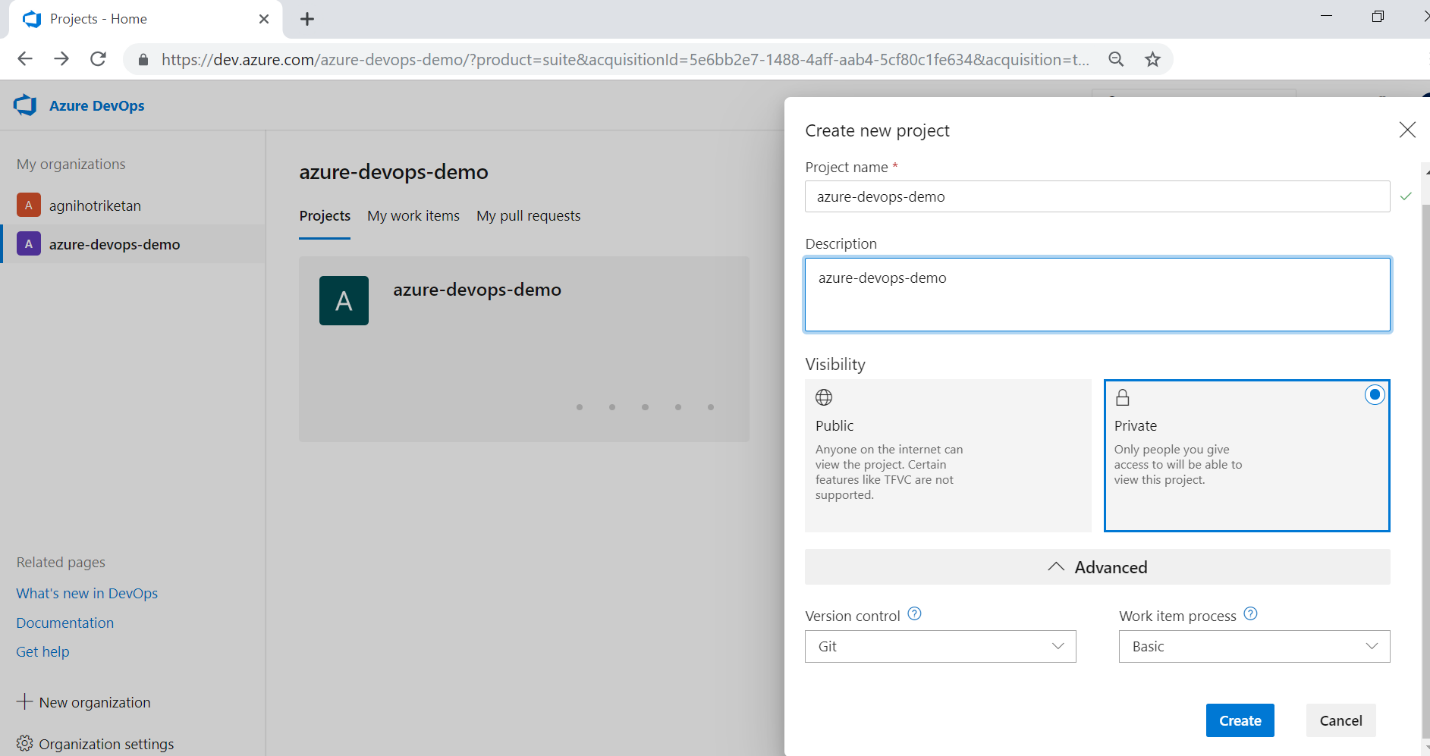
Create a Project
Please create an Azure DevOps project by selecting values like visibility, source control etc.
Create a Build Pipeline
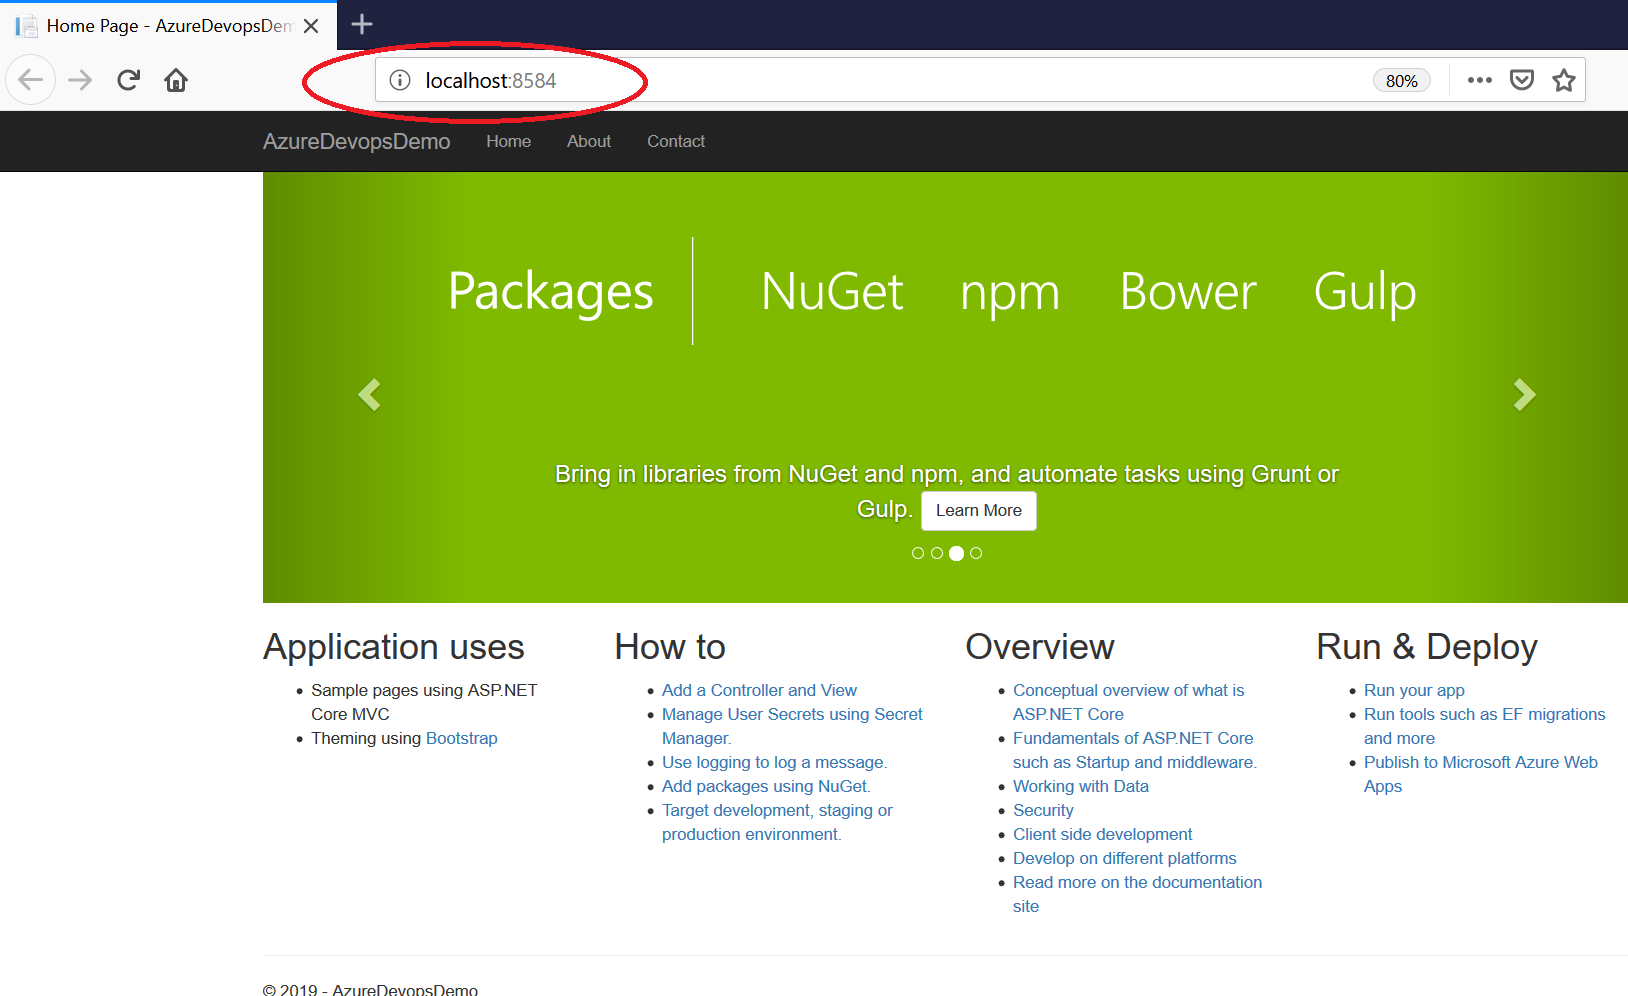
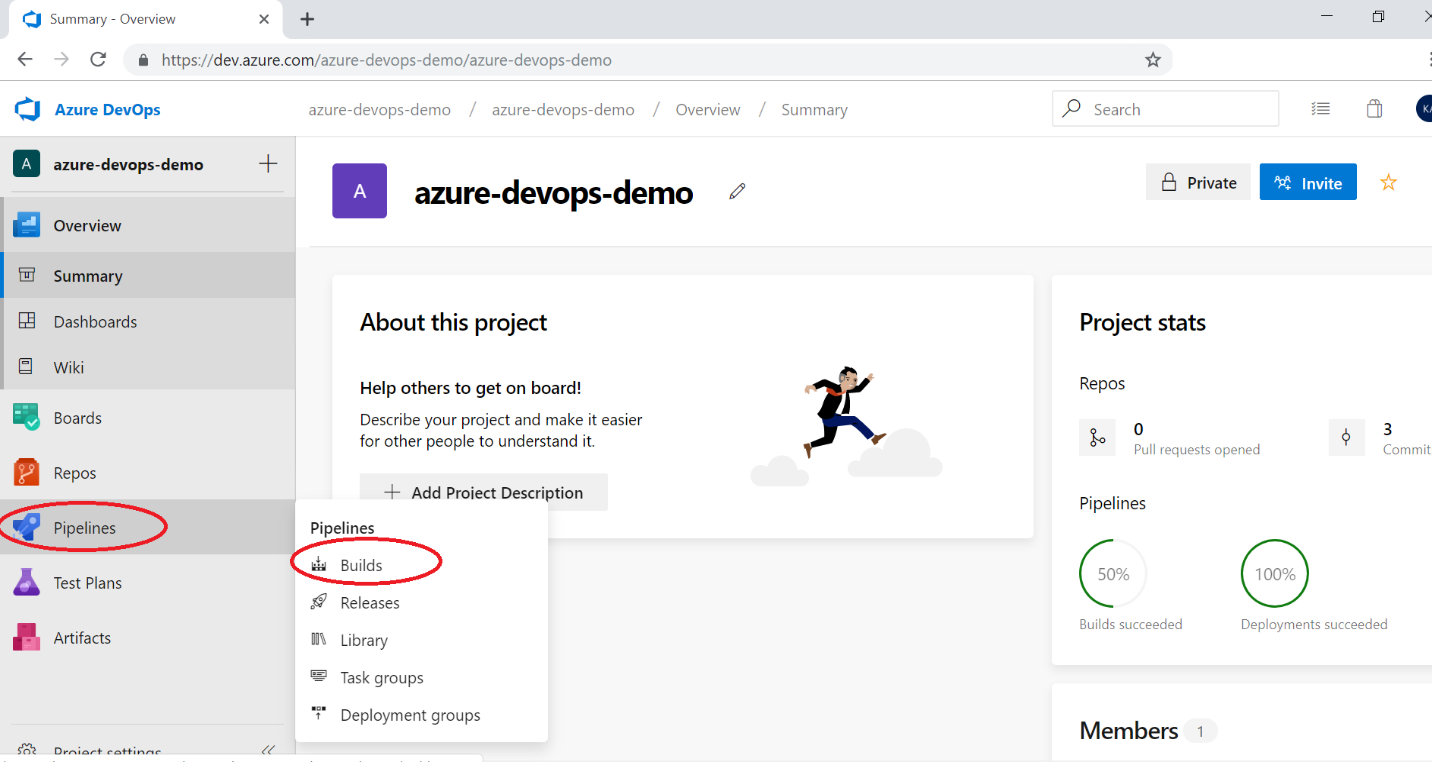
I have created a sample .net core app and it is running on my machine. Now I want to set up a CI-CD pipeline for this application using Azure DevOps. Please select the build option from the pipeline menu to set up the build pipeline.
Now choose a build template provided by Azure DevOps as shown below.
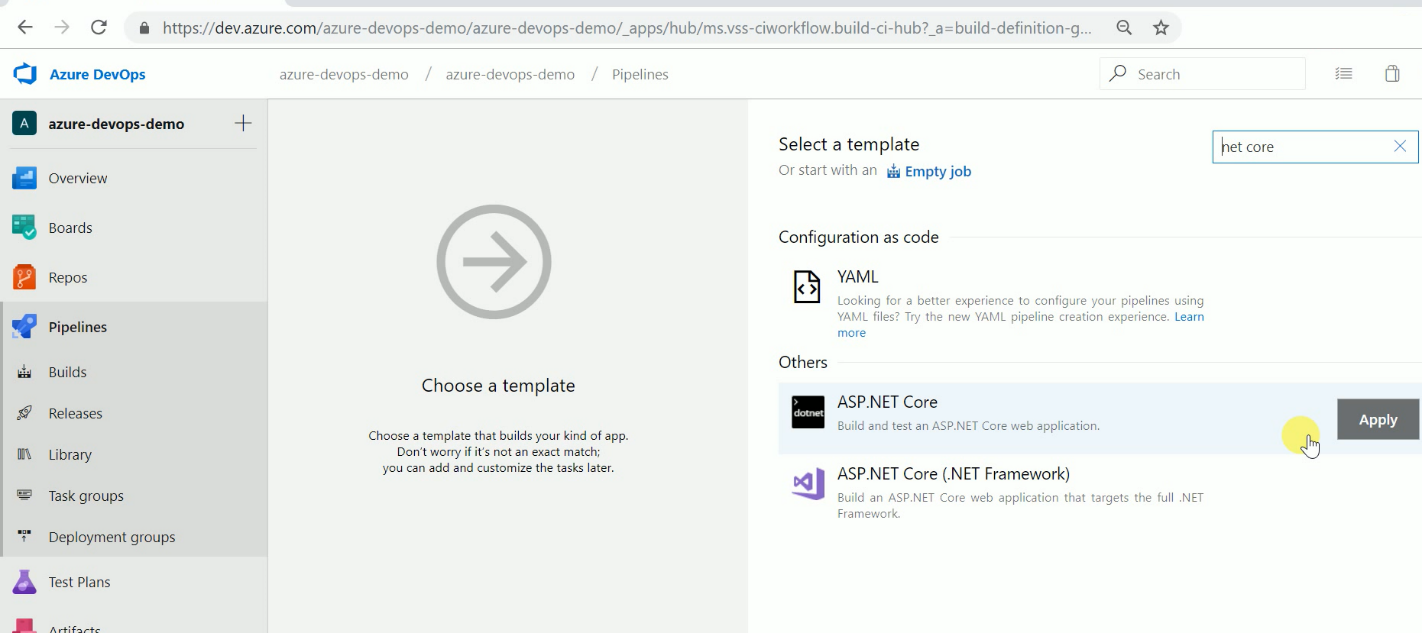
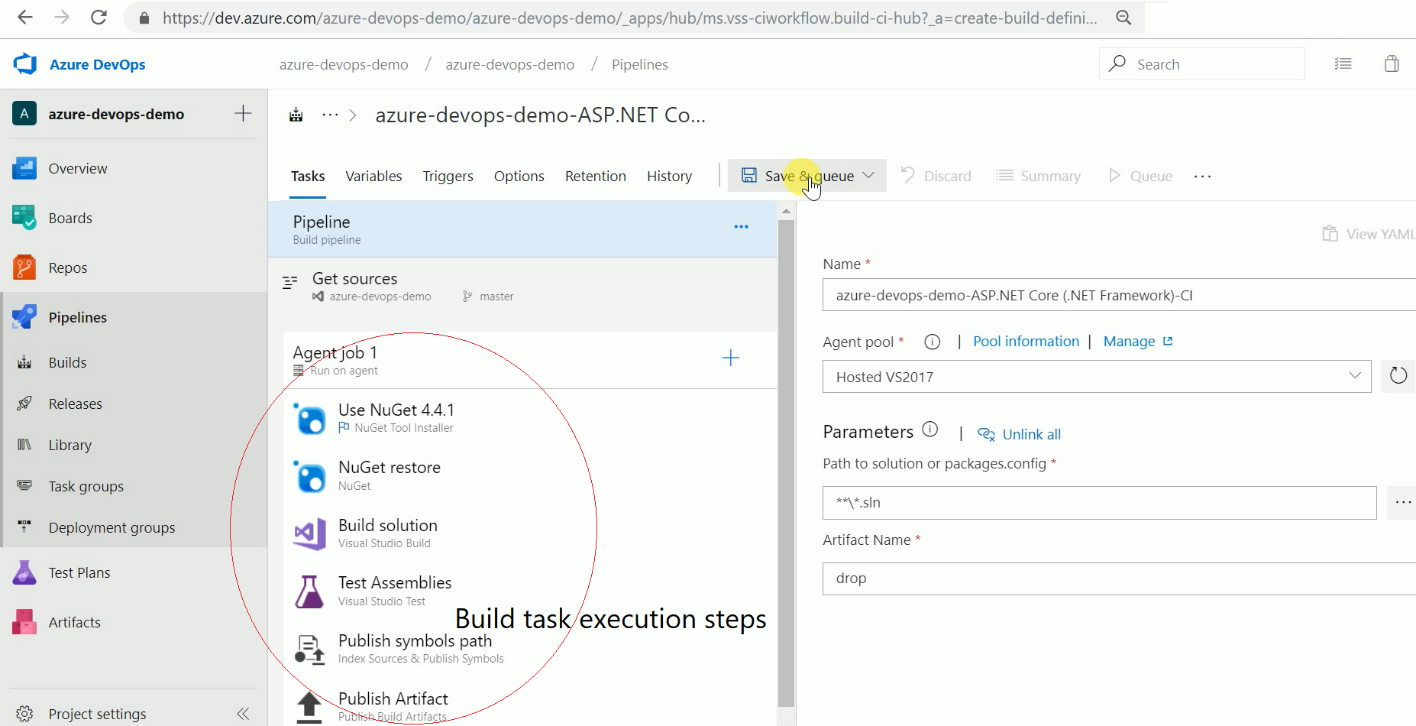
I can also select the TFVC version control system or GitHub if I want to as source code. Now give a name to build definition. Please select an appropriate solution file to build & location to save build artifacts. These artifacts will be used as input to the release pipeline. You can see which artifacts. Azure DevOps provides multiple predefined templates to build applications developed in Java, node.js, PHP, etc.
Create a Release Pipeline
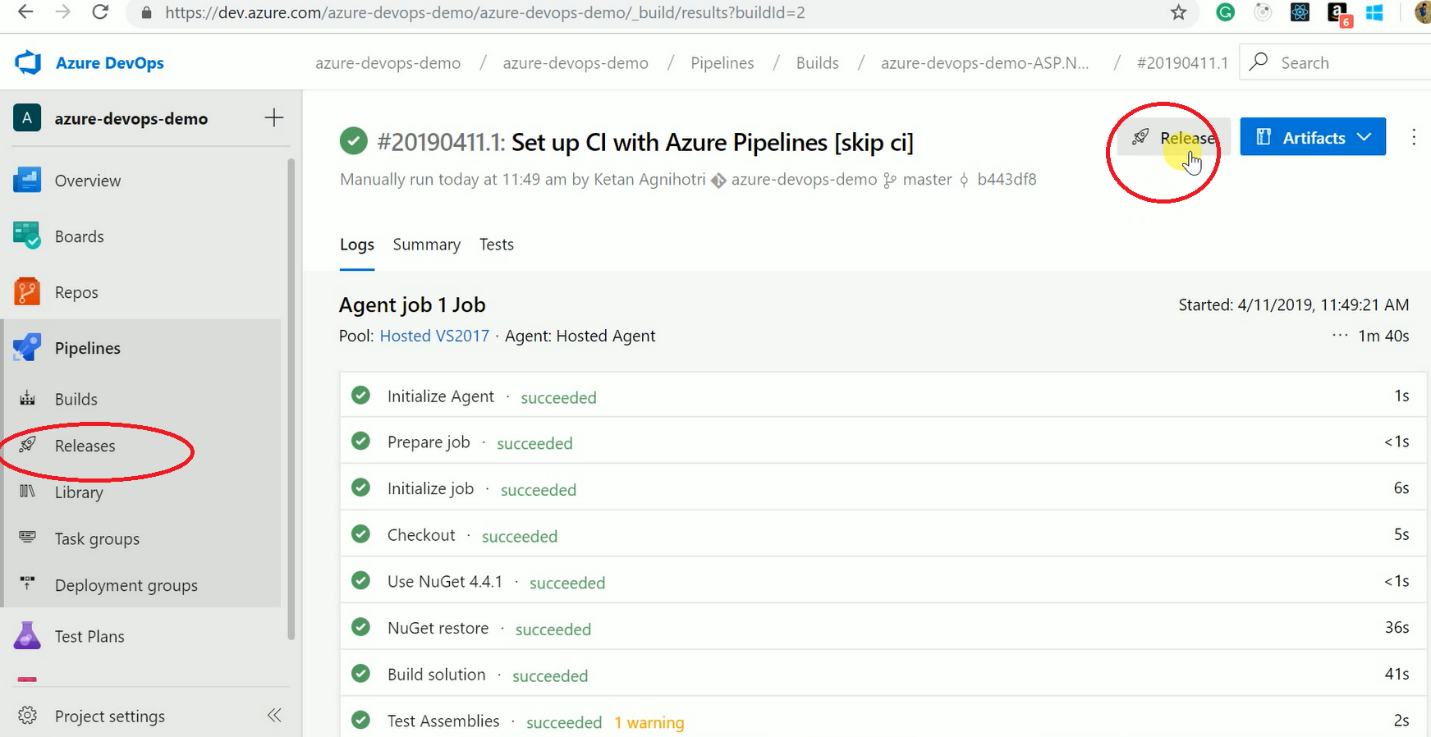
Now once the build succeeds, we need to create a release definition. You can select the release menu from the pipeline or click on the release button as shown below. When you get into the release pipeline screen, you’ll need to select a template.
Azure DevOps has provided a lot of predefined templates for deployment. Some of them are as follows
Azure App Service Deployment with Test and without Test
Azure App Service Deployment with continuous monitoring
Cloud Service Deployment
On-Premise deployment
Azure VM Scale Set
Service Fabric (Stateful/ stateless)
Azure Policy Deployment
Function App to Azure
We can create our own custom template as well as per our requirements.
 Figure 9. Choose Release Template
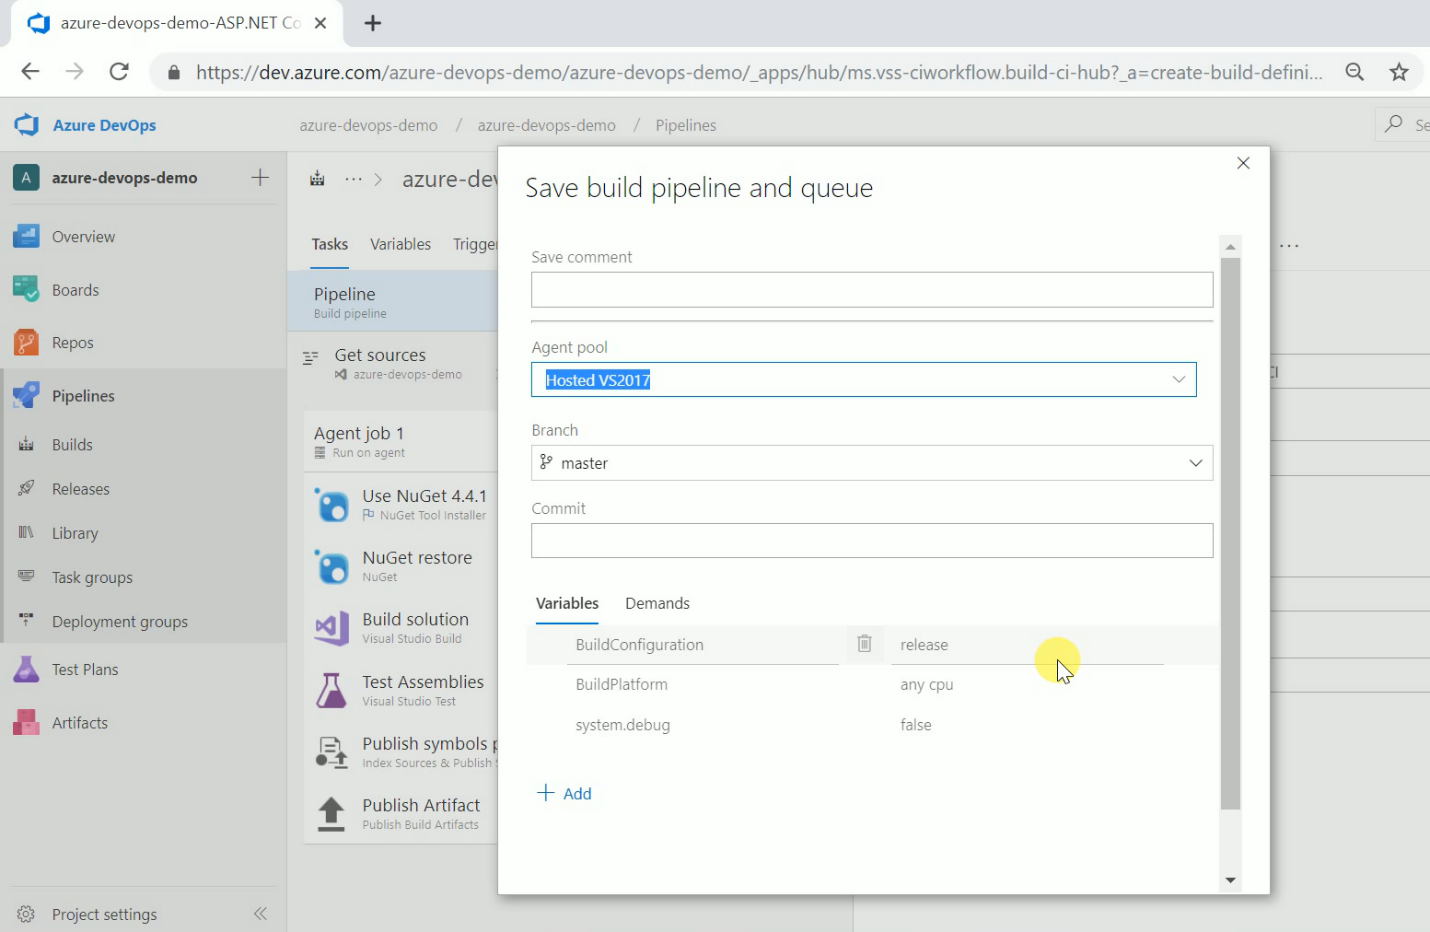
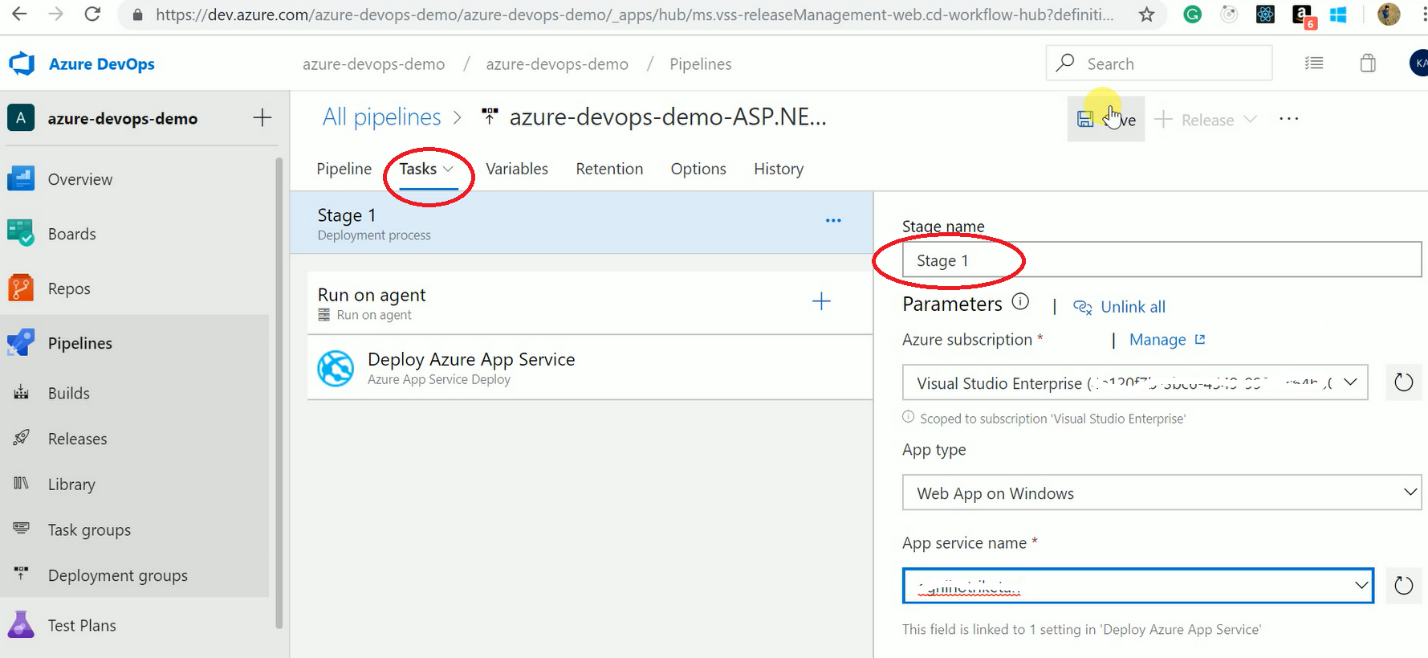
After selecting the template, we can add tasks so that we can deploy a build multiple environments like dev, test, UAT, etc. We can add a particular use as a release approver as well. We can set the variable values which are used in the release definition. You can convert those templates to YAML in a later stage as well and then check in version control if you want. You see that there are all kinds of pre-defined templates to do your builds.
So for example, a Gradle build or a Go build, or you want to do some load testing, or you want to do Xamarin app for iOS, Ant builds, you name it; it's all there and part of the out-of-the-box experience. Azure DevOps has things like NuGet restore, Test Assemblies, Build the solution, and all kinds of things that we can pick from the task picker.
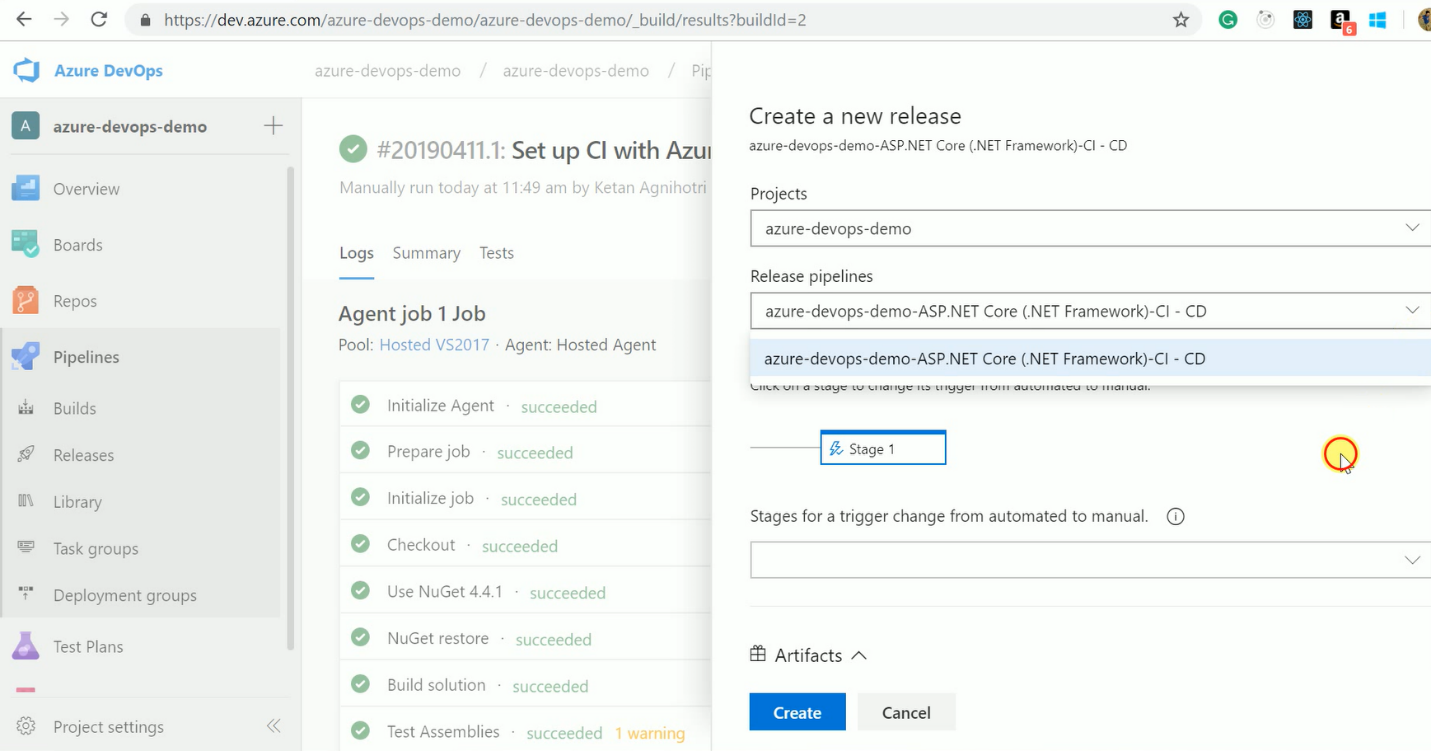
After saving the release definition, you can create a new release. You can choose environments for release if you have added multiple release tasks.
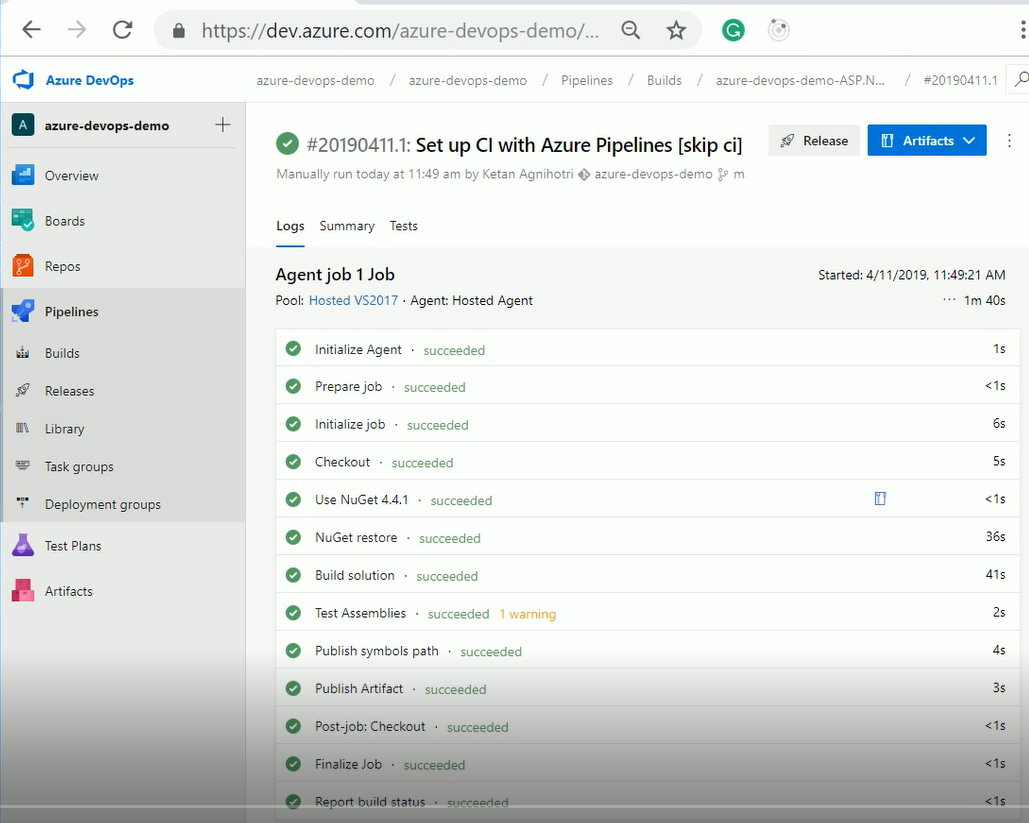
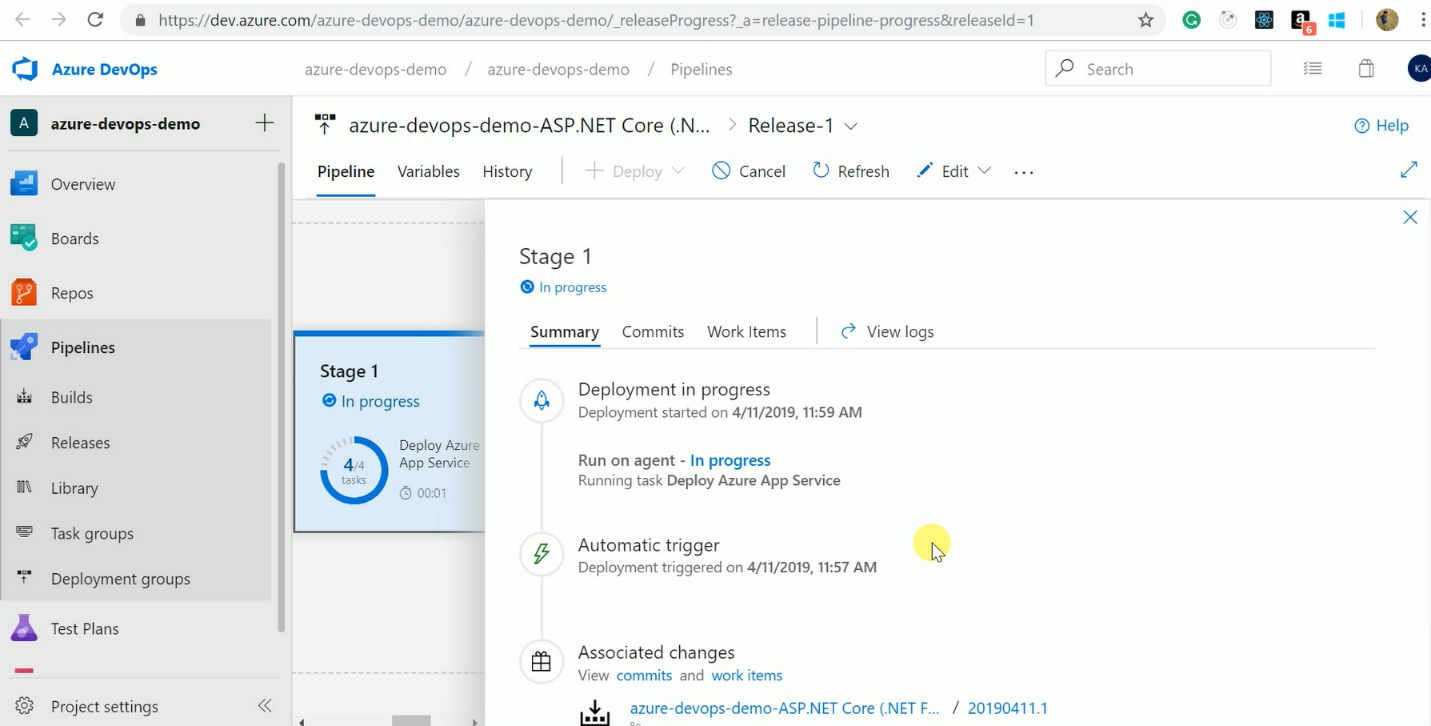
After creating a release, we can track release progress as shown below.
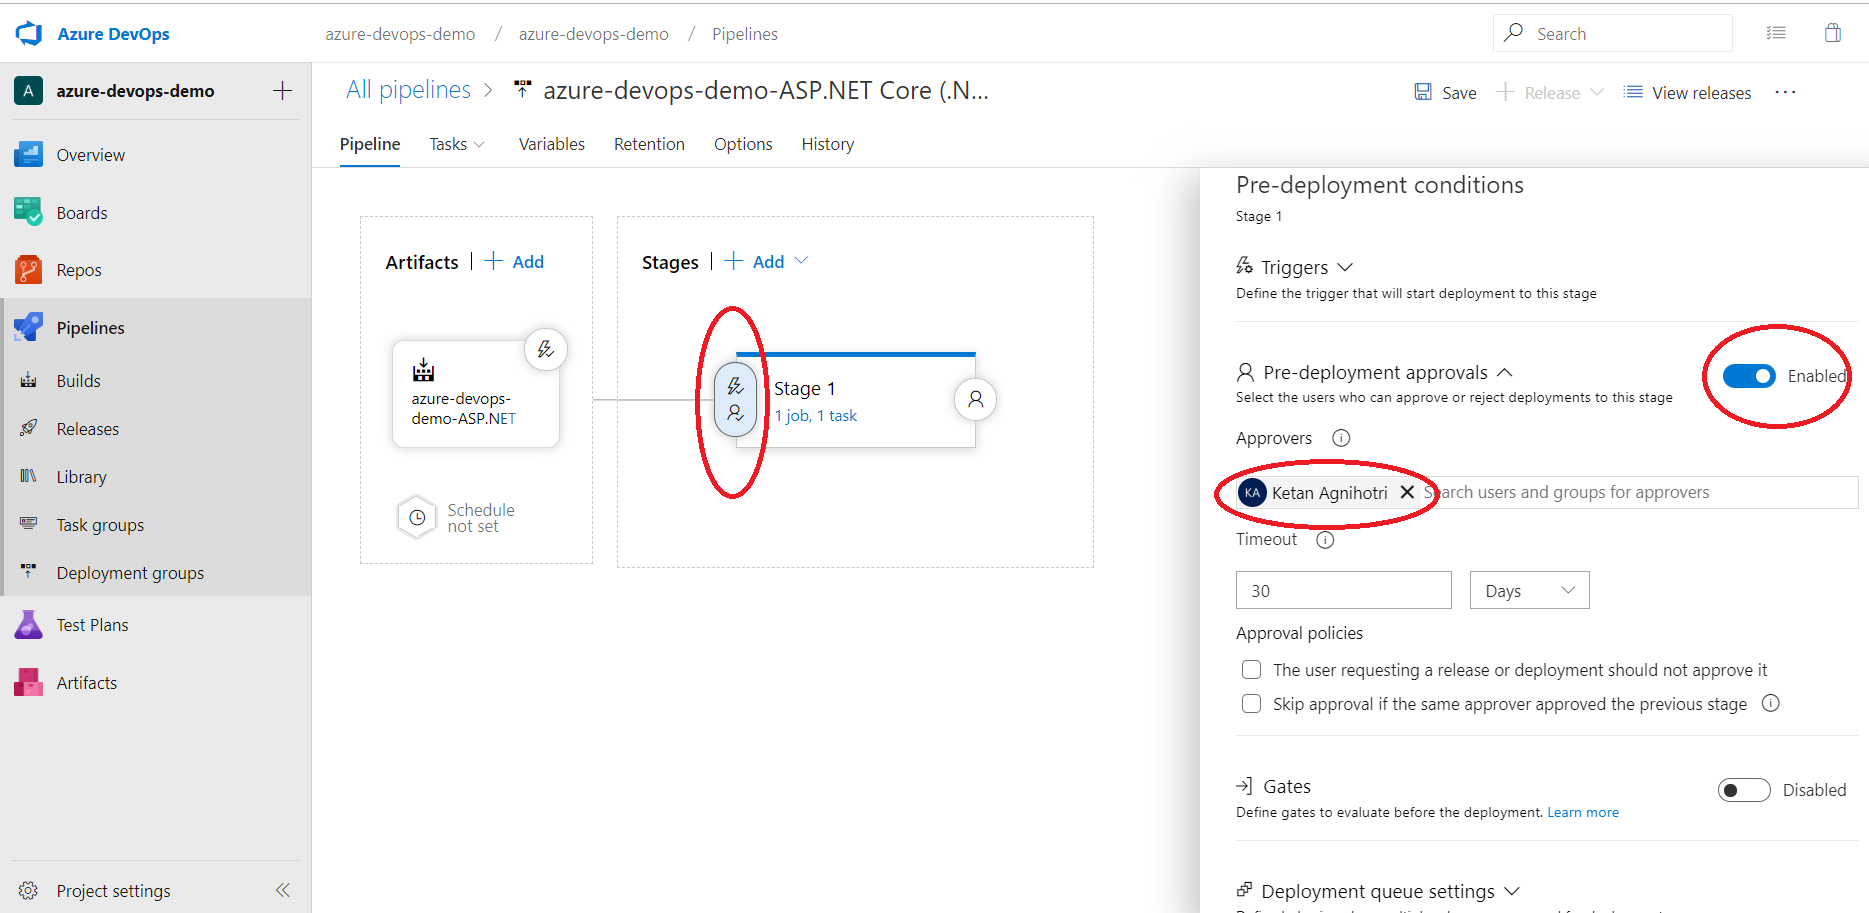
We can enable pre-deployment approvals as shown below. Now, what happens when I do a deployment and the deployment fails? Well, I can select to re-deploy the previous well-known stable deployment so I'm always in a good state again, which is quite handy. So that's a way we can define those post-approvals before we move to the next phase in our deployment.
Key Components and Stages in Azure CI/CD Pipeline
The key components and stages in Azure CI/CD Pipeline are as follows:
- Source Control- It is basically the Azure DevOps Repos or GitHub which contains the application code.
- Build Stage- Then comes the compilation of source code, running tests and producing build artifacts.
- Release Stage- At this stage, the built artifacts are deployed in order to target development, staging and production.
- Deployment Gates- Additional quality checks occur at this stage before the deployment to the next stage but it an optional stage.
- Approve Workflow- At this stage, the builds are approved manually before they are promoted to production.
- Artifacts- The build stage outputs are moderated to pass them to the release stage for the deployment process.
- Release Triggers- Whenever new artifacts are available, it starts a release automatically.
- Environment Variables- It is managed within the pipeline for arrangement of settings based upon each environment.
- Logs and Monitoring- Here comes the tracking of execution of the pipeline which gives an insight into failures and performance metrics.
Benefits of Azure DevOps for CI/CD
- Integration with Azure services becomes easier with popular third party tools such as GitHub, Jenkins and Docker.
- Scalability increases with Azure DevOps that can take in large projects also.
- Automation of build, test and deployment tasks reduces the occurrence of manual errors.
- It allows real-time monitoring, detailed logs and customizable dashboards which helps to track progress and identify blockages.
- There are built-in features like role-based access control, encrypted communication which ensures security over sensitive data.
- The collaboration between development, testing and operations teams enhances.
Differences between CI/CD
The main differences between CI and CD are discussed below:
Continuous Integration (CI)-
- Its main objective is to detect and address errors that occur during the process of integration early in the process of development.
- It triggers automated builds and tests when the codes are changed in the repository.
- It helps to integrate code changes into a shared repository often multiple times a day.
Continuous Delivery (CD)-
- It extends the CI as the delivery of applications are automated to several environments like testing, staging and production.
- It involves the processes of automated testing, configuration management and environment provisioning.
- The process is fully automated, only the deployment to production might need manual approval.
Continuous Deployment (CD)-
- Every change that goes through the CI/CD pipeline is deployed automatically to production without the need for manual interference.
- When the code has passed all the automated tests and has met predefined criteria, it is sent to production automatically.
- This is the approach which can reduce manual work to deliver features and bug-fixes faster.
Pipeline History
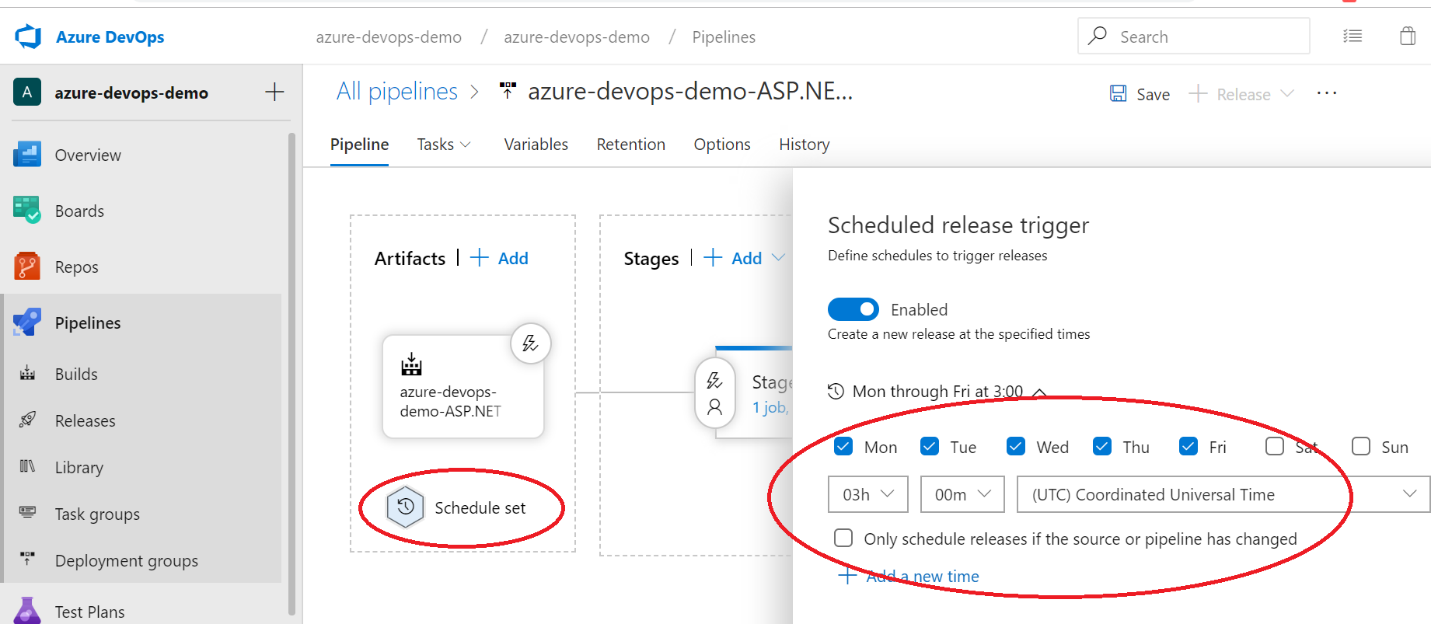
We can also look at the history where we can track the changes that are made to the release definition, which is also very handy if it comes to compliance and security. Now we can clone those different environments, because after you want to do the same in let's say dev, as in staging as in test or production. We have different triggers here and one of the triggers is that we wanted to have continuous integration. So every time, changes in our Git repo, I want to trigger the build/Release pipeline. We can also schedule things in Azure DevOps.
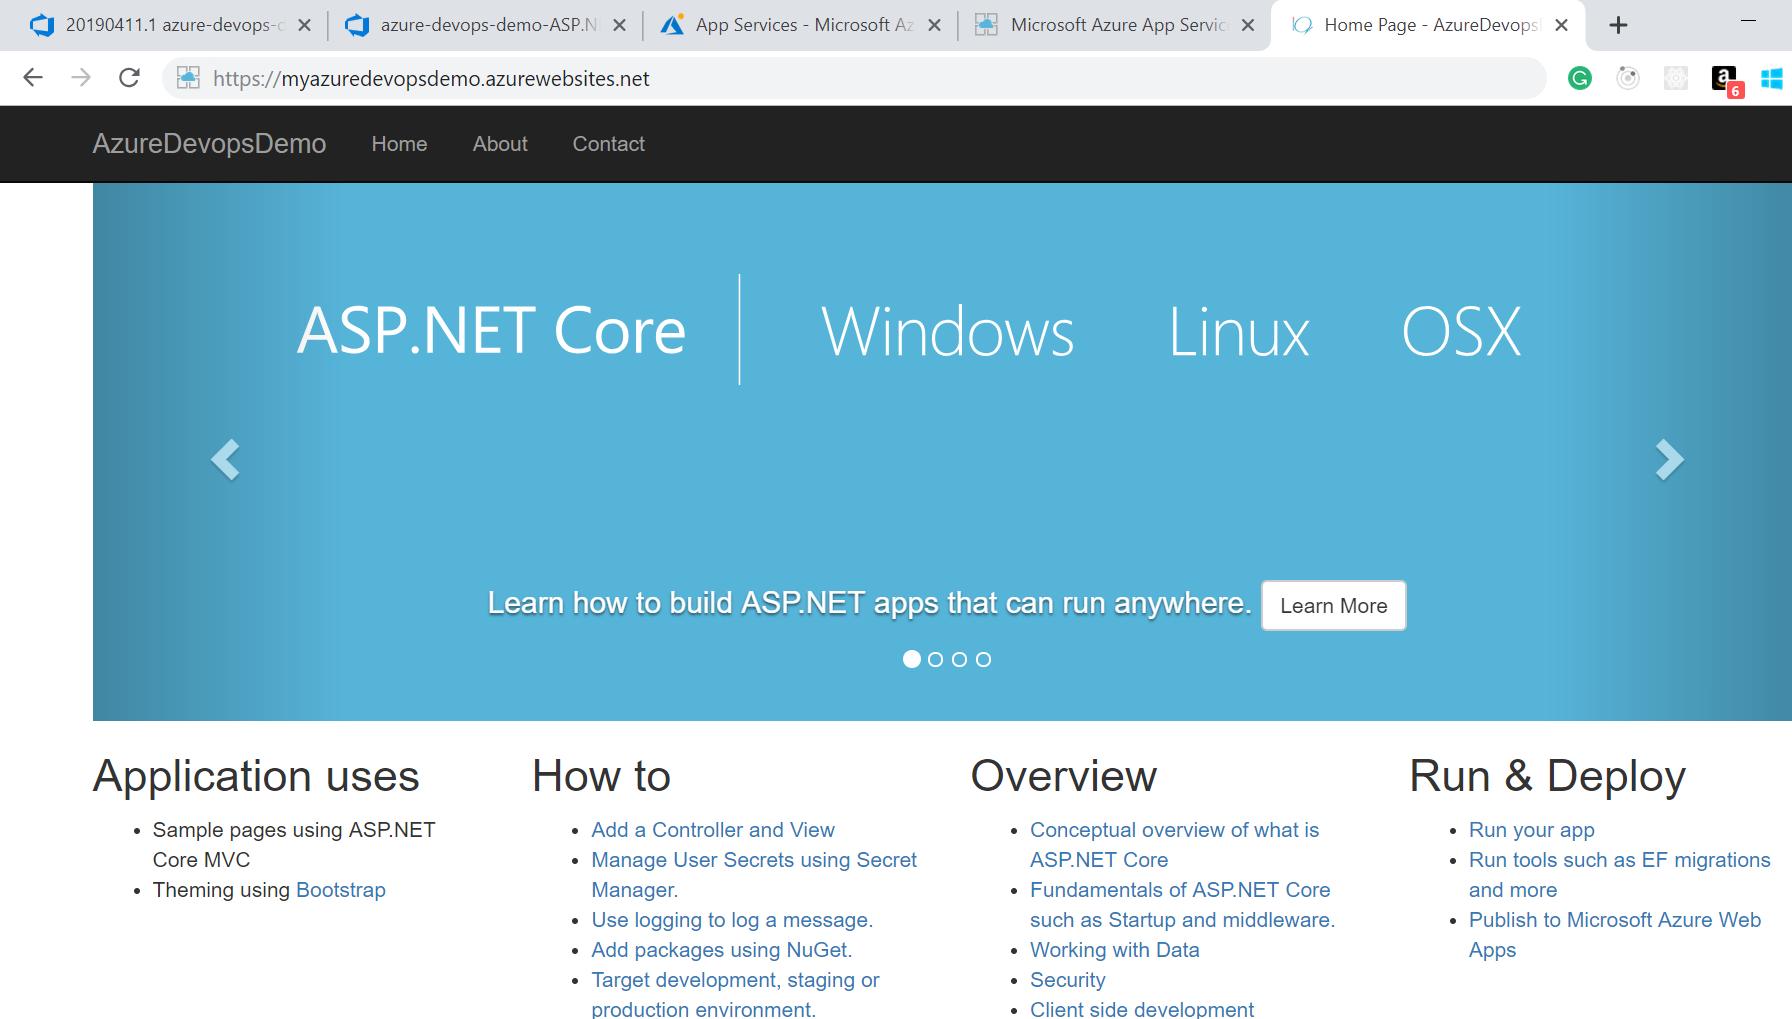
After successful completion of a release pipeline, you can visit the deployed version of your application.
Summary
Azure Pipelines is a cloud-based CI/CD solution that enables you to build, test, and deploy code to any cloud. It supports any language, platform, and cloud, allowing you to design and deploy applications to Azure, AWS, Google Cloud, and other cloud providers. Embracing "Azure DevOps Training" offers the opportunity to delve deeper into these components. This specialized training equips users with the expertise to harness Azure Pipelines effectively, optimizing build and release processes within the Azure DevOps ecosystem.
FAQs
Q1. What is the difference between CI and CD pipeline in Azure DevOps?
CI is more concerned with preparing the code for release (build/test), whereas CD is concerned with actually releasing the code (release/deploy).
Q2. What is the purpose of a build pipeline in Azure DevOps?
Azure Pipelines automatically creates and tests code projects. It supports all main languages and project types, as well as continuous integration, delivery, and testing, allowing you to build, test, and deploy code to any destination.
Q3. Is Azure DevOps a CI CD tool?
Azure DevOps by Microsoft is an all-in-one CI/CD platform that features entire software delivery in one place.
Q4. What is the CI pipeline in Azure DevOps?
Continuous integration (CI) is the practice of automatically building and testing code whenever a team member pushes a change to version control. When you commit code to the main or trunk branch of a shared repository, the automated build system builds, tests, and validates the entire branch.
Q5. What are Azure's CI/CD tools?
Azure provides two key managed CI/CD tools: Azure DevOps and Azure Pipelines. Azure DevOps enables you to manage CI/CD processes by defining entities such as artifacts, boards, and test plans. Azure Pipelines includes version control, a build server, and deployment mechanisms that enable CI/CD.
Take our free devops skill challenge to evaluate your skill

In less than 5 minutes, with our skill challenge, you can identify your knowledge gaps and strengths in a given skill.