


25
AprGetting Started with DotNet CLI
08 Jan 2024
Beginner
29.8K Views
29 min read
Learn via Video Course & by Doing Hands-on Labs
.NET Course
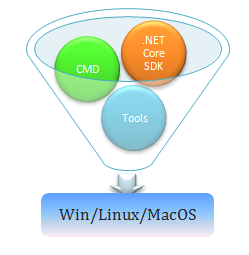
Do you want to develop cross platform apps that will run on Windows, Linux, MacOS then you should for .NET Core, that says “Develop once and deploy on multiple platform”. Get ready for 100% growth in your tech career! Our dot net microservices course guarantees you the skills you need for a salary hike, job placement, and interview success. Enroll today and watch your future soar! I have explained about .NET Core in my previous article, you can refer it here To Develop Apps using .NET .Core you can use the below methods
Using .NET Command Line Interface (CLI)
Using Visual studio or VS for MAC
Using Visual Studio Code
In this article we will see how to use .NET Command Line Interface (CLI) to create, build, compile and run .NET Core Apps that will deploy on Windows, MacOS and Linux, So let’s get started
.NET CLI Commands

CLI having different commands (that includes Basic command set, Project Modification command set and Advanced command set) that helps to create a base or a foundation, that will support IDE, editors and tools.
Basic commands
new command
This command is used to create New file that file may be solutions file, template or configuration file the syntax of this command is as below
dotnet new <TEMPLATE><Options>
Here dotnet is the keyword and newis the command, Template could be application type like Console app, class library, Unit test project, Razor, MVC, ASP.NET Core file, JSON, NuGet config etc. Go through next example
dotnet new console -o myFirst_CLI_App
In above command console is the application template and-ois the application attribute which is used to generate output in current directory myFirst_CLI_App is the application name
restore Command
This command is used to restores tools and dependencies of the project, basically, this command takes use of NuGet Packages to restore project related tools and dependencies, The syntax of the command is as below
dotnet restore [<ROOT>]
The example, Dotnet restore [Here is the root is the optional path which is project directory, default it is current directory]
build Command
This command is used to build a project with all its dependencies, The syntax is as simple
dotnet build [<PROJECT>]
The example, dotnet build[<PROJECT>, is the path of project that needs to be build, by default it takes current path as project path]
publish Command
As name suggest this command helps to create deployment package, The resultant output is a directory that contains IL (Intermediate Language) files, config files, JSON files, NuGet Packages if exists. The Syntax is
dotnet publish [<PROJECT>]
The example, dotnet publish[<PROJECT> is the path of the project file, default is current directory]
run Command
This command is used to run application, it is very helpful for rapid development from command line, the output of the application is written to the default location that is bin/<configuration>/<target> the syntax is dotnet run, If you want to run any specific project then the syntax would be
dotnet run --projectThe example
dotnet run –projectprojects/MyProj/MyProj.csproj
in above example projects/MyProj/MyProj.csprojis the project path to run.
test Command
This command is used to execute Unit Test Cases basically it’s a console that support unit test runner, the output of the command is result of each test case that is fail or pass, The syntax is
dotnet test [<PROJECT>]
The example, dotnet test[<Project> is the project path which is optional, default path is current directory]
Some additional Basic commands S.No.
Command
Syntax/Usage
1
Vtest
dotnet vstest MyProject.dll,It helps to run test from specifi file
2
Pack
dotnet pack, This command packs the code in to packages
3
Migrate
dotnet migrate, This is migration command use to migrate project from Preview 2 to Core SDK 1.0
4
Clean
dotnet clean [<PROJECT>], use to clean project output
5
Sln
dotnet sln <solution name> add <project name>, this command is use to modify (add, remove files in solution) solution file,
6
Help
dotnet help <COMMAND_NAME>, as name suggest it displays help about each command
7
Store
dotnet store -m|--manifest it store the project assembly in package (by default assemblies are not packaged with runtime)
Project Modification Commands
These commands are used to modify project settings like adding and removing of package, references etc.Let’s see them one by one
add package command
This command will add package as a reference in project
dotnet add [<PROJECT>] package <PACKAGE_NAME>
The example, Suppose, I want to add the test.Jsonpackage reference to project, then I can use syntax like
dotnet add package test.Json
add reference command
This command will add reference in project from a project, in short project can be add as a reference in another project
dotnet add [<PROJECT>] reference <PROJECT_REFERENCES>
The example, Suppose, I want to add the app.csproj project in another project then the syntax will be,
dotnet add app.csproj reference test.csproj
remove package command
This command is use to remove package from project
dotnet remove [<PROJECT>] package <PACKAGE_NAME>
The example, Suppose, I want to remove the test.jsonpackage from my project then the syntax will be,
dotnet remove package test.JsonSome additional Basic commands
S.No.
Command
Syntax/Usage
1
remove reference
dotnet remove [<PROJECT>] reference <PROJECT_REFERENCES>,It helps to remove reference of a project from another project
2
list reference
dotnet pack, This command packs the code in to packages
Advanced commands
There are some advanced commands that deals with nuget packages
nuget delete command
This command is use to remove or delete nuget package server
dotnet nuget delete [<PACKAGE_NAME><PACKAGE_VERSION>]
The example, Suppose, I want to remove the AspNetCore.Mvc package from my project then the syntax will be
dotnet nuget delete Microsoft.AspNetCore.Mvc
nuget locals command
This command is use to clear local cache and resources used by NuGet
dotnet nuget locals <CACHE_LOCATION>
The example, Following command will clear all cache directories, temp cache and global temp packages
dotnet nuget locals –l all
nuget push command
As name suggest This command is use to push package on server as well as it helps to publish it
dotnet nuget push [<ROOT>]
The example, Following command will push test.pkg to server and publish it
dotnet nuget push foo.nupkg
msbuild command
This command is same like our build menu in Visual Studio, it will build the project with all its dependencies
dotnet msbuild
The example, Following command will build project using release configuration
dotnet msbuild -p:Configuration=Release
.NET CLI Application Templates
There are lot of template exist in C#, F# and VB.NET template. you can install them using CLI commands with different attributes. Some of them are listed below with their CLI commands
Name
Quick Install
.NET Boxed
dotnet new -i "Boxed.Templates::*"ASP.NET Core SPA Templates
dotnet new -i "Microsoft.AspNetCore.SpaTemplates::*"Auth0 Templates
dotnet new -i "Auth0.Templates::*"AWS Lambda .NET Core Templates
dotnet new -i "Amazon.Lambda.Templates::*"Blazor - Full stack web development with C# and Web Assembly
dotnet new -i Microsoft.AspNetCore.Blazor.Templates::*Cake.Frosting
dotnet new -i "Cake.Frosting.Template::*"Carter - Carter is a library that allows Nancy-esque routing for use with ASP.Net Core.
dotnet new -i "CarterTemplate::*"Cloudscribe
dotnet new -i "cloudscribe.templates::*"DotVVM - Open source MVVM framework for line of business web applications
dotnet new -i "DotVVM.Templates::*"For more information you can checkout link .NET Template with CLI commands
Creating and Building An Application Using DotNetCLI
To start building app on .NET Core with CLI, first you need to install .NET SDK. As .NET Core is supporting cross platform compatibility, .NET Core SDK come with cross platform version including Windows (32 and 64 bit), Linux and MacOS. To download your desired installer you can check next link Setup Installer, Now move to Command prompt and type following commands
dotnet new console -o my_first_app
Explanation : With the above new command we are creating console application in my_first_app directory
cd my_first_app
Explanation : Move to directory my_first_app
If you move to my_first_app directory, you will find Program.cs file, it has ‘Hello World’ program written inside it. The code of the program is given below
 using System;
 namespace my_first_app
 {
 class Program
 {
 staticvoidMain(string[] args)
 {
 Console.WriteLine("Hello World!");
 }
 }
 }
Now put next command
dotnet run
Explanation : It is the basic command used to run project
Outputdotnet runHello World!
That’s it. We have successfully completed out first .Net Core program with CLI commands
Dot NET CLI Advantages
Rapid development is possible
Support crossplat form OS so no need to depend upon only Windows
No Need to install Visual Studio
Easy compile and run, Just fire runcommand in command prompt and it will do all task for you
Summary
In this article, we have learned about .NET microservices training. If we want to develop code without Visual Studio and without Windows platform (Linux or MacOS), the Command Line Interface is a really good tool. It has all the necessary capabilities of Visual Studio, starting from new project creation, build, compile, run to publish. It’s so simple that one can easily learn and develop .NET Core app that will be cross-platform compatible. .NET Core CLI code is available on GitHub.